ROS2 のツール、Launch、可視化
最終更新:
17 一般的なコマンドツール
17 一般的なコマンドツール(CLI Tools)
17.1 パッケージ管理ツール ros2 pkg
17.1.1 ros2 pkg create
機能:機能パッケージを作成します。パッケージ名、コンパイル方法、依存関係などを指定する必要があります。
形式:
ros2 pkg create <package_name> --build-type <build-type> --dependencies <dependencies>ros2 コマンドにおいて:
pkg:機能パッケージに関連する機能を示します。
create:機能パッケージの作成を示します。
パッケージ名:必須:新しい機能パッケージの名前。
build-type:必須:新しく作成された機能パッケージが C++ か Python かを示します。C++ または C を使用する場合は ament_cmake、Python を使用する場合は ament_python です。
オプション:C++ 機能パッケージは rclcpp を含む必要があり、Python 機能パッケージは rclpy などの依存関係を含む必要があります。
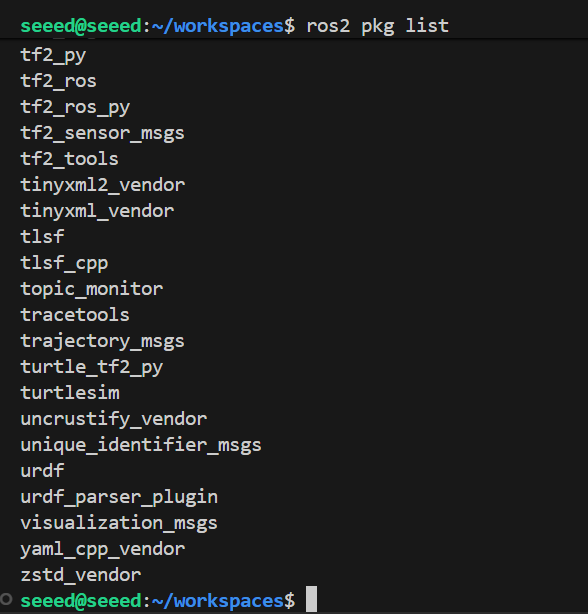
17.1.2 ros2 pkg list
機能:システム内の機能パッケージのリストを表示します。
形式:
ros2 pkg list17.1.3 ros2 pkg executables
機能:パッケージ内のすべての実行可能ファイルを表示します。
形式:
ros2 pkg executables <pkg_name>17.2 ノード実行 ros2 run
機能:機能パッケージのノードプログラムを実行します。
形式:
ros2 run <pkg_name> <node_name>pkg_name:機能パッケージ名
node_name:実行可能ファイルの名前
17.3 ノード関連ツール
17.3.1 ros2 node list
機能:現在のドメイン内のすべてのノードをリストします。
ros2 node list17.3.2 ros2 node info
機能:サブスクリプション、パブリッシュされたメッセージ、サービス、アクションなどを含むノードの詳細を表示します。
ros2 node info <node_name>17.4 トピック関連ツール
17.4.1 ros2 topic list
ros2 topic list17.4.2 ros2 topic info
ros2 topic info <topic_name>17.4.3 ros2 topic type
ros2 topic type <topic_name>17.4.4 ros2 topic hz
機能:トピックパブリッシュの平均周波数を表示します。
ros2 topic hz <topic_name>17.4.5 ros2 topic echo
機能:サブスクライバーのようにターミナルでトピックメッセージを印刷します。
ros2 topic echo <topic_name>17.4.6 ros2 topic pub
機能:ターミナルで指定されたトピックメッセージを送信します。
ros2 topic pub <topic_name> <message_type> <message_content>例:
ros2 topic pub turtle1/cmd_vel geometry_msgs/msg/Twist "{linear: {x: 0.5, y: 0.0, z: 0.0}, angular: {x: 0.0, y: 0.0, z: 0.2}}"17.5 ros2 インターフェース関連ツール
ros2 interface list
ros2 interface show <interface_name>
17.6 サービス関連ツール
ros2 service list
ros2 service call /spawn turtlesim/srv/Spawn "{x: 2, y: 2, theta: 0.2, name: 'turtle10'}"
17.7 次のステップ
18 RViz2 の使用 - RViz2 可視化を学ぶ
- 19 Rqt ツールボックス - Rqt ツールを学ぶ
18 RViz2 の使用
18 RViz2 使用方法(RViz2 Vision)
18.1 RViz2 概要
Rviz2 は ROS 2 で最もよく使用される 3 次元可視化ツールで、ロボットシステムの動作状態を可視化します。レーザーレーダーの点群、地図、ロボットモデル(URDF)、TF 座標変換、経路計画軌道、カメラ画像など、さまざまな ROS 2 トピックデータを購読して表示でき、開発者がセンサー、位置決め、ナビゲーションが正常に機能しているかどうかを迅速に確認するのに役立ちます。Rviz2 を通じて、ユーザーは同じインターフェース内でロボットと環境の関係をリアルタイムで観察でき、デバッグと開発の効率を大幅に向上させます。
18.2 準備作業
実際のロボットがある場合は、ロボットマスター制御端で rviz 練習を開始できます。実際のロボットがない場合は、gazebo を使用して turtlebot3 を起動し、レーザーレーダー、カメラなどを模倣できるので、次のデータを可視化できます。
Turtlebot3 シミュレーターパッケージをインストール
sudo apt install ros-${ROS_DISTRO}-turtlebot3*ros と gazebo ブリッジのインストール
sudo apt install ros-humble-ros-gz -yturtlebot3 環境変数を設定
export TURTLEBOT3_MODEL=wafflegazebo シミュレーション環境を開始
# source /opt/ros/humble/setup.bash
ros2 launch turtlebot3_gazebo turtlebot3_world.launch.py
注:Jetson は起動できない場合があり、この操作は X86 PC で実行されます
18.3 Rviz2 起動
ターミナルを起動し、以下のコマンドで起動できます:
rviz2注:docker で起動する場合は、GUI 表示が開いていることを確認してください。
18.4 画像データの可視化
左側の Displays ウィンドウで Add をクリックし、Image 表示項目を見つけて OK で確認後に表示リストに追加し、表示項目に画像トピックを設定すると、ロボットのカメラ画像を見ることができます。
Fixed Frame を base_footprint 座標に選択
Camera Color Topic にトピックを選択
これで、Camera ウィンドウに現在のシミュレーションロボットの視野を見ることができます。
18.5 レーダーデータの可視化
左側の Displays ウィンドウの Add をクリックし、LaserScan を選択し、サブスクリプション用の件名を設定します。
LaserScan のトピック選択
これで、レーザーレーダーの輪郭を見ることができます。
18.6 ロボットモデルの可視化
左側の Displays ウィンドウの Add をクリックし、RobotModel を選択
robotDescriptionTopic のトピックを選択
Rviz2 でロボットの可視化を見ることができます。
18.7 その他のデータの可視化
rivz のデフォルトプラグインには、頻繁に使用されるさまざまなデータ可視化プラグインがリストされており、必要に応じて使用できます。
18.8 次のステップ
-
19 Rqt ツールボックス - Rqt ツールを学ぶ
-
20 Launch 設定 - Launch 設定を学ぶ
19 Rqt ツールボックス
19 Rqt ツールボックス(Rqt Tools)
19.1 Rqt 概要
rqt は ROS の Qt ベースのグラフィカルツールフレームワークで、多くの一般的な機能をプラグインによって可視化インターフェースに統合します。開発者は rqt を表示することでシステムを可視化およびデバッグできます。例えば、Topic の配信/サブスクリプション、ノードと通信の監視(rqt graph)、リアルタイムログ表示(rqt console)、動的参照(rqt reconfigure)、解析データの描画(rqt plot)などです。簡単に言えば、rqt は ROS の多機能可視化デバッグシートのように、開発、デバッグ、システム理解の効率を大幅に高めることができます。
19.2 インストール
デスクトップ版がインストールされていれば、rqt ツールボックスは通常デフォルトでインストールされています。ros2 のインストールがフルバージョンのインストールでない場合は、次のようにインストールできます:
sudo apt install ros-${ROS_DISTRO}-rqt*19.3 開始
一般的な rqt 起動命令は次のとおりです:
# Method 1: run `rqt` in the terminal
rqt# Method 2
ros2 run rqt_gui rqt_gui19.4 プラグインの使用
rqt を起動すると、plugins から必要なプラグインを追加できます:
ノードのサブスクリプションを表示する小さなカメの例を開きます:
# Terminal 1:
ros2 run turtlesim turtlesim_node
# Terminal 2:
ros2 run turtlesim turtle_teleop_key
# Terminal 3:
rqt
プラグインには、トピック、サービス、アクション、パラメータ、ログなどが含まれており、ROS2 デバッグを容易にするように適応できます。
19.4.1 topic プラグイン
topic プラグインを追加し、速度コマンドを送信して小さなカメの動きを制御します。
19.4.2 service プラグイン
service プラグインを追加し、指定された場所に小さなカメを作成するリクエストを送信します。
19.4.3 パラメータプラグイン
パラメータプラグインを通じてカメフォームの背景色を動的に変更します。
19.5 次のステップ
- 20 Launch 設定 - Launch 設定を学ぶ
記録と再生 - パッケージ記録を学ぶ
20 Launch 設定
20 Launch 設定(Launch Files)
20.1 Launch 概要
ROS の Launch 起動ファイルは、複数のノード/コンポーネントの統合管理とアクティベーションのために使用され、本質的にはシステムレベルの起動スクリプトです。Python(最も一般的)、XML、または YAML で準備でき、複数のノードの同時アクティベーション、パラメータの設定、トピックの再マッピング、ネームスペースの読み込み、環境変数の設定、および条件付き起動、遅延起動、インシデントトリガーなどのより高度な論理制御をサポートします。要するに、Launch ファイルは ROS 2 プロジェクトでノードのセットを「ワンキースタート」でパッケージ化および設定するためのコアツールであり、特に複雑なロボットシステムの展開とデバッグに適しています。
20.2 単一の Node ノードの起動
20.2.1 準備キット
cd ~/workspaces/src
ros2 pkg create learn_launch --build-type ament_python
20.2.2 新しい launch ファイル
機能パッケージの下に新しい launch フォルダを作成し、launch フォルダ内に新しい single_node_launch.py ファイルを作成して以下をコピーします:
from launch import LaunchDescription
from launch_ros.actions import Node

def generate_launch_description():
  node = Node(
  package='pkg_helloworld_py',
  executable='helloworld',
  output='screen'
  )
  return LaunchDescription([node])
20.2.3 setup.py ファイルの設定
launch ファイルは LaunchName_launch.py の名前が付けられることが多く、LaunchName はカスタマイズされ、_launch.py は固定と見なされます。機能パッケージの下の setup.py ファイルを変更して launch パスの下のドキュメントを追加し、.py ファイルを実行のためにコンパイルできるようにする必要があります。
# 1. Import the required header files
import os
from glob import glob

# 2. Add the `launch` path and its `launch.py` file to the `data_files` list
(os.path.join('share',package_name,'launch'),glob(os.path.join('launch','*launch.py')))
20.2.4 機能パッケージのコンパイル
cd ~/workspaces
colcon build --packages-select learn_launch
20.2.5 操作手順
# Refresh environment variables
source install/setup.bash
ros2 launch learn_launch single_node_launch.py
20.2.6 ソース分析
関連ライブラリのインポート
from launch import LaunchDescription
from launch_ros.actions import Node
generate_launch_description 関数を定義し、launch description を返します
def generate_launch_description():
  node = Node(
  package='pkg_helloworld_py',
  executable='helloworld',
  )
  return LaunchDescription([node])
変数 Node がノードとして起動する戻り値を定義し、Node 関数を呼び出して 2 つの重要なパラメータ type と executable を起動します。
Package:機能パッケージを示し、機能パッケージの名前を表します。
Executable:実行されるプロシージャ、つまり実行可能ファイルの名前を示します。
LaunchDescription 関数の最後の呼び出しは、node パラメータを入力して return を実行することです。
return LaunchDescription([node])20.3 複数の Node ノードの launch
20.3.1 新しい launch ファイル
新しい multi_node_launch.py ファイルに以下を追加します:
from launch import LaunchDescription
from launch_ros.actions import Node

def generate_launch_description():
  publisher_node = Node(
  package='pkg_topic',
  executable='publisher_demo',
  output='screen'
  )
  subscriber_node = Node(
  package='pkg_topic',
  executable='subscriber_demo',
  output='screen'
  )
  return LaunchDescription([
  publisher_node,
  subscriber_node
  ])
20.3.2 機能パッケージのコンパイル
colcon build --packages-select learn_launch20.3.3 操作手順
# Refresh environment variables
source install/setup.bash
ros2 launch learn_launch multi_node_launch.py
ターミナルが内容を印刷しない場合は、起動が成功したかどうかを確認するためにアクティブ化されたノードを確認できます。
ros2 node list20.3.4 ソース解決
それは single_node_launch.py のようなもので、ただ別のノードです!
20.4 トピック再マッピングケース
20.4.1 新しい launch ファイル
multi_node_launch.py ディレクトリの下に新しい remap_name_launch.py ファイルを作成し、以下を追加します:
from launch import LaunchDescription
from launch_ros.actions import Node

def generate_launch_description():
  publisher_node = Node(
  package='pkg_topic',
  executable='publisher_demo',
  output='screen',
  remappings=[("/topic_demo", "/topic_update")]
  )
  return LaunchDescription([
  publisher_node
  ])
20.4.2 機能パッケージのコンパイル
colcon build --packages-select learn_launch20.4.3 操作手順
# ros2 launch learn_launch multi_node_launch.py
ros2 topic list# Refresh the environment variables and run the remapped-topic program to observe the changes:
source install/setup.bash
ros2 launch learn_launch remap_name_launch.py
ros2 topic list題名を /topic_update に再マッピングします
20.4.4 ソース分析
特に、以下のセクションが追加されました:
remappings=[("/topic_demo", "/topic_update")]ここでは元の /topic_demo トピックを /topic_update に再マッピングします。
20.5 Launch ファイルの埋め込みで別の launch ファイルを起動
20.5.1 新しい launch ファイル
multi_node_launch.py ディレクトリの下の新しい include_launch.py に以下を追加します:
from launch import LaunchDescription
from launch_ros.actions import Node
import os
from launch.actions import IncludeLaunchDescription
from launch.launch_description_sources import PythonLaunchDescriptionSource
from ament_index_python.packages import get_package_share_directory

def generate_launch_description():
  hello_launch = IncludeLaunchDescription(PythonLaunchDescriptionSource(
  [os.path.join(get_package_share_directory('learn_launch'), 'launch'),
  '/multi_node_launch.py']),
  )
  return LaunchDescription([
  hello_launch
  ])
20.5.2 機能パッケージのコンパイル
colcon build --packages-select learn_launch20.5.3 操作手順
# Refresh environment variables
source install/setup.bash
ros2 launch learn_launch include_launch.py
20.5.4 ソース分析
launch ファイルを埋め込むには、launch システムの IncludeLaunchDescription および PythonLaunchDescriptionSource カテゴリを使用する必要があります
os.path.join (get_package_share_directory('learn_launch'):機能パッケージの位置を取得します。ここで機能パッケージの名前は learn_launch です;
'launch':機能パッケージの下にある launch ファイルを含むフォルダを意味します;
'/multi_node_launch.py':launch フォルダの下の /multi_node_launch.py ファイルを示します。
20.6 複合 launch ドキュメントの例
このデモは主に、複雑な launch ファイルの準備方法を示しており、プログラムの機能は無視できます。
20.6.1 新しい launch ファイル
multi_node_launch.py ディレクトリの下に新しい complex_launch.py ファイルを作成し、以下を追加します:
# complex_launch.py
import os
from ament_index_python import get_package_share_directory
from launch import LaunchDescription
from launch.actions import DeclareLaunchArgument
from launch.actions import IncludeLaunchDescription
from launch.actions import GroupAction
from launch.launch_description_sources import PythonLaunchDescriptionSource
from launch.substitutions import LaunchConfiguration
from launch.substitutions import TextSubstitution
from launch_ros.actions import Node
from launch_ros.actions import PushRosNamespace


def generate_launch_description():

  # args that can be set from the command line or a default will be used
  background_r_launch_arg = DeclareLaunchArgument(
  "background_r", default_value=TextSubstitution(text="0")
  )
  background_g_launch_arg = DeclareLaunchArgument(
  "background_g", default_value=TextSubstitution(text="255")
  )
  background_b_launch_arg = DeclareLaunchArgument(
  "background_b", default_value=TextSubstitution(text="0")
  )
  chatter_ns_launch_arg = DeclareLaunchArgument(
  "chatter_ns", default_value=TextSubstitution(text="my/chatter/ns")
  )

  # include another launch file
  launch_include = IncludeLaunchDescription(
  PythonLaunchDescriptionSource(
  os.path.join(
  get_package_share_directory('demo_nodes_cpp'),
  'launch/topics/talker_listener.launch.py'))
  )
  # include another launch file in the chatter_ns namespace
  launch_include_with_namespace = GroupAction(
  actions=[
  # push-ros-namespace to set namespace of included nodes
  PushRosNamespace(LaunchConfiguration('chatter_ns')),
  IncludeLaunchDescription(
  PythonLaunchDescriptionSource(
  os.path.join(
  get_package_share_directory('demo_nodes_cpp'),
  'launch/topics/talker_listener.launch.py'))
  ),
  ]
  )

  # start a turtlesim_node in the turtlesim1 namespace
  turtlesim_node = Node(
  package='turtlesim',
  namespace='turtlesim1',
  executable='turtlesim_node',
  name='sim'
  )

  # start another turtlesim_node in the turtlesim2 namespace
  # and use args to set parameters
  turtlesim_node_with_parameters = Node(
  package='turtlesim',
  namespace='turtlesim2',
  executable='turtlesim_node',
  name='sim',
  parameters=[{
  "background_r": LaunchConfiguration('background_r'),
  "background_g": LaunchConfiguration('background_g'),
  "background_b": LaunchConfiguration('background_b'),
  }]
  )

  # perform remap so both turtles listen to the same command topic
  forward_turtlesim_commands_to_second_turtlesim_node = Node(
  package='turtlesim',
  executable='mimic',
  name='mimic',
  remappings=[
  ('/input/pose', '/turtlesim1/turtle1/pose'),
  ('/output/cmd_vel', '/turtlesim2/turtle1/cmd_vel'),
  ]
  )

  return LaunchDescription([
  background_r_launch_arg,
  background_g_launch_arg,
  background_b_launch_arg,
  chatter_ns_launch_arg,
  launch_include,
  launch_include_with_namespace,
  turtlesim_node,
  turtlesim_node_with_parameters,
  forward_turtlesim_commands_to_second_turtlesim_node,
  ])
20.6.2 ワークスペースのコンパイル
colcon build --packages-select learn_launch20.6.3 操作手順
# source install/setup.bash
ros2 launch learn_launch complex_launch.py
Jetson に 2 匹のカメが表示されます。
キーボード制御ノードを起動し、ネームスペースを追加します(launch ファイルでノードを起動するときにネームスペースを追加したため)
ros2 run turtlesim turtle_teleop_key --ros-args -r __ns:=/turtlesim1右と左のボタンを使用してカメ 1 の動きを制御します。カメ 2 はカメ 1 の完璧なコピーです。
20.6.4 手順の説明
このプロセスは主に開始で構成されました:
1 つは demo_nodes_cpp talker_listener、
- ネームスペース付きの talker_listener ノード
3 つ目は、turtlesim1 はネームスペース内のカメです。
4 と Turtlesim2 は turtles2 のネームスペースです
5 つ目は、両方のカメが同じコマンドトピックを聞くように再マッピングします。
20.7 xml の実装
20.7.1 新しい launch ファイル
complex_launch.xml ディレクトリの下の新しい Complex_Launch.py ファイルに以下を追加します:
<launch>

  <!-- args that can be set from the command line or a default will be used -->
  <arg name="background_r" default="0"/>
  <arg name="background_g" default="255"/>
  <arg name="background_b" default="0"/>
  <arg name="chatter_ns" default="my/chatter/ns"/>

  <!-- include another launch file -->
  <include file="$(find-pkg-share demo_nodes_cpp)/launch/topics/talker_listener.launch.py"/>
  <!-- include another launch file in the chatter_ns namespace-->
  <group>
  <!-- push-ros-namespace to set namespace of included nodes -->
  <push-ros-namespace namespace="$(var chatter_ns)"/>
  <include file="$(find-pkg-share demo_nodes_cpp)/launch/topics/talker_listener.launch.py"/>
  </group>

  <!-- start a turtlesim_node in the turtlesim1 namespace -->
  <node pkg="turtlesim" exec="turtlesim_node" name="sim" namespace="turtlesim1"/>
  <!-- start another turtlesim_node in the turtlesim2 namespace
  and use args to set parameters -->
  <node pkg="turtlesim" exec="turtlesim_node" name="sim" namespace="turtlesim2">
  <param name="background_r" value="$(var background_r)"/>
  <param name="background_g" value="$(var background_g)"/>
  <param name="background_b" value="$(var background_b)"/>
  </node>
  <!-- perform remap so both turtles listen to the same command topic -->
  <node pkg="turtlesim" exec="mimic" name="mimic">
  <remap from="/input/pose" to="/turtlesim1/turtle1/pose"/>
  <remap from="/output/cmd_vel" to="/turtlesim2/turtle1/cmd_vel"/>
  </node>
</launch>
20.7.2 setup.py ファイル設定
システムはコンパイルされたファイルを設定し、.xml の launch ファイルを install のインストールディレクトリにコピーしてファイルを見つける必要があります
(os.path.join('share',package_name,'launch'),glob(os.path.join('launch','*launch.xml'))),20.7.3 機能パッケージのコンパイル
cd ~/workspaces
colcon build --packages-select learn_launch
20.7.4 操作手順
# ros2 launch learn_launch complex_launch.xml2 匹の小さなカメが期待され、ターミナルはログ情報を印刷します。
キーボード制御ノードを起動し、ネームスペースを追加
ros2 run turtlesim turtle_teleop_key --ros-args -r __ns:=/turtlesim120.8 Yaml の実装
20.8.1 新しい launch ファイル
complex_launch.py ディレクトリの下の新しい Complex_Launch.yaml ファイルに以下を追加します:
launch:

# args that can be set from the command line or a default will be used
- arg:
  name: "background_r"
  default: "0"
- arg:
  name: "background_g"
  default: "255"
- arg:
  name: "background_b"
  default: "0"
- arg:
  name: "chatter_ns"
  default: "my/chatter/ns"


# include another launch file
- include:
  file: "$(find-pkg-share demo_nodes_cpp)/launch/topics/talker_listener.launch.py"

# include another launch file in the chatter_ns namespace
- group:
  - push-ros-namespace:
  namespace: "$(var chatter_ns)"
  - include:
  file: "$(find-pkg-share demo_nodes_cpp)/launch/topics/talker_listener.launch.py"

# start a turtlesim_node in the turtlesim1 namespace
- node:
  pkg: "turtlesim"
  exec: "turtlesim_node"
  name: "sim"
  namespace: "turtlesim1"

# start another turtlesim_node in the turtlesim2 namespace and use args to set parameters
- node:
  pkg: "turtlesim"
  exec: "turtlesim_node"
  name: "sim"
  namespace: "turtlesim2"
  param:
  -
  name: "background_r"
  value: "$(var background_r)"
  -
  name: "background_g"
  value: "$(var background_g)"
  -
  name: "background_b"
  value: "$(var background_b)"

# perform remap so both turtles listen to the same command topic
- node:
  pkg: "turtlesim"
  exec: "mimic"
  name: "mimic"
  remap:
  -
  from: "/input/pose"
  to: "/turtlesim1/turtle1/pose"
  -
  from: "/output/cmd_vel"
  to: "/turtlesim2/turtle1/cmd_vel"
20.8.2 設定
ros システムが私たちのファイルを見つけるには、コンパイルされたファイルを設定して .yaml フォーマットの launch ファイルを Install インストールディレクトリにコピーする必要があります
(os.path.join('share',package_name,'launch'),glob(os.path.join('launch','*launch.yaml'))),20.8.3 機能パッケージのコンパイル
colcon build --packages-select learn_launch20.8.4 操作手順
# Refresh environment variables
source install/setup.bash
ros2 launch learn_launch complex_launch.yaml
キーボード制御ノードを起動し、ネームスペースを追加
ros2 run turtlesim turtle_teleop_key --ros-args -r __ns:=/turtlesim1キーボード制御を使用してカメ 1 をアクティブ化し、カメ 2 はカメ 1 の完璧な模倣です。
20.9 次のステップ
1.21 記録と再生 - パッケージ記録を学ぶ
- 22 URDF モデル - ロボットモデリングを学ぶ