ROS2 工具、Launch 与可视化
最近更新:
17 常用命令工具
17 常用命令工具(CLI Tools)
17.1 包管理工具 ros2 pkg
17.1.1 ros2 pkg create
功能:创建一个功能包,需要指定包名、编译方式、依赖项等。
格式:
ros2 pkg create <package_name> --build-type <build-type> --dependencies <dependencies>在 ros2 命令中:
pkg:表示与功能包相关的功能;
create:表示创建一个功能包;
包名:必填,新功能包的名称;
build-type:必填,表示新创建的功能包是 C++ 还是 Python,如果使用 C++ 或 C,则为 ament_cmake,如果使用 Python,则为 ament_python;
选项:C++ 功能包需要包含 rclcpp,Python 功能包需要包含 rclpy,以及其他依赖项;
17.1.2 ros2 pkg list
功能:查看系统中的功能包列表
格式:
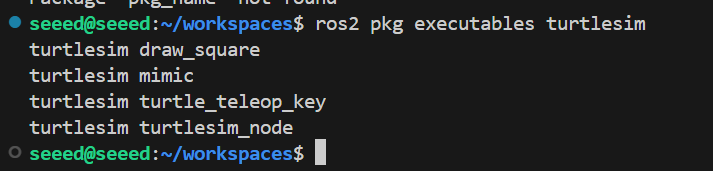
ros2 pkg list17.1.3 ros2 pkg executables
功能:查看一个包中所有可执行文件
格式:
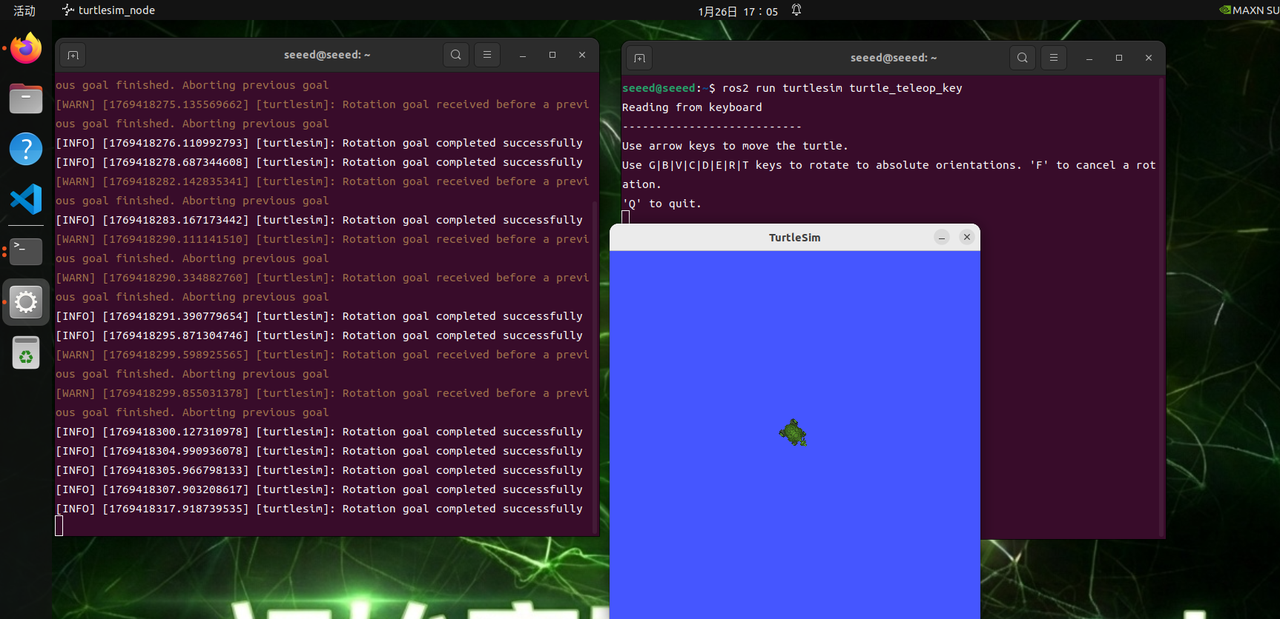
ros2 pkg executables <pkg_name>17.2 节点运行 ros2 run
功能:运行功能包节点程序
格式:
ros2 run <pkg_name> <node_name>
pkg_name:功能包名称
node_name:可执行文件名称
17.3 节点相关工具
17.3.1 ros2 node list
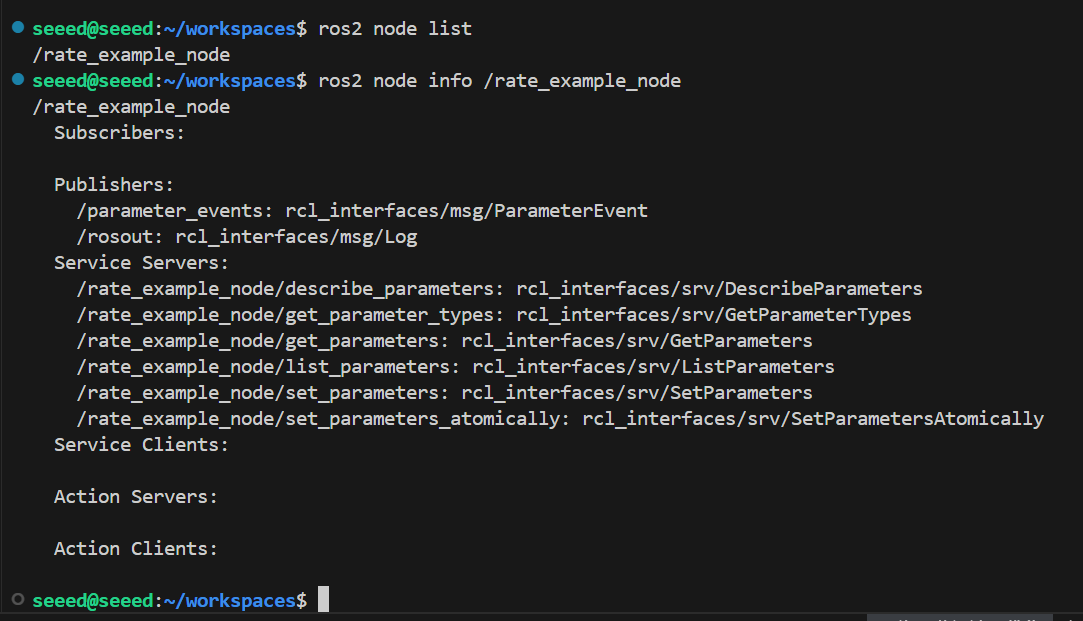
功能:列出当前域中的所有节点
格式:
ros2 node list17.3.2 ros2 node info
功能:查看节点详细信息,包括订阅、发布的消息、服务和动作等。
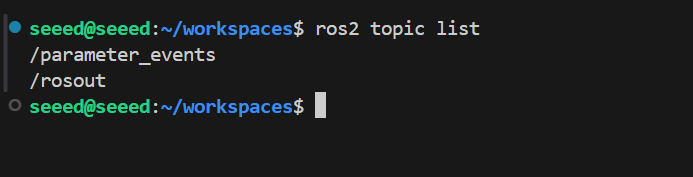
格式:
ros2 node info <node_name>node_name:要查看的节点名
17.4 话题相关工具
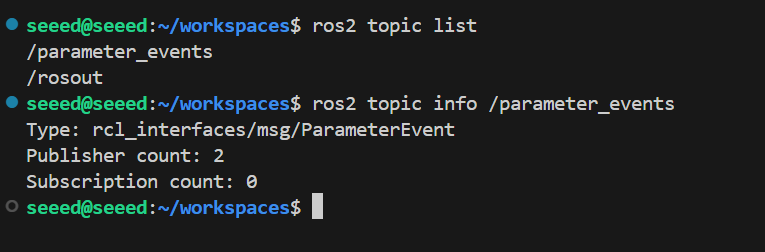
17.4.1 ros2 topic list
功能:列出当前域中的所有话题
格式:
ros2 topic list
17.4.2 ros2 topic info
功能:显示话题消息类型、订阅者/发布者数量
格式:
ros2 topic info <topic_name>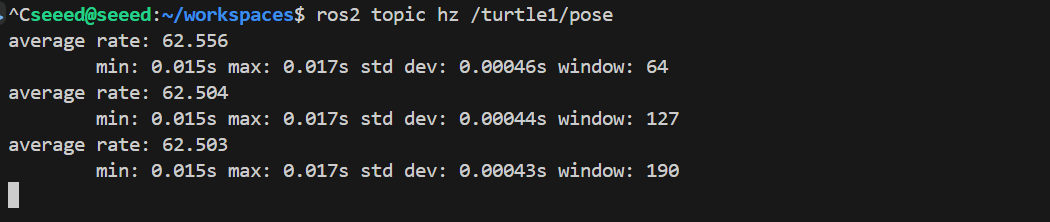
topic_name:要查询的话题名
17.4.3 ros2 topic type
功能:查看话题的消息类型
格式:
ros2 topic type <topic_name>topic_name:要查询的主题类型名称
17.4.4 ros2 topic hz
功能:显示话题发布的平均频率
格式:
ros2 topic hz <topic_name>topic_name:要查询频率的话题名称

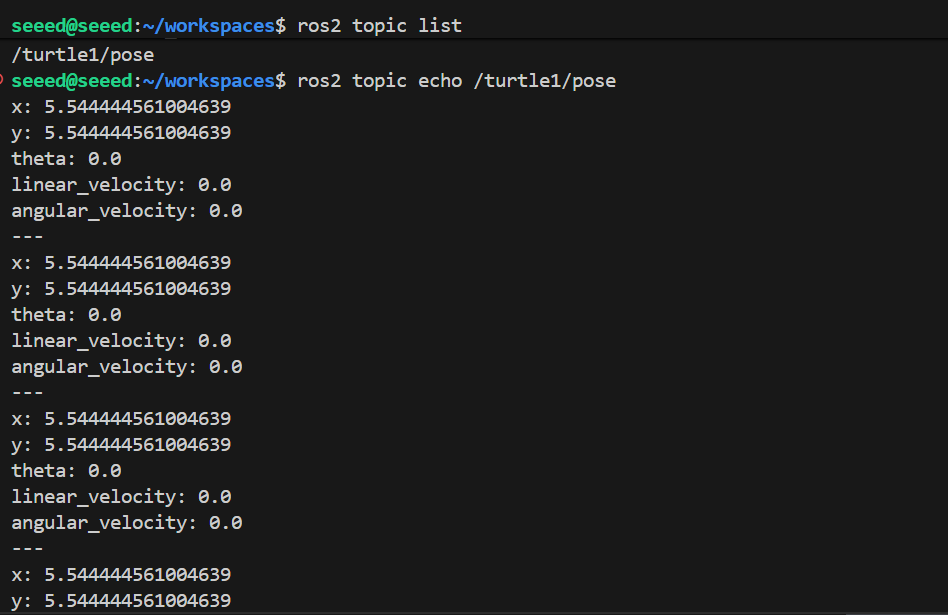
17.4.5 ros2 topic echo
功能:在终端打印话题消息,类似订阅者
格式:
ros2 topic echo <topic_name>topic_name:要打印消息的话题名称
17.4.6 ros2 topic pub
功能:在终端发送指定话题消息
格式:
ros2 topic pub <topic_name> <message_type> <message_content>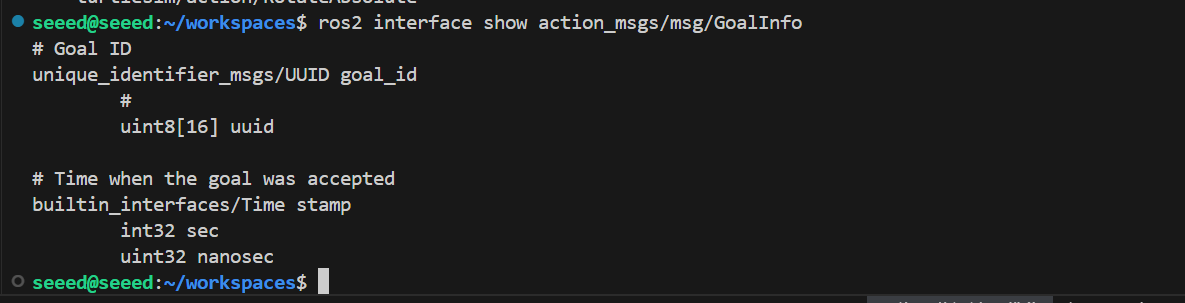
topic_name:要发布的话题名称
message_type:话题数据类型
message_content:消息内容
默认以 1 Hz 频率发布,设置以下参数:
参数 -1 发布一次,ros2 topic pub -1 topic_name message_type message_content
参数 -t count 循环发布 count 次后结束,ros2 topic pub -t count topic_name message_type message_content
参数 -r count 以 count Hz 频率发布,ros2 topic pub -r count topic_name message_type message_content
示例:
通过命令行发布速度命令
需要注意的是,每个冒号后面有一个空格,否则格式会出错。
ros2 topic pub turtle1/cmd_vel geometry_msgs/msg/Twist "{linear: {x: 0.5, y: 0.0, z: 0.0}, angular: {x: 0.0, y: 0.0, z: 0.2}}"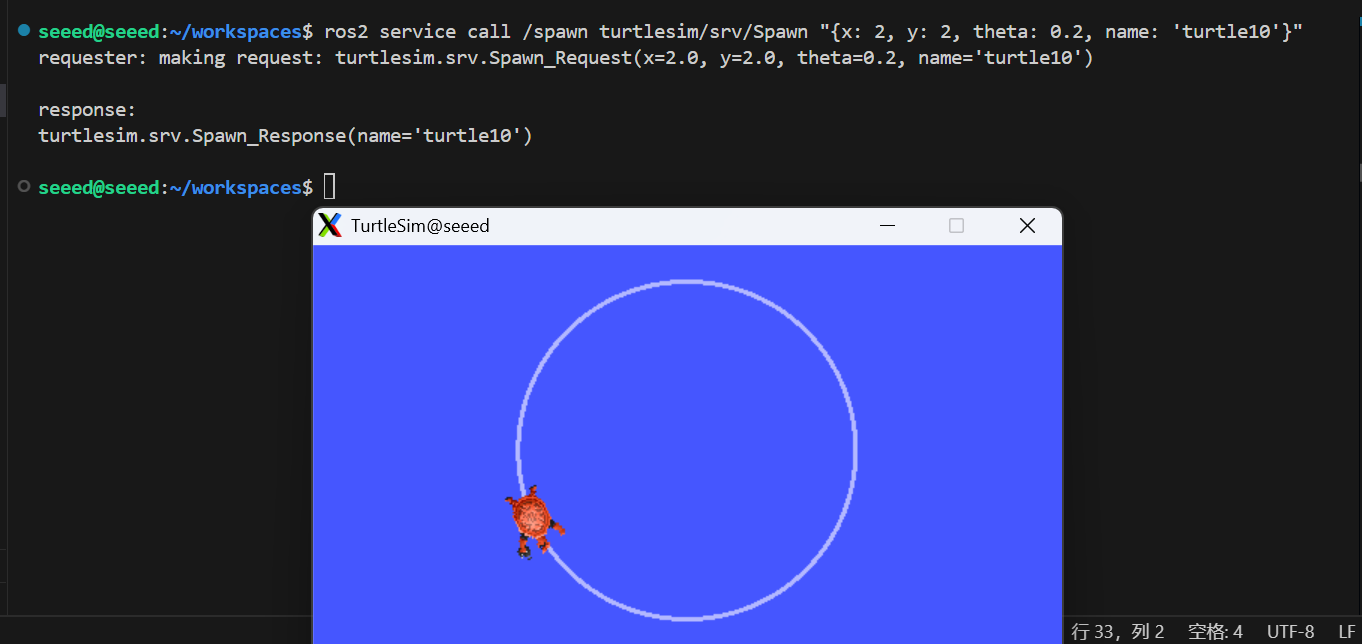
17.5 ros2 接口相关工具
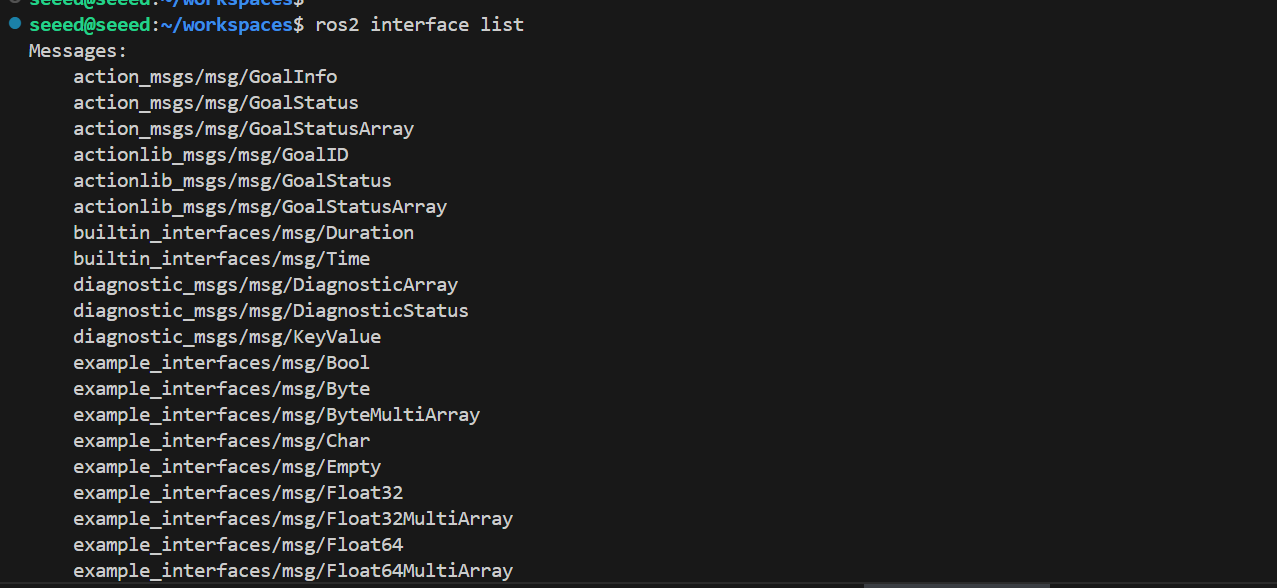
17.5.1 ros2 interface list
功能:列出当前系统的所有接口,包括话题、服务、动作。
格式:
ros2 interface list17.5.2 ros2 interface show
功能:显示指定接口的详细信息
格式:
ros2 interface show <interface_name>interface_name:要显示接口内容的名称
17.6 服务相关工具
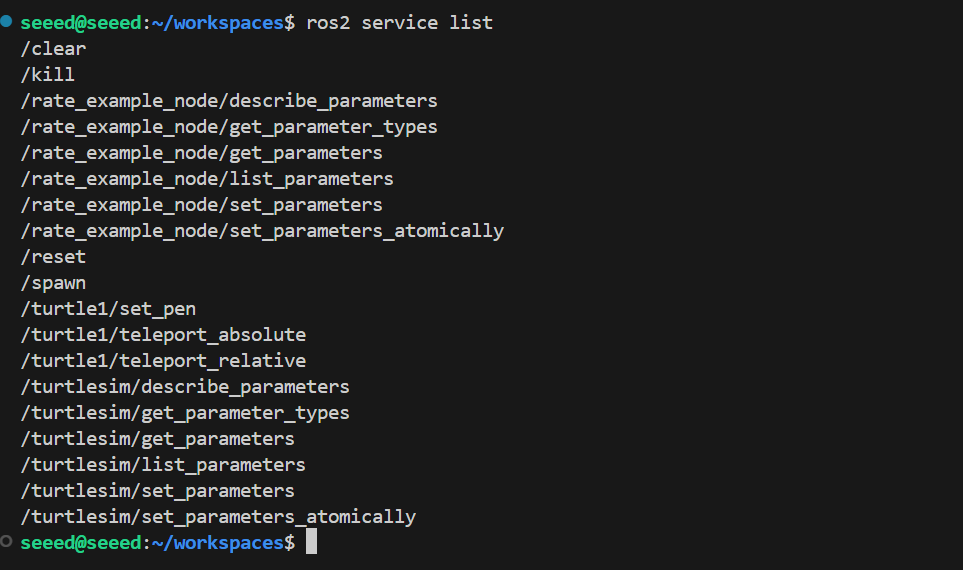
17.6.1 ros2 service list
功能:列出当前域中的所有服务
格式:
ros2 service list17.6.2 ros2 service call
功能:调用指定服务
格式:
ros2 interface call <service_name> <service_Type> <arguments>service_name:要调用的服务
service_Type:服务数据类型
arguments:服务传递的参数
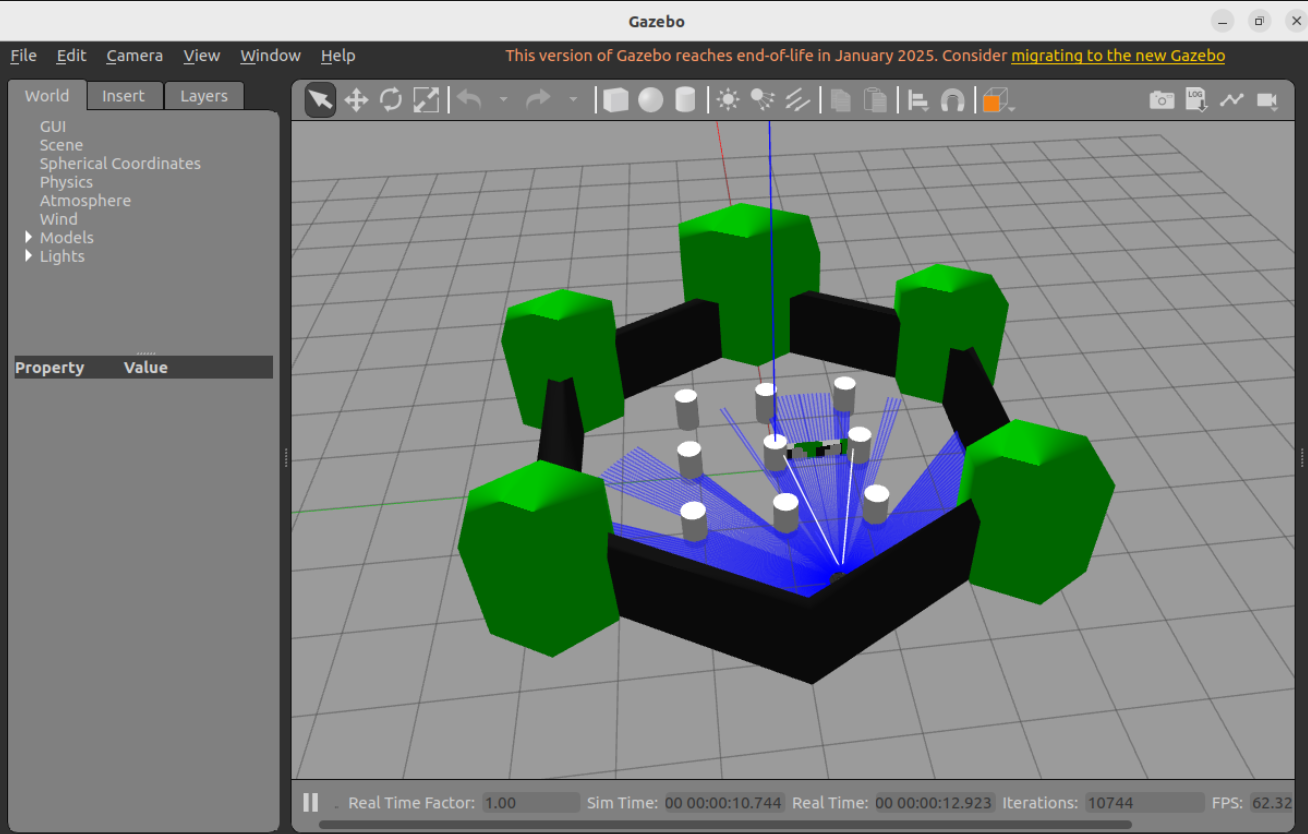
例如,调用生成小海龟的服务
ros2 service call /spawn turtlesim/srv/Spawn "{x: 2, y: 2, theta: 0.2, name: 'turtle10'}"17.7 后续步骤
18 RViz2 使用 - 学习 RViz2 可视化
- 19 Rqt 工具箱 - 学习 Rqt 工具
18 RViz2 使用
18 RViz2 使用(RViz2 Vision)
18.1 RViz2 概述
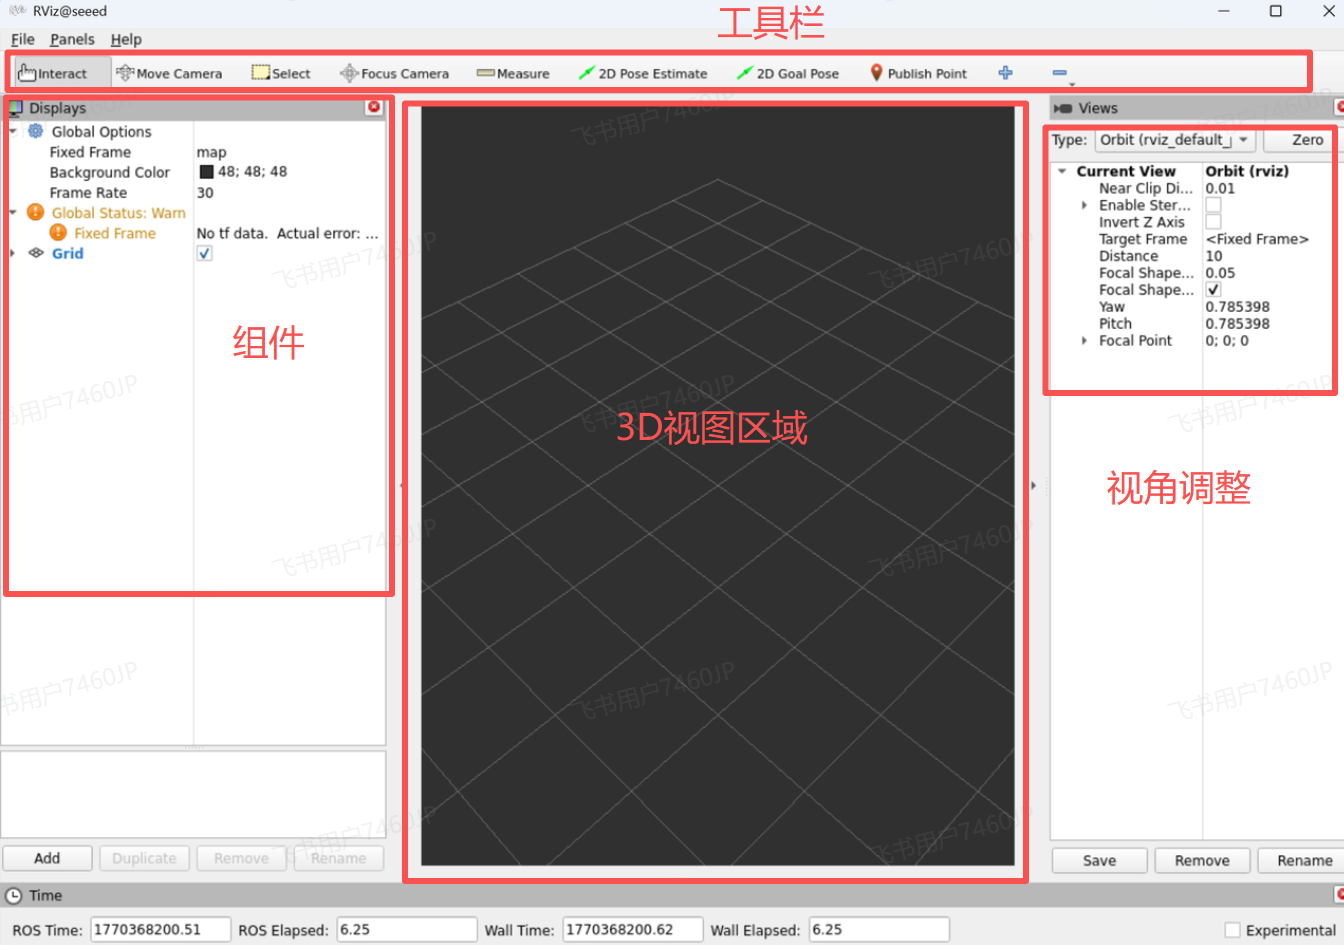
Rviz2 是 ROS 2 中最常用的三维可视化工具,用于可视化机器人系统的运行状态。它可以订阅并显示各种 ROS 2 话题数据,例如激光雷达点云、地图、机器人模型(URDF)、TF 坐标变换、路径规划轨迹和摄像头图像,帮助开发者快速验证传感器、定位、导航等是否正常工作。通过 Rviz2,用户可以在同一界面实时观察机器人与环境之间的关系,显著提高调试和开发效率。
18.2 准备工作
如果有真实机器人,可以在机器人主控端启动 rviz 练习,如果没有真实机器人,我们可以通过 gazebo 启动 turtlebot3,模拟激光雷达、摄像头等,以便接下来可以可视化数据。
请注意,以下安装步骤不是必需的,如果手中有实物机器人,有大量机器人通信允许直接使用真实机器雷达信息,可以使用真实雷达或他们选择的虚拟仿真机器人;以下适用于没有实物机器的用户。
本节课程使用仿真机器人作为示例,教授 rviz2 可视化,真实或模拟机器人,以及 rviz2 流程都是相同的。
安装 Turtlebot3 仿真包
sudo apt install ros-${ROS_DISTRO}-turtlebot3*安装 ros 和 gazebo 桥接
sudo apt install ros-humble-ros-gz -y设置 turtlebot3 环境变量
export TURTLEBOT3_MODEL=waffle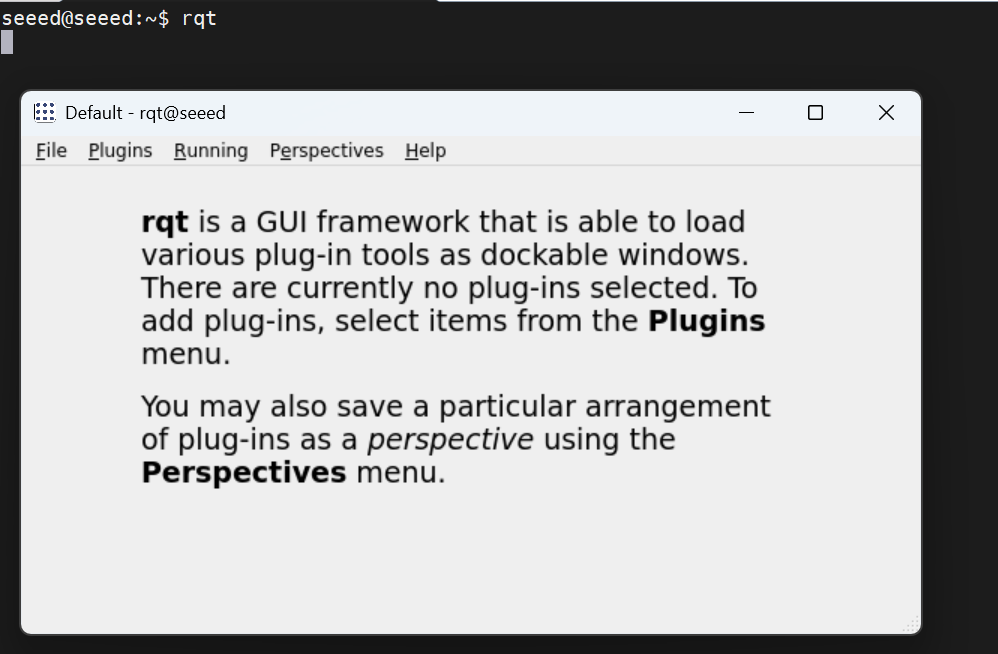
启动 gazebo 仿真环境
# source /opt/ros/humble/setup.bash
ros2 launch turtlebot3_gazebo turtlebot3_world.launch.py
注意:Jetson 可能无法启动,此操作在 X86 PC 上运行
18.3 Rviz2 启动
启动一个终端,可以使用以下命令激活:
rviz2注意:如果在 docker 中启动,请确保已打开 GUI 显示。
18.4 图像数据可视化
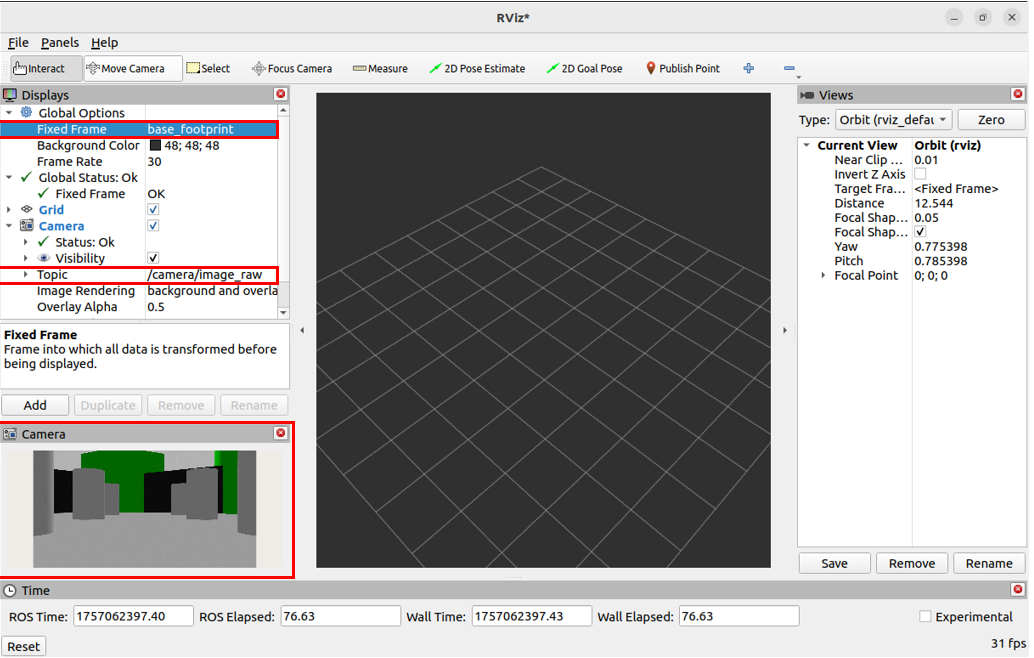
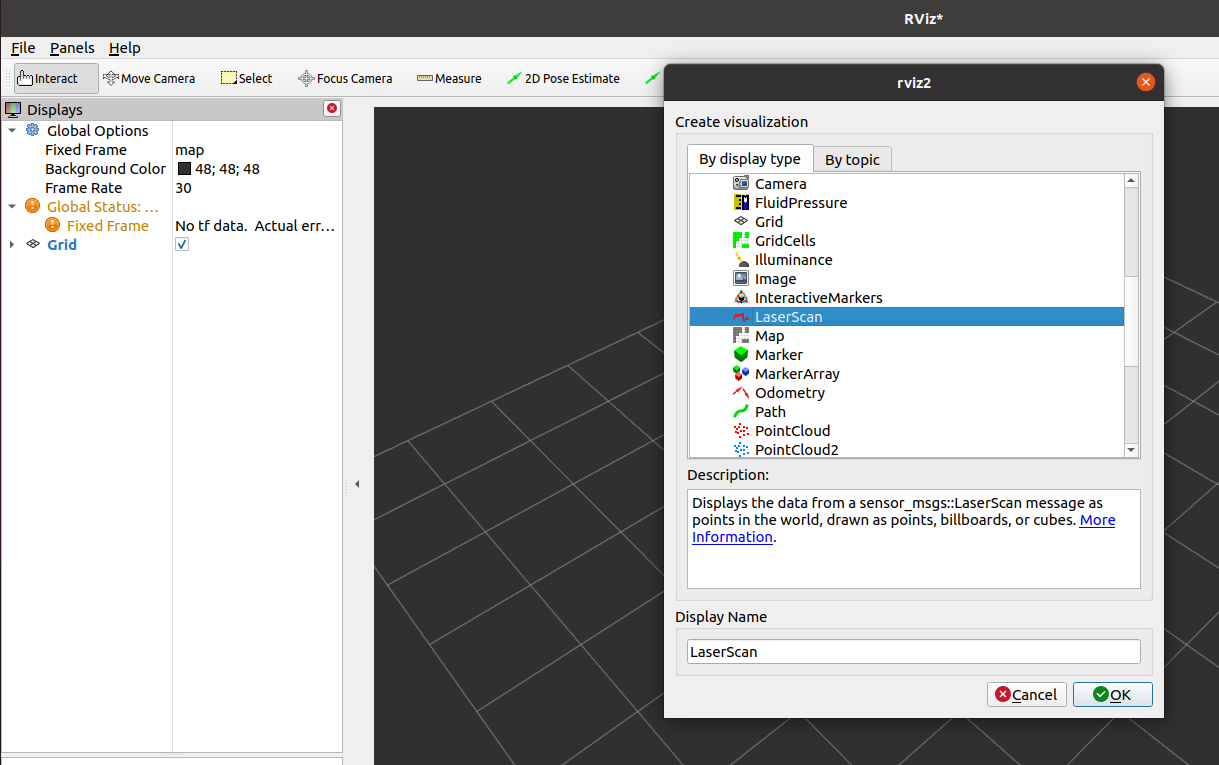
点击左侧 Displays 窗口中的 Add,找到 Image 显示项,确认后单击 OK 添加到显示列表,然后为显示项配置图像话题,这样就可以看到机器人的摄像头图像。
[图片下载失败]
将 Fixed Frame 选择为 base_footprint 坐标
将 Camera Color Topic 选择为话题
现在,我们可以在 Camera 窗口中看到当前仿真机器人的视野。
18.5 雷达数据可视化
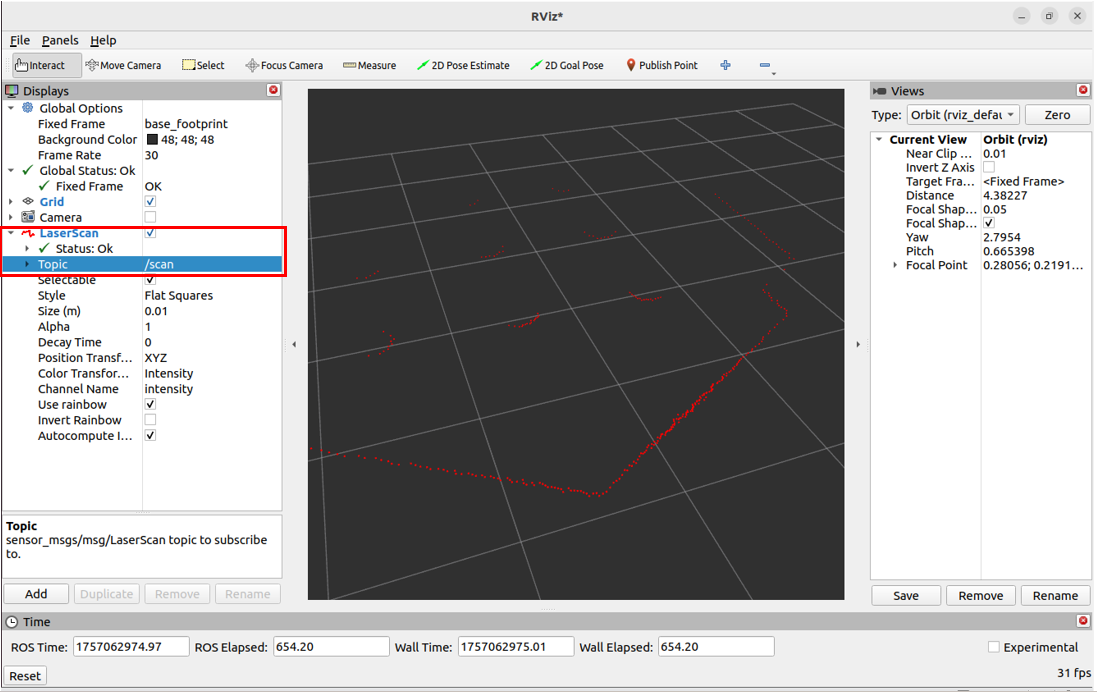
点击左侧 Displays 窗口中的 Add,选择 LaserScan,并配置订阅的话题名称。
为 LaserScan 选择话题
此时,我们可以看到激光雷达的轮廓。
18.6 机器人模型可视化
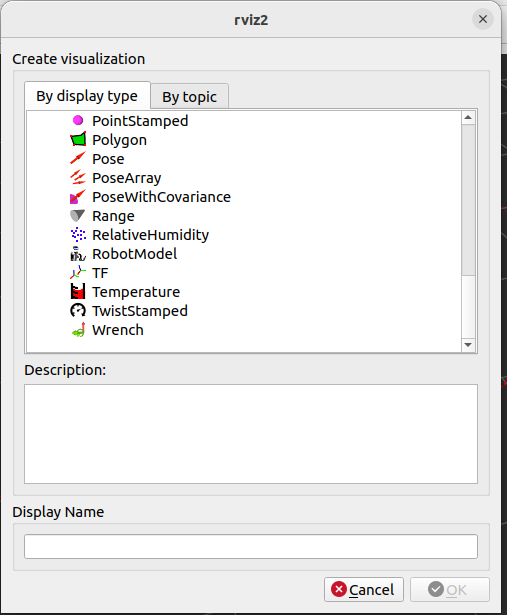
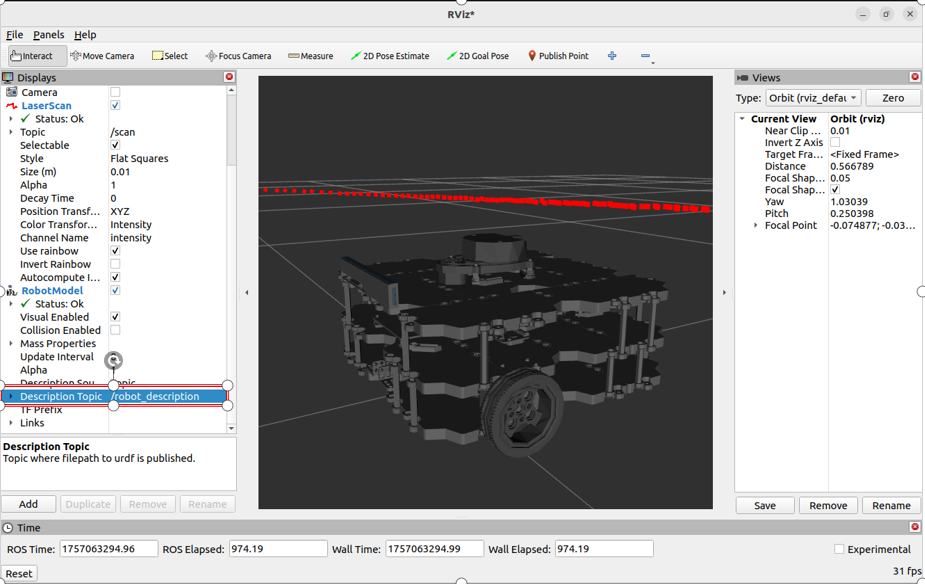
点击左侧 Displays 窗口中的 Add,选择 RobotModel
将 robotDescriptionTopic 的话题选择
我们可以在 Rviz2 中看到机器人的可视化。
18.7 其他数据可视化
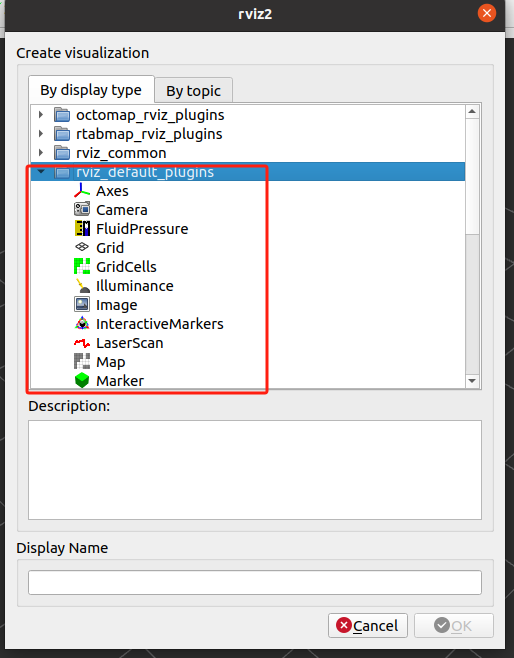
rivz 默认插件列出了许多常用的数据可视化插件,可以根据需要使用。
18.8 后续步骤
-
19 Rqt 工具箱 - 学习 Rqt 工具
-
20 Launch 配置 - 学习 Launch 配置
19 Rqt 工具箱
19 Rqt 工具箱(Rqt Tools)
19.1 Rqt 概述
| rqt 是 ROS 中基于 Qt 的图形工具框架,通过插件将许多常用功能集成到一个可视化界面中。开发者可以通过查看 rqt 来可视化和调试系统,例如 Topic 的发布/订阅、监控节点和通信(rqt graph)、实时查看日志(rqt console)、动态参数引用(rqt reconfigure)和绘制分析数据(rqt plot)。简单地说,rqt 就像 ROS 的多功能可视化调试面板,可以显著提高开发、调试和系统理解的效率。 |
|---|
Plain Text Rqt 插件生态:
Rqt 框架
rqt graph│rqt plot│rqt console (节点) (数据绘图) (日志查看)
rqt reconfigure (参数配置) (TF 树) (数据包)

19.2 安装
只要安装了桌面版本,通常默认会安装 rqt 工具箱;如果 ros2 的安装不是完整版本的安装,可以按以下方式安装:
sudo apt install ros-${ROS_DISTRO}-rqt*19.3 启动
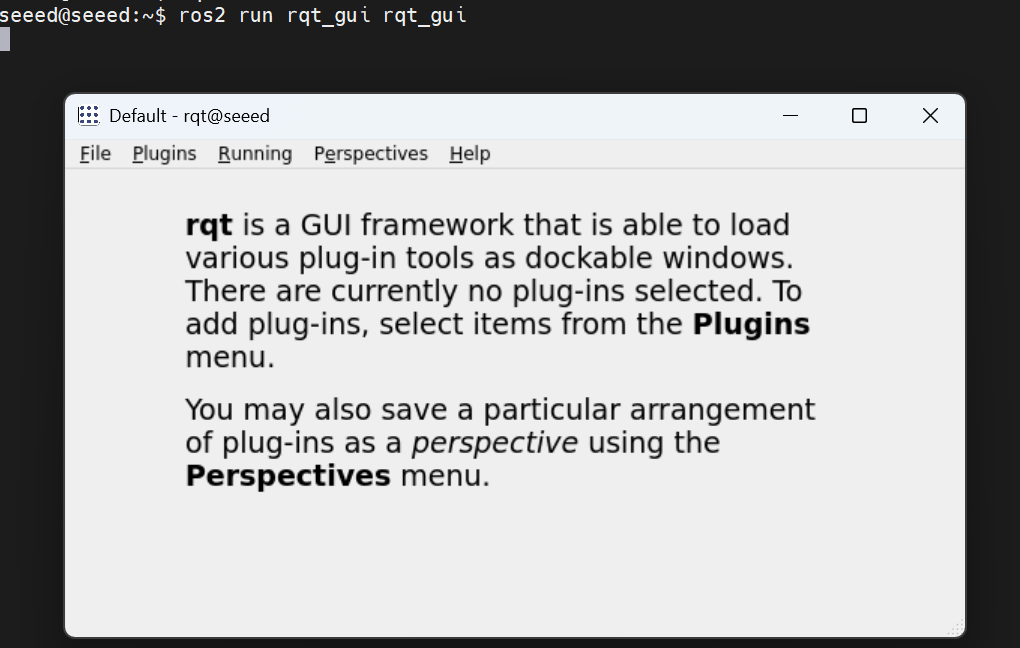
常用的 rqt 启动命令是:
# Method 1: run `rqt` in the terminal
rqt# Method 2
ros2 run rqt_gui rqt_gui19.4 插件的使用
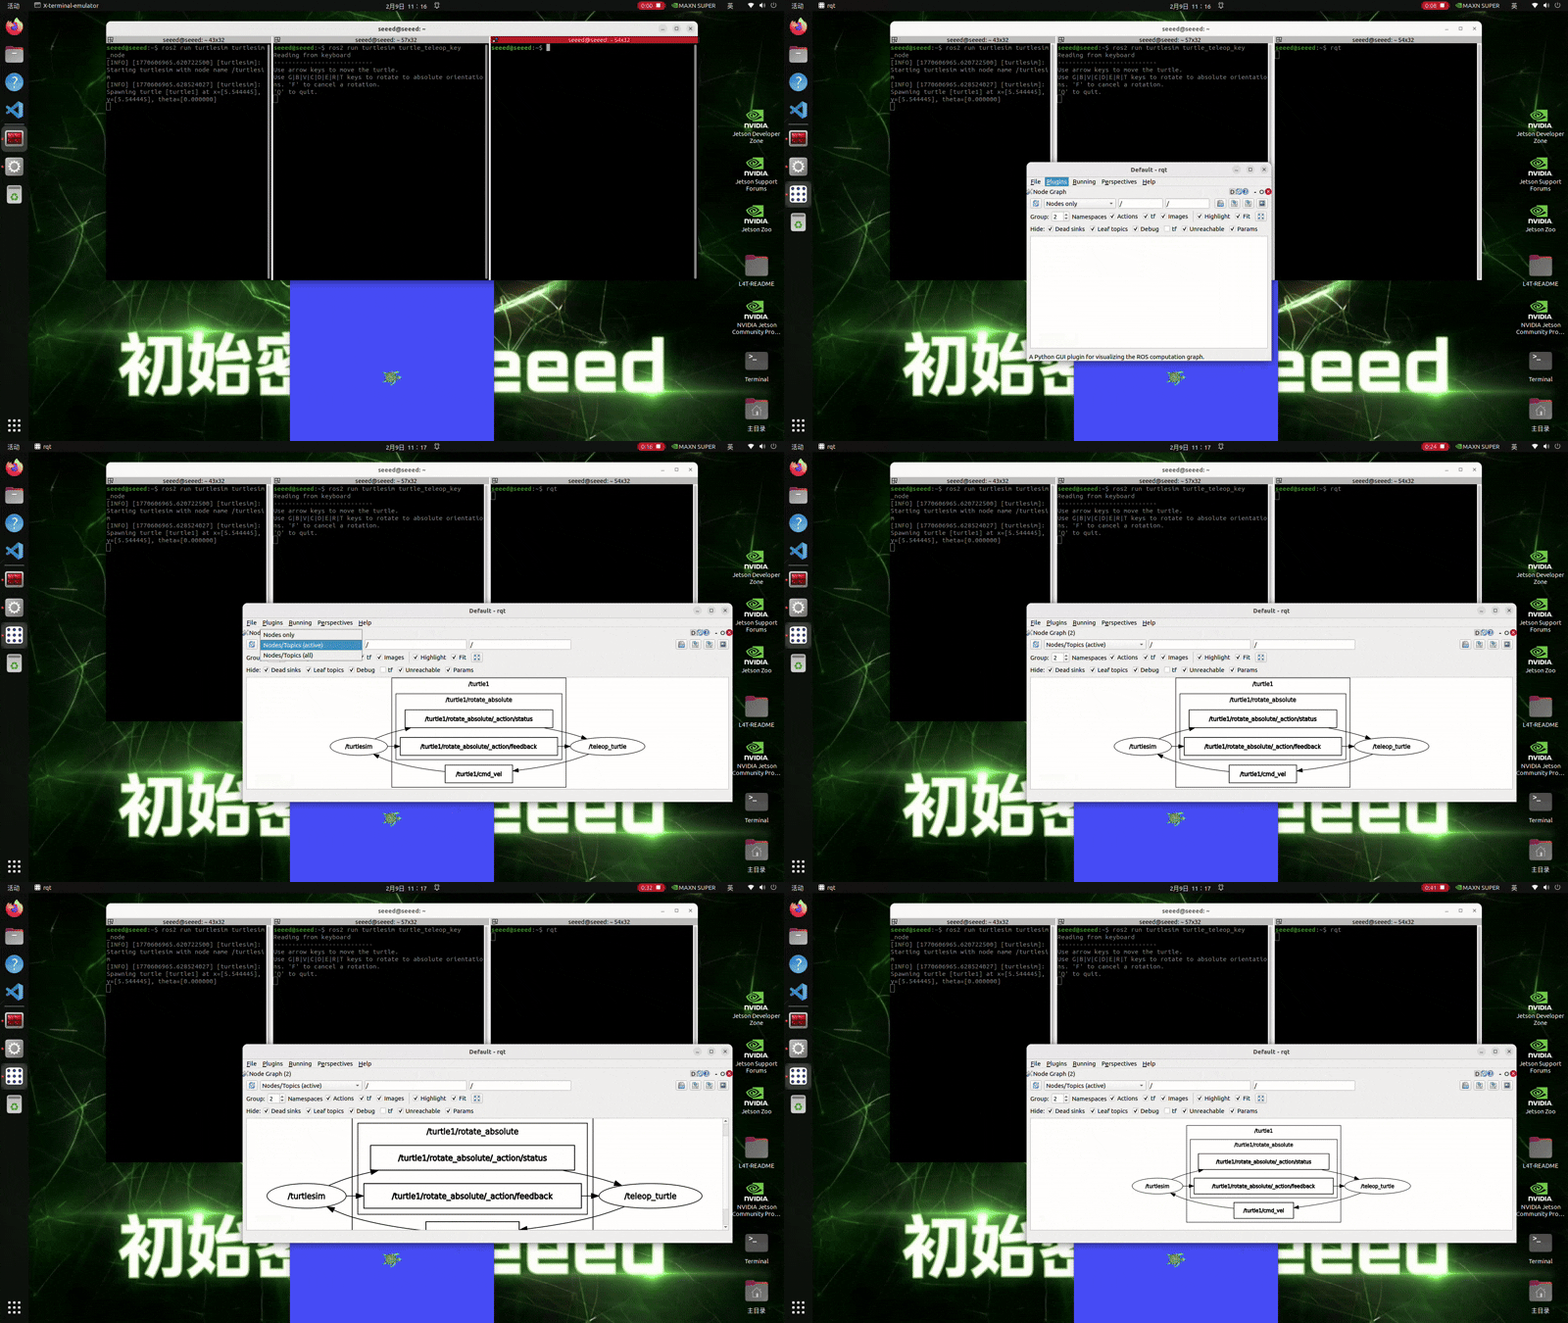
启动 rqt 后,可以通过 plugins 添加所需的插件:
打开一个小海龟示例以查看节点的订阅:
# Terminal 1:
ros2 run turtlesim turtlesim_node
# Terminal 2:
ros2 run turtlesim turtle_teleop_key
# Terminal 3:
rqt
插件包含话题、服务、动作、参数、日志等,可以根据需要适配以方便 ROS2 调试。以下是使用示例。
19.4.1 topic 插件
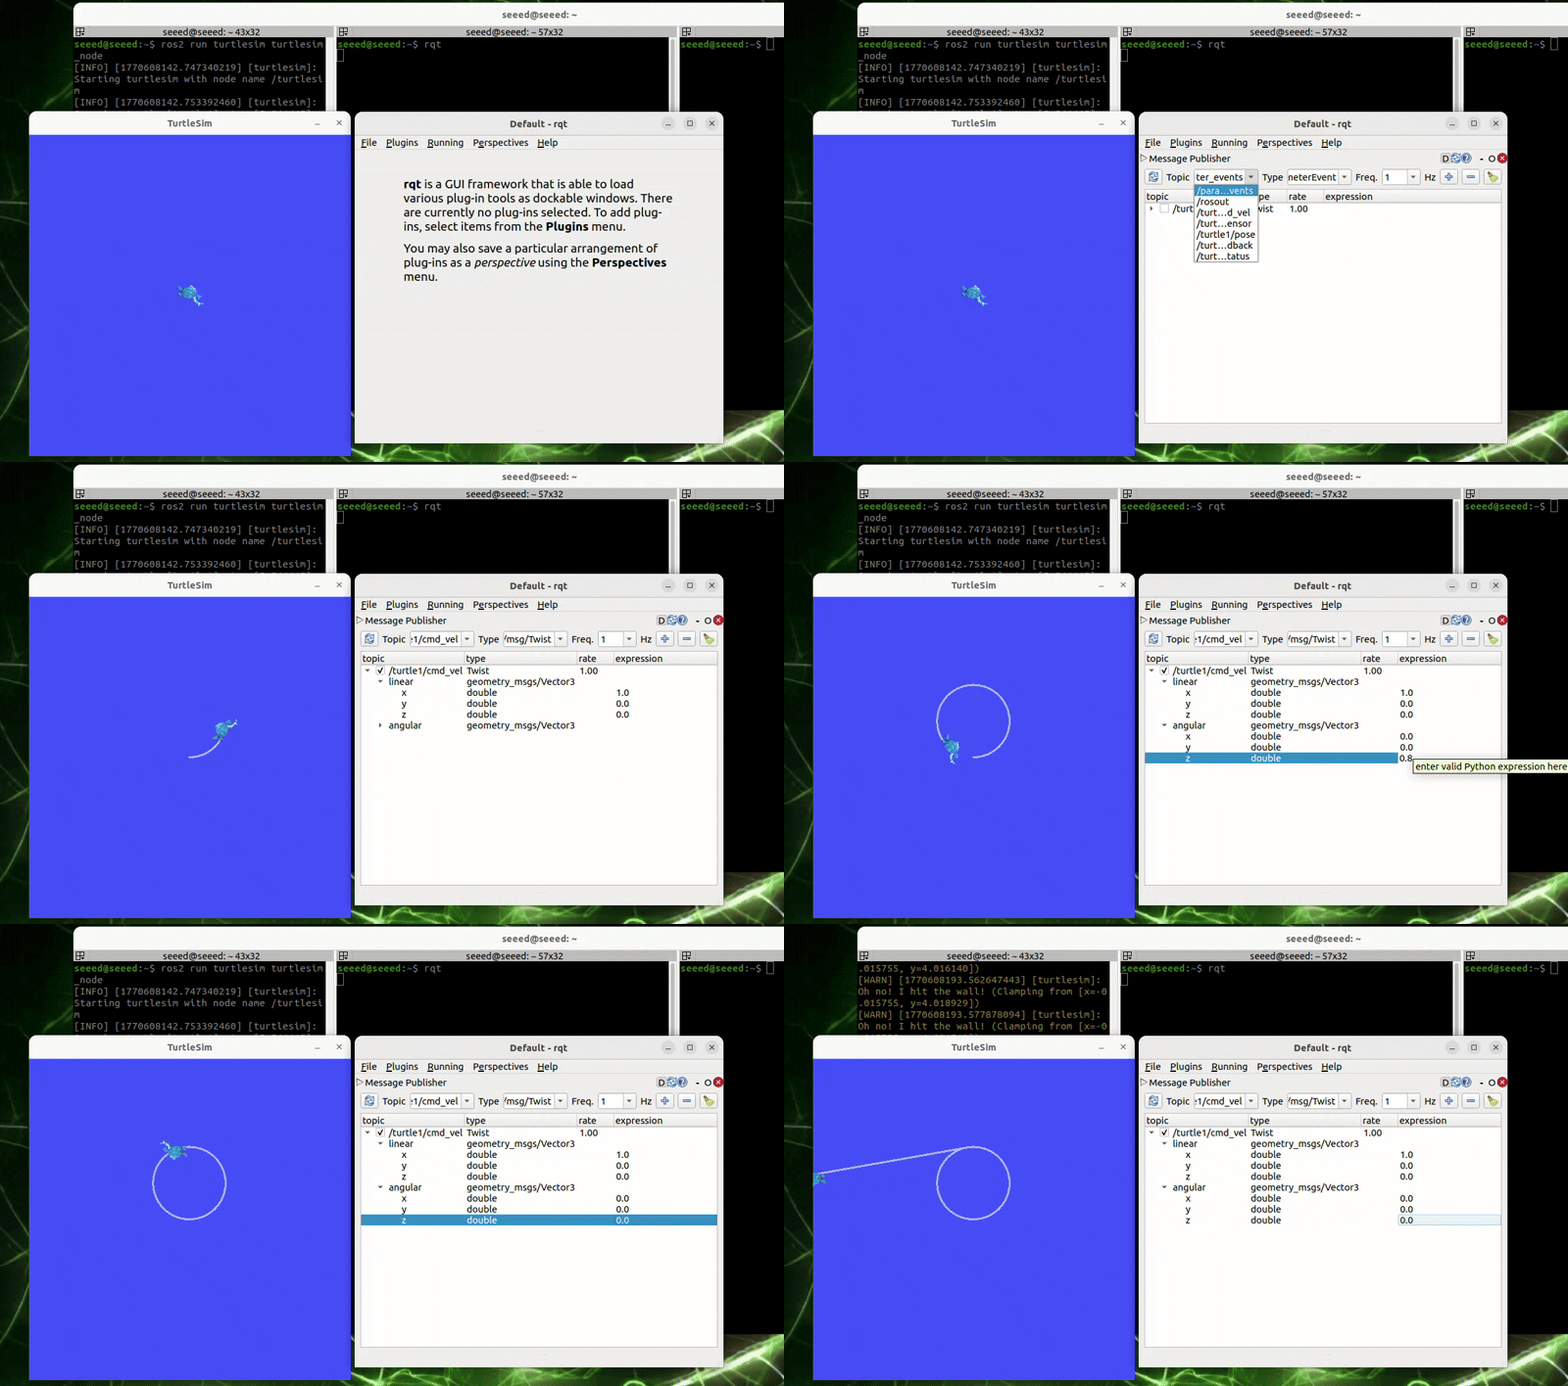
添加 topic 插件并发送速度命令以控制小海龟运动。
19.4.2 service 插件
添加一个 service 插件并发送请求以在指定位置创建一只小海龟。
[图片下载失败]
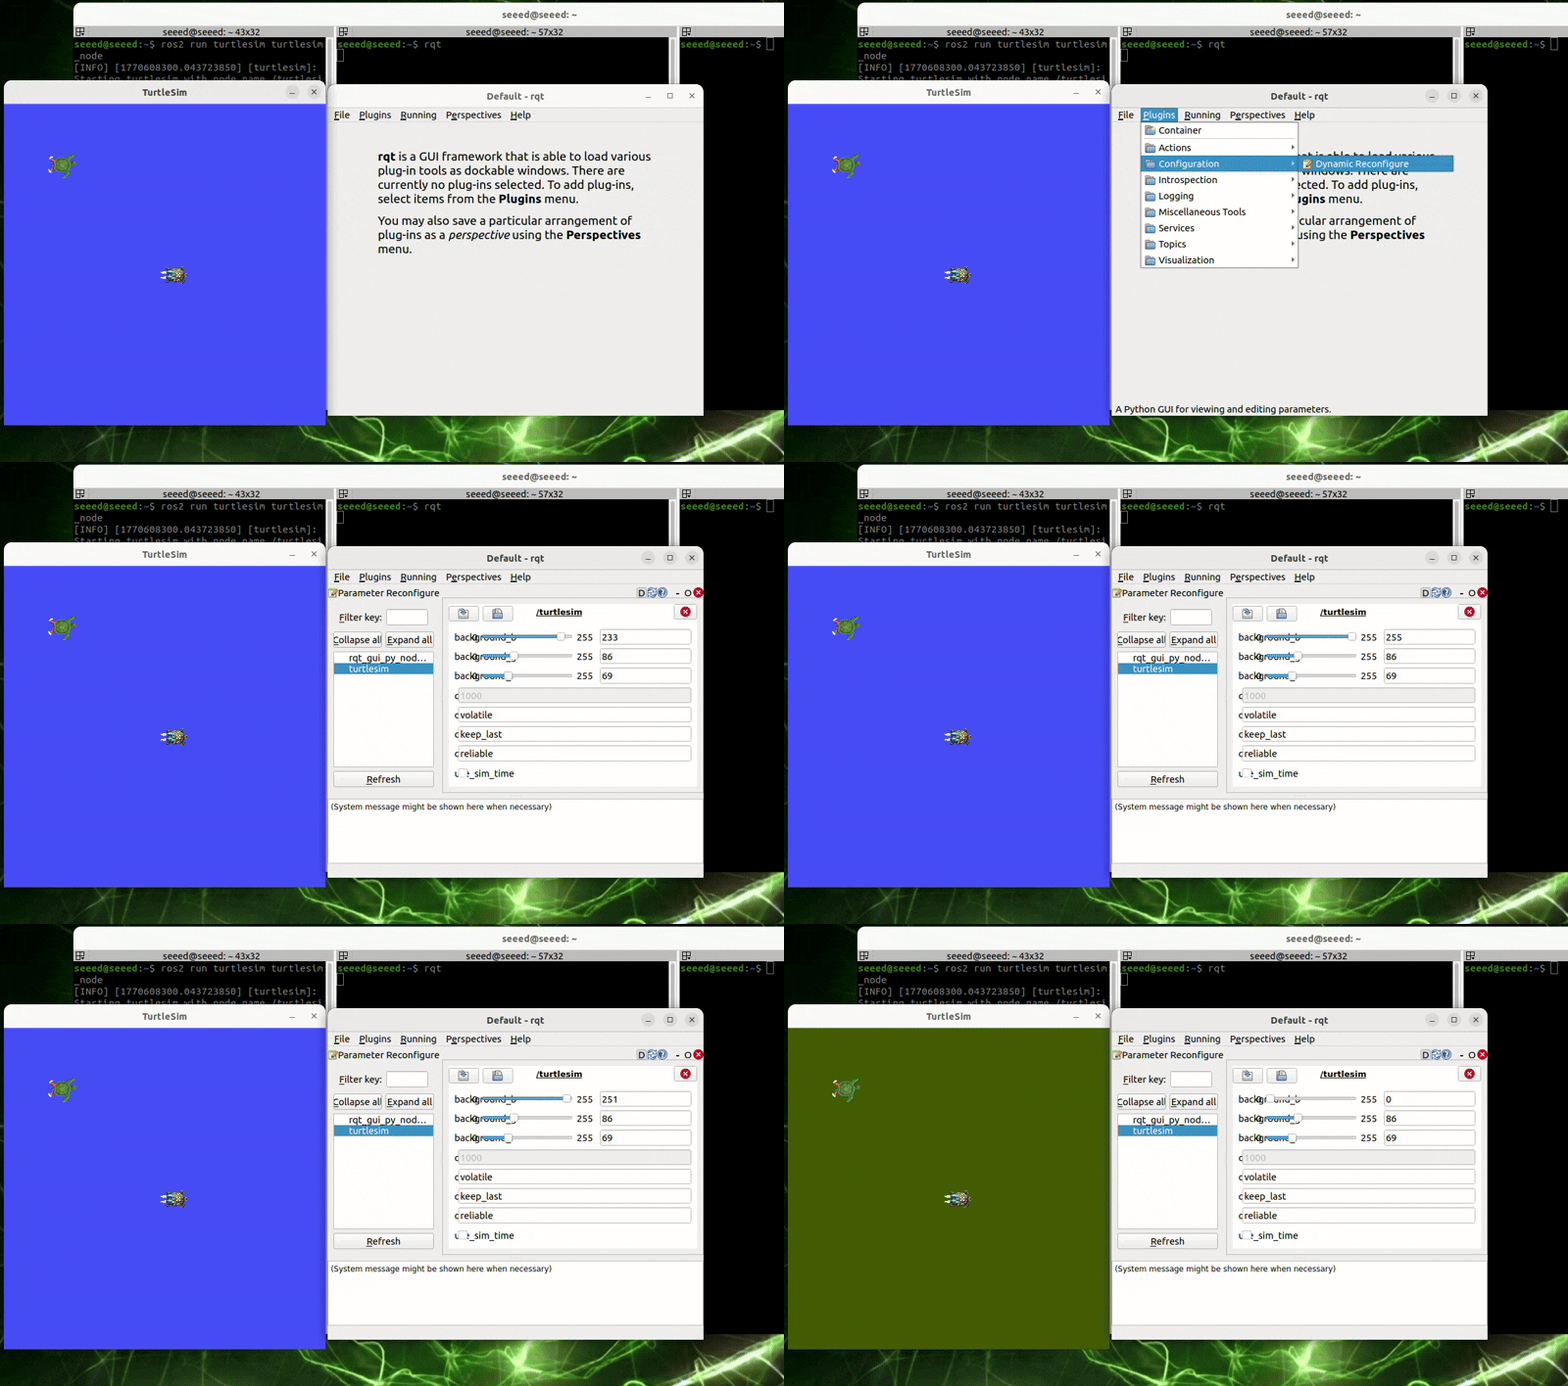
19.4.3 参数插件
通过参数插件动态更改小海龟窗口的背景颜色。
19.5 后续步骤
- 20 Launch 配置 - 学习 Launch 配置
记录与回放 - 学习数据包记录
20 Launch 配置
20 Launch 配置(Launch Files)
20.1 Launch 概述
ROS 中的 Launch 启动文件用于多个节点/组件的集成管理和激活,本质上是一个系统级启动脚本。它可以由 Python(最常用)、XML 或 YAML 编写,支持多个节点的同时激活、设置参数、重映射话题、加载命名空间、配置环境变量,以及进行更高级的逻辑控制,例如条件启动、延迟启动、按事件触发等。简而言之,Launch 文件是 ROS 2 项目"一键启动"一组节点的核心工具,特别适用于复杂机器人系统的部署和调试。
20.2 启动单个 Node 节点
20.2.1 准备包
cd ~/workspaces/src
ros2 pkg create learn_launch --build-type ament_python
20.2.2 新建 launch 文件
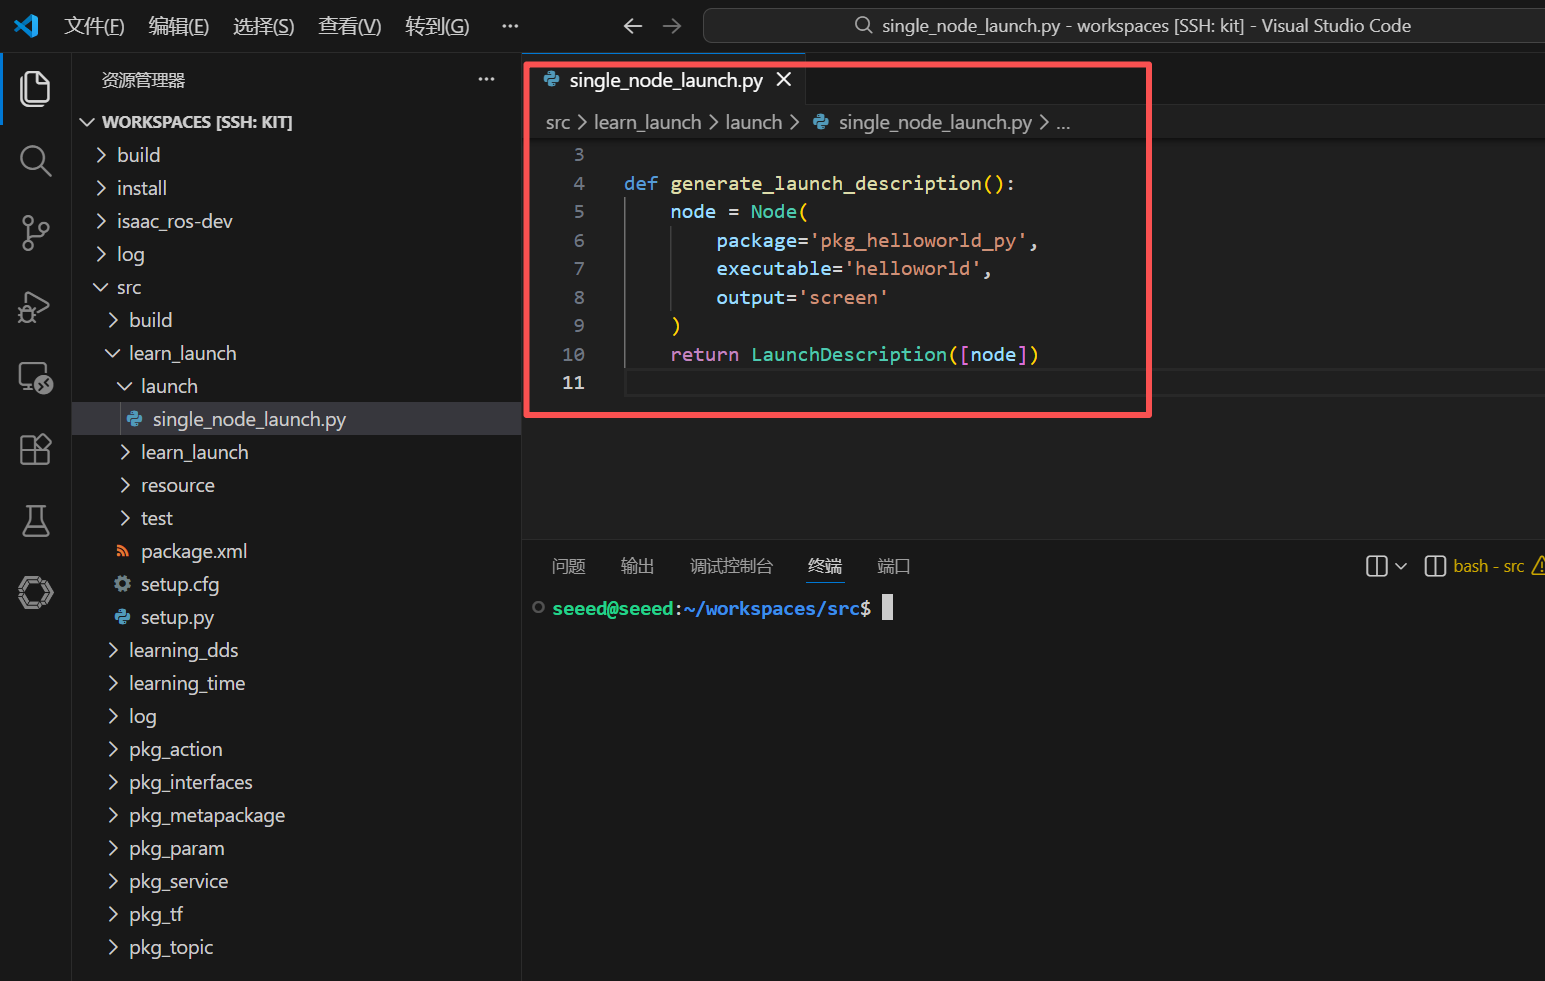
在功能包下创建一个新的 launch 文件夹,然后在 launch 文件夹中创建一个新的 single_node_launch.py 文件并复制以下内容:
from launch import LaunchDescription
from launch_ros.actions import Node

def generate_launch_description():
  node = Node(
  package='pkg_helloworld_py',
  executable='helloworld',
  output='screen'
  )
  return LaunchDescription([node])
20.2.3 配置 setup.py 文件
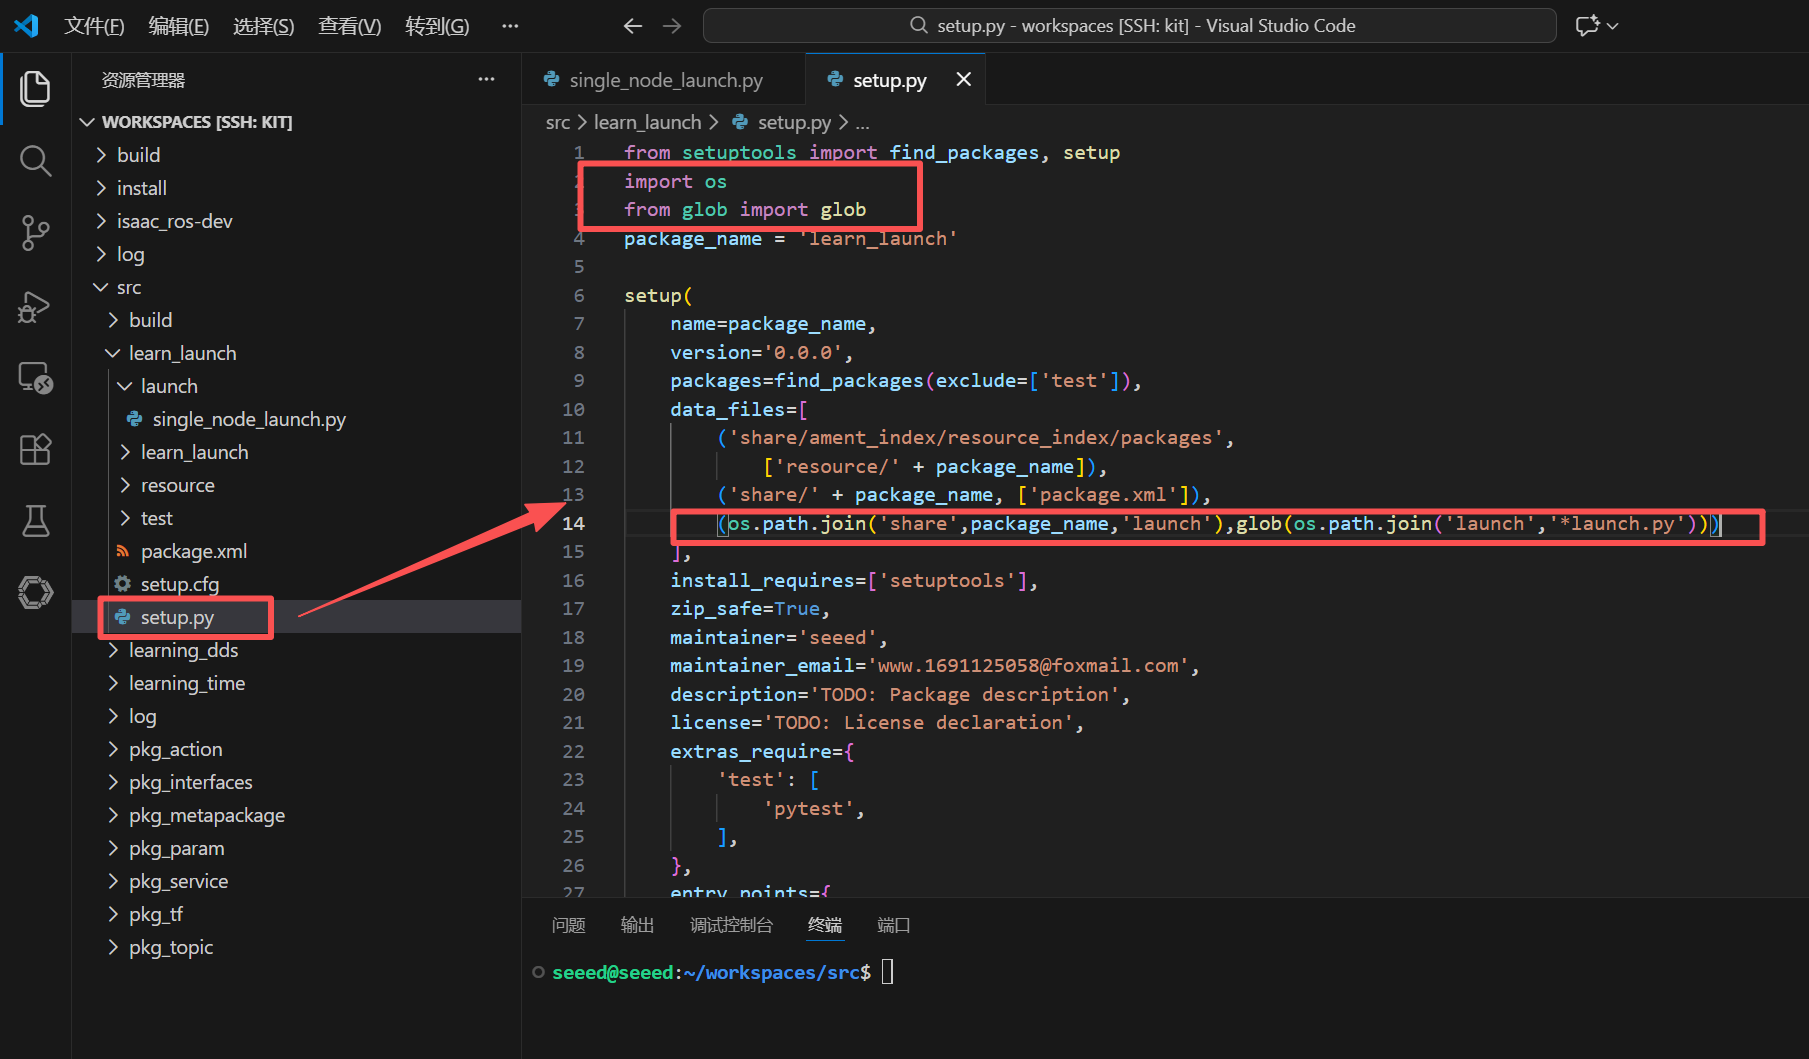
launch 文件通常以 LaunchName_launch.py 命名,其中 LaunchName 是自定义的,_launch.py 通常被认为是固定的。您需要修改功能包下的 setup.py 文件,将 launch 路径下的文档添加进来,这样您就可以编译 .py 文件以执行
# 1. Import the required header files
import os
from glob import glob

# 2. Add the `launch` path and its `launch.py` file to the `data_files` list
(os.path.join('share',package_name,'launch'),glob(os.path.join('launch','*launch.py')))
20.2.4 编译功能包
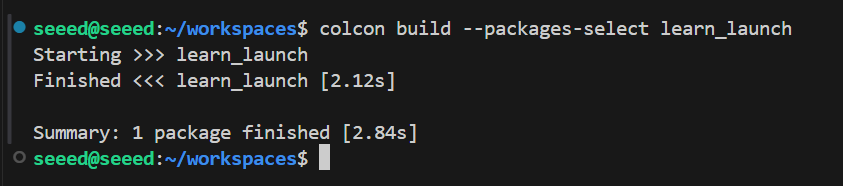
cd ~/workspaces
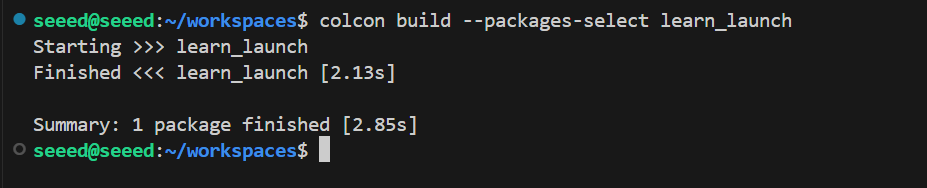
colcon build --packages-select learn_launch
20.2.5 操作步骤
# Refresh environment variables
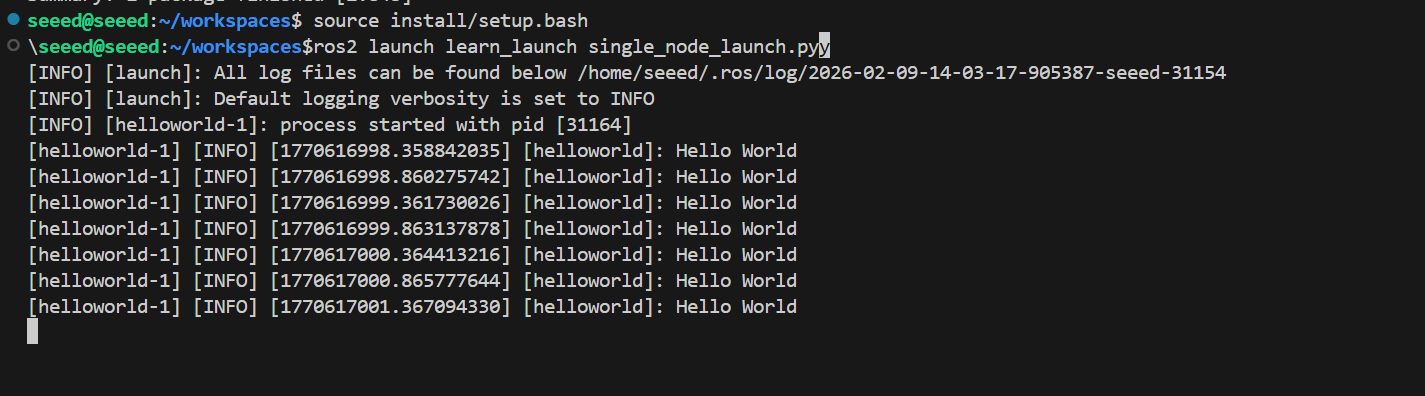
source install/setup.bash
ros2 launch learn_launch single_node_launch.py
20.2.6 源代码分析
导入相关库
from launch import LaunchDescription
from launch_ros.actions import Node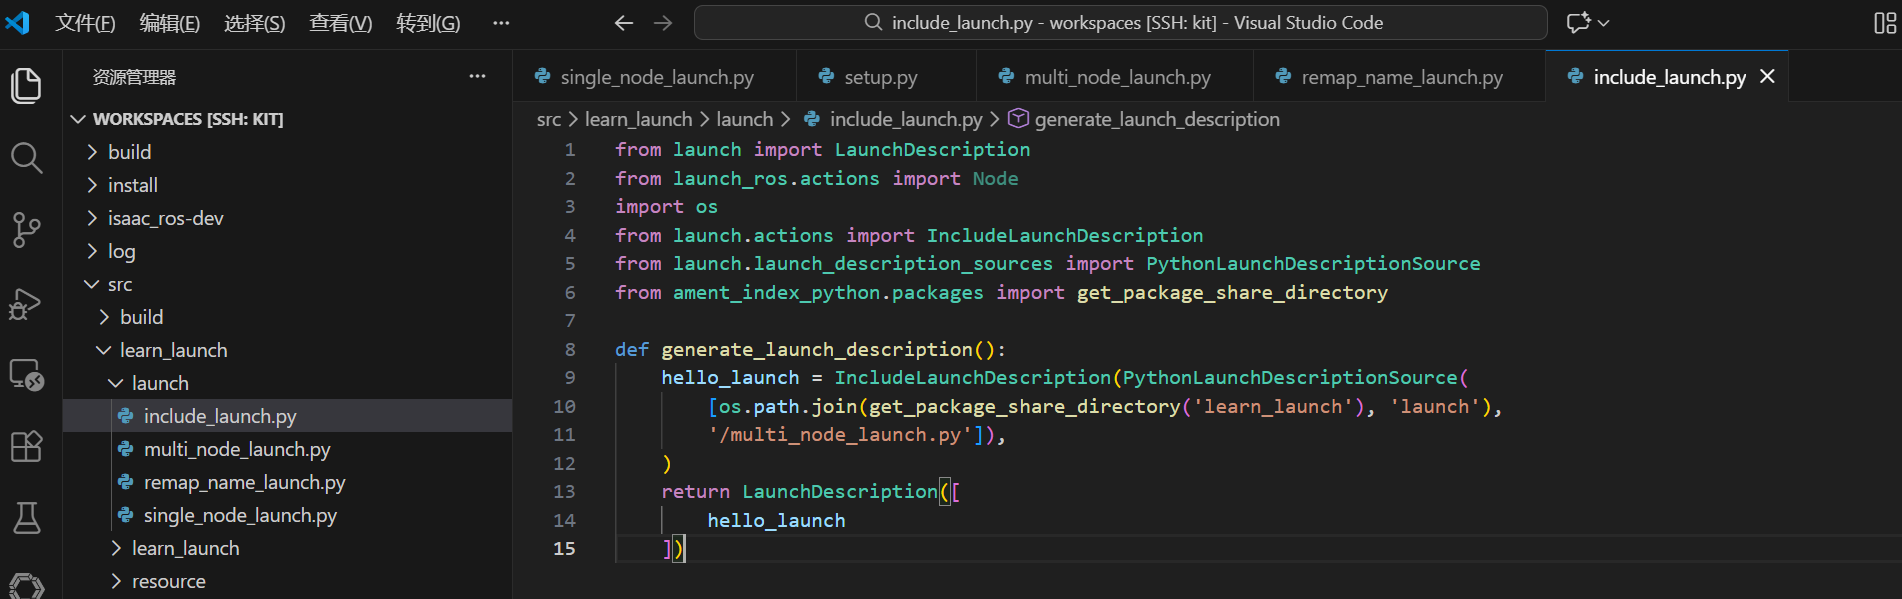
定义一个函数 generate_launch_description 并返回一个 launch 描述
def generate_launch_description():
  node = Node(
  package='pkg_helloworld_py',
  executable='helloworld',
  )
  return LaunchDescription([node])
定义一个变量 Node 启动作为节点的返回值,调用 Node 函数并启动两个重要参数 type 和 executable。
package:表示功能包,代表功能包名称。
Executable:表示执行的程序,可执行程序的名称。
最后一次调用 LaunchDescription 函数是输入 node 参数以执行返回。
return LaunchDescription([node])20.3 启动多个 Node 节点
20.3.1 新建 launch 文件
新建 multi_node_launch.py 文件,添加以下内容:
from launch import LaunchDescription
from launch_ros.actions import Node

def generate_launch_description():
  publisher_node = Node(
  package='pkg_topic',
  executable='publisher_demo',
  output='screen'
  )
  subscriber_node = Node(
  package='pkg_topic',
  executable='subscriber_demo',
  output='screen'
  )
  return LaunchDescription([
  publisher_node,
  subscriber_node
  ])
20.3.2 编译功能包
colcon build --packages-select learn_launch20.3.3 操作步骤
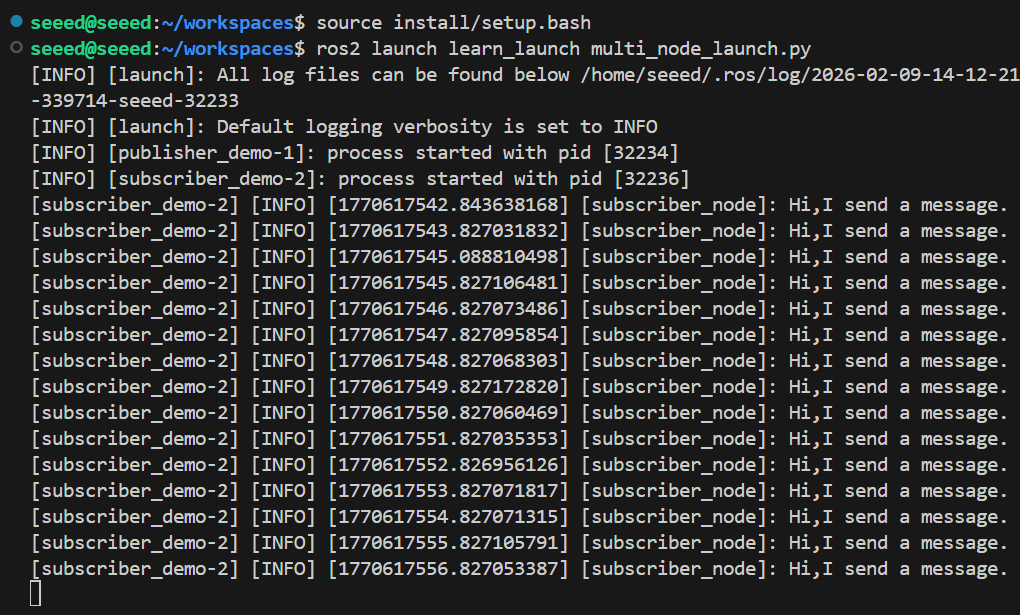
# Refresh environment variables
source install/setup.bash
ros2 launch learn_launch multi_node_launch.py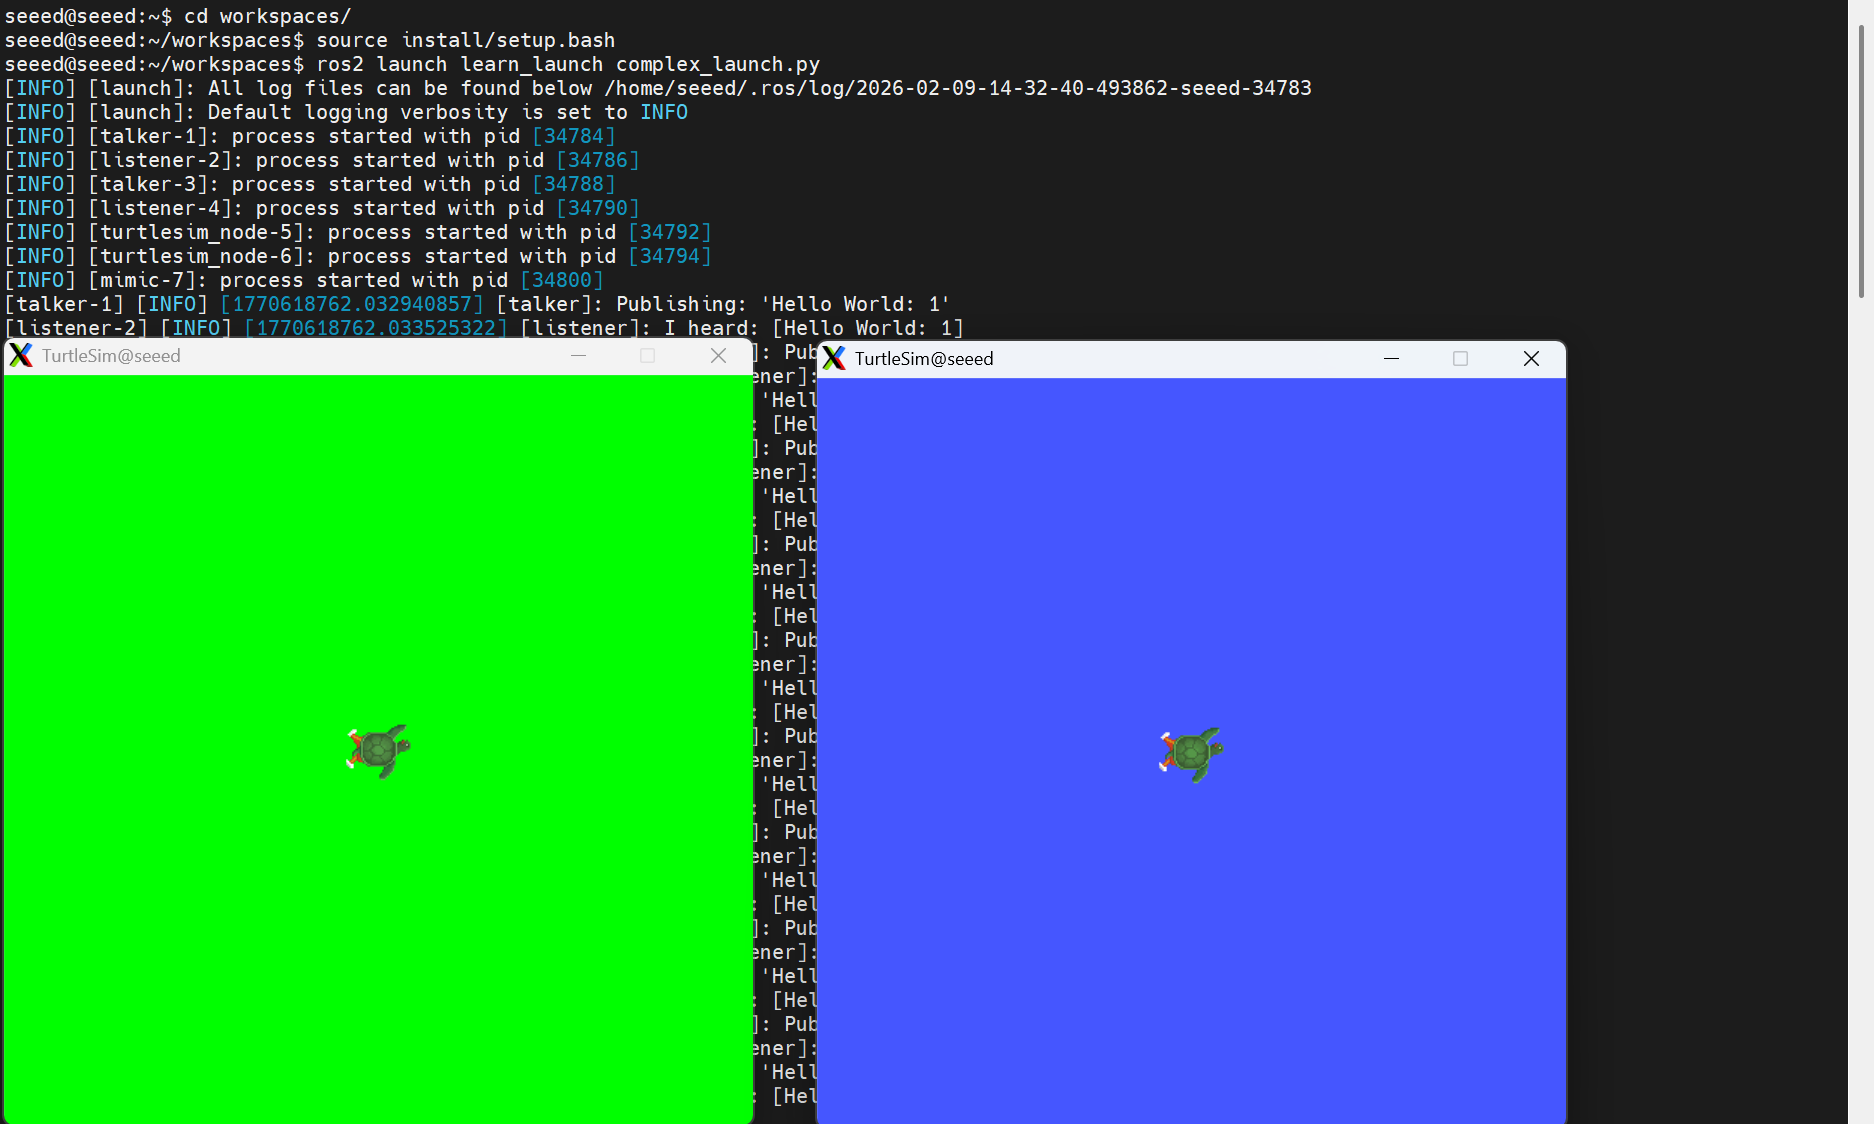
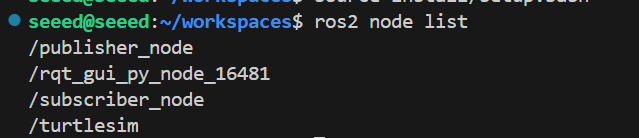
如果终端没有打印内容,您可以查看哪些节点已激活以验证启动是否成功。
ros2 node list20.3.4 源代码解析
它就像 single_node_launch.py,只是另一个节点!
20.4 话题重映射案例
20.4.1 新建 launch 文件
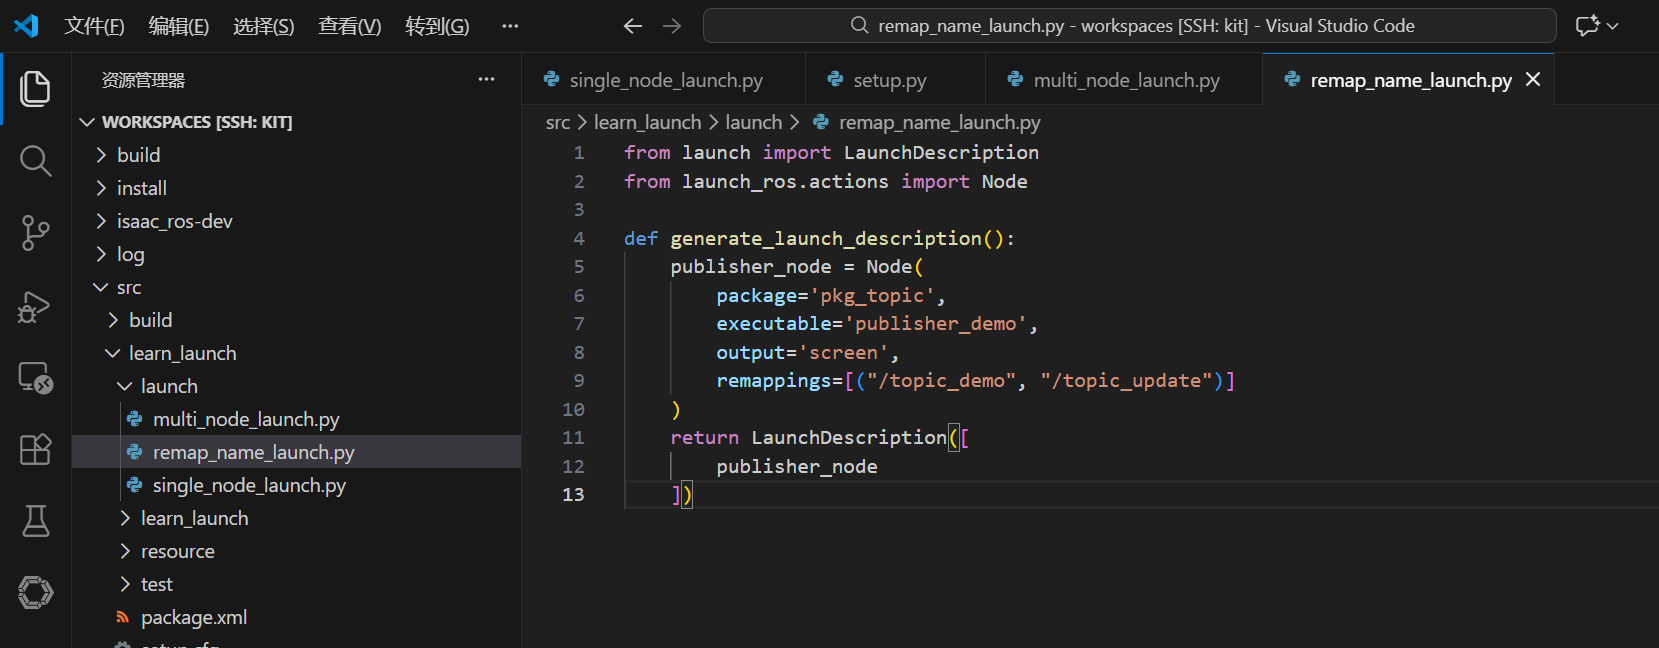
在 multi_node_launch.py 目录下创建一个新的 remap_name_launch.py 文件,添加以下内容:
from launch import LaunchDescription
from launch_ros.actions import Node

def generate_launch_description():
  publisher_node = Node(
  package='pkg_topic',
  executable='publisher_demo',
  output='screen',
  remappings=[("/topic_demo", "/topic_update")]
  )
  return LaunchDescription([
  publisher_node
  ])
20.4.2 编译功能包
colcon build --packages-select learn_launch20.4.3 操作步骤
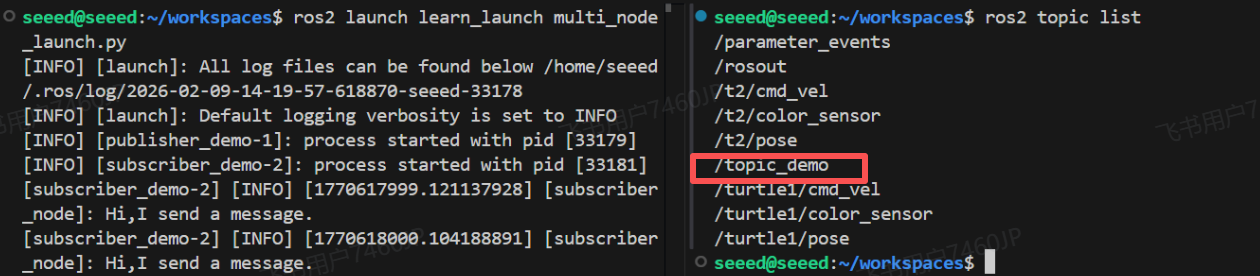
让我们看看在话题重映射之前 publisher_demo 节点说什么:
# ros2 launch learn_launch multi_node_launch.py
ros2 topic list
这是话题:/topic_demo。
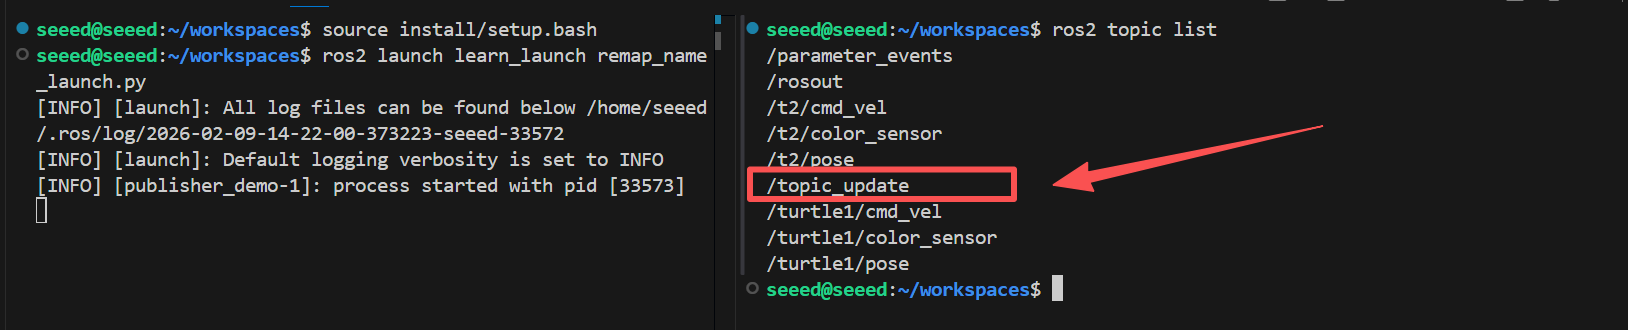
# Refresh the environment variables and run the remapped-topic program to observe the changes:
source install/setup.bash
ros2 launch learn_launch remap_name_launch.py
ros2 topic list
将话题名重映射为 /topic_update
20.4.4 源代码分析
特别是,以下部分已添加:
remappings=[("/topic_demo", "/topic_update")]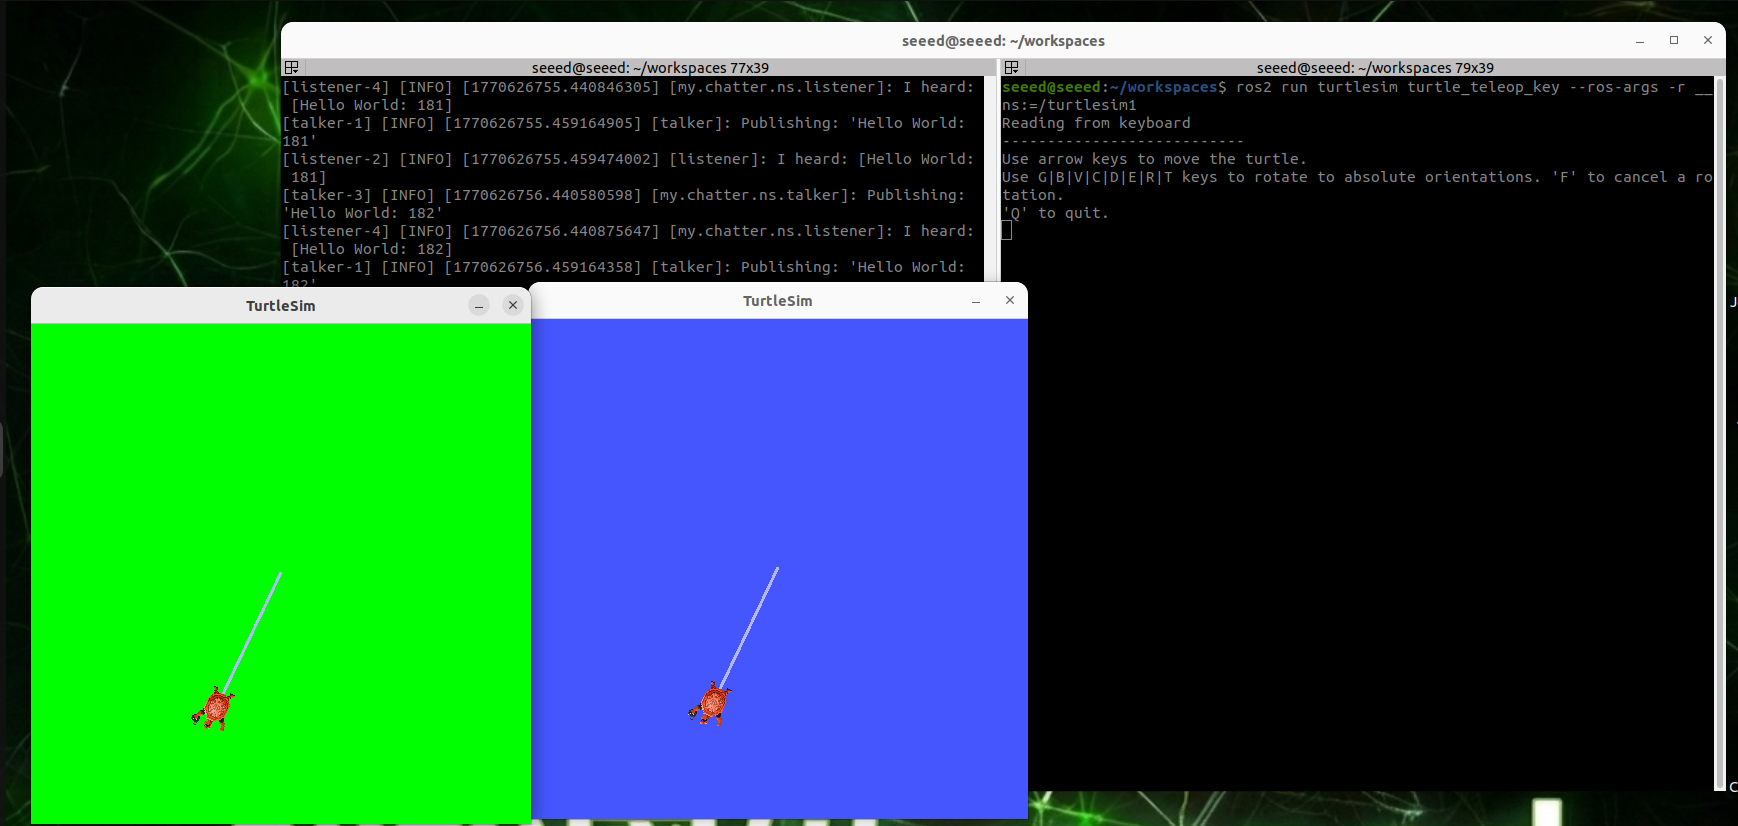
这是将原始 /topic_demo 话题重新映射到 /topic_update。
20.5 Launch 文件嵌入启动另一个 launch 文件
20.5.1 新建 launch 文件
在 multi_node_launch.py 目录下创建新的 include_launch.py,添加以下内容:
from launch import LaunchDescription
from launch_ros.actions import Node
import os
from launch.actions import IncludeLaunchDescription
from launch.launch_description_sources import PythonLaunchDescriptionSource
from ament_index_python.packages import get_package_share_directory

def generate_launch_description():
  hello_launch = IncludeLaunchDescription(PythonLaunchDescriptionSource(
  [os.path.join(get_package_share_directory('learn_launch'), 'launch'),
  '/multi_node_launch.py']),
  )
  return LaunchDescription([
  hello_launch
  ])
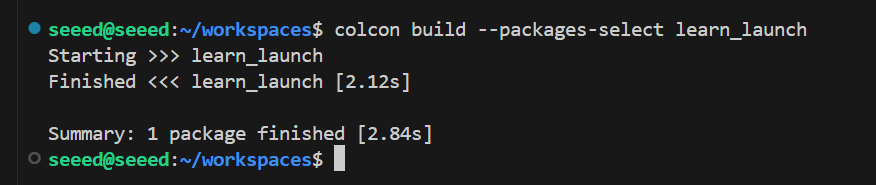
20.5.2 编译功能包
colcon build --packages-select learn_launch20.5.3 操作步骤

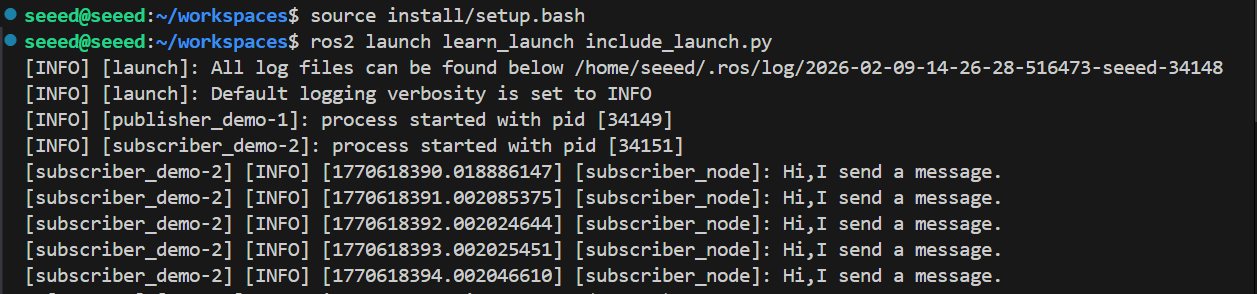
# Refresh environment variables
source install/setup.bash
ros2 launch learn_launch include_launch.py
20.5.4 源代码分析
嵌入 launch 文件需要使用 launch 系统的 IncludeLaunchDescription 和 PythonLaunchDescriptionSource 类别
os.path.join(get_package_share_directory('learn_launch')):获取功能包的位置,其中功能包名称为 learn_launch;
'launch':表示功能包下包含 launch 文件的文件夹;
'/multi_node_launch.py':表示 launch 文件夹下的 /multi_node_launch.py 文件。
20.6 复合 launch 文件示例
此演示主要展示如何编写复杂的 launch 文件,程序的功能可以忽略。
20.6.1 新建 launch 文件
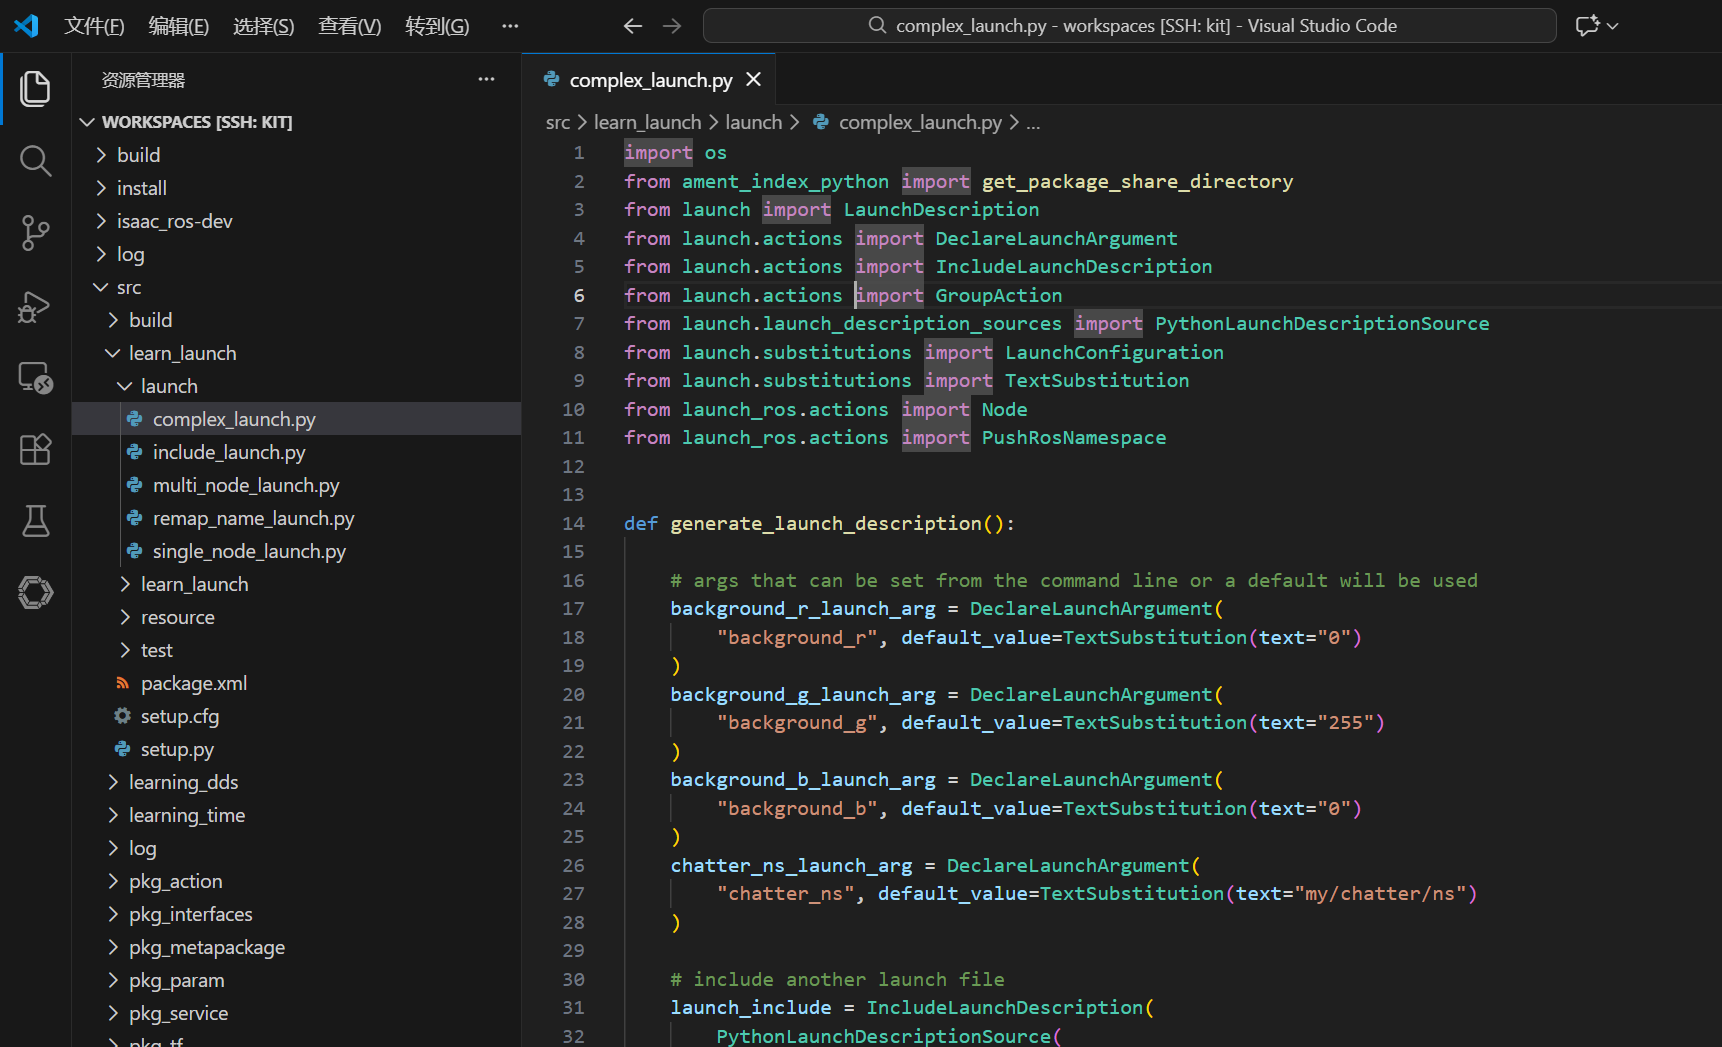
在 multi_node_launch.py 目录下创建一个新的 complex_launch.py 文件,添加以下内容:
# complex_launch.py
import os
from ament_index_python import get_package_share_directory
from launch import LaunchDescription
from launch.actions import DeclareLaunchArgument
from launch.actions import IncludeLaunchDescription
from launch.actions import GroupAction
from launch.launch_description_sources import PythonLaunchDescriptionSource
from launch.substitutions import LaunchConfiguration
from launch.substitutions import TextSubstitution
from launch_ros.actions import Node
from launch_ros.actions import PushRosNamespace


def generate_launch_description():

  # args that can be set from the command line or a default will be used
  background_r_launch_arg = DeclareLaunchArgument(
  "background_r", default_value=TextSubstitution(text="0")
  )
  background_g_launch_arg = DeclareLaunchArgument(
  "background_g", default_value=TextSubstitution(text="255")
  )
  background_b_launch_arg = DeclareLaunchArgument(
  "background_b", default_value=TextSubstitution(text="0")
  )
  chatter_ns_launch_arg = DeclareLaunchArgument(
  "chatter_ns", default_value=TextSubstitution(text="my/chatter/ns")
  )

  # include another launch file
  launch_include = IncludeLaunchDescription(
  PythonLaunchDescriptionSource(
  os.path.join(
  get_package_share_directory('demo_nodes_cpp'),
  'launch/topics/talker_listener.launch.py'))
  )
  # include another launch file in the chatter_ns namespace
  launch_include_with_namespace = GroupAction(
  actions=[
  # push-ros-namespace to set namespace of included nodes
  PushRosNamespace(LaunchConfiguration('chatter_ns')),
  IncludeLaunchDescription(
  PythonLaunchDescriptionSource(
  os.path.join(
  get_package_share_directory('demo_nodes_cpp'),
  'launch/topics/talker_listener.launch.py'))
  ),
  ]
  )

  # start a turtlesim_node in the turtlesim1 namespace
  turtlesim_node = Node(
  package='turtlesim',
  namespace='turtlesim1',
  executable='turtlesim_node',
  name='sim'
  )

  # start another turtlesim_node in the turtlesim2 namespace
  # and use args to set parameters
  turtlesim_node_with_parameters = Node(
  package='turtlesim',
  namespace='turtlesim2',
  executable='turtlesim_node',
  name='sim',
  parameters=[{
  "background_r": LaunchConfiguration('background_r'),
  "background_g": LaunchConfiguration('background_g'),
  "background_b": LaunchConfiguration('background_b'),
  }]
  )

  # perform remap so both turtles listen to the same command topic
  forward_turtlesim_commands_to_second_turtlesim_node = Node(
  package='turtlesim',
  executable='mimic',
  name='mimic',
  remappings=[
  ('/input/pose', '/turtlesim1/turtle1/pose'),
  ('/output/cmd_vel', '/turtlesim2/turtle1/cmd_vel'),
  ]
  )

  return LaunchDescription([
  background_r_launch_arg,
  background_g_launch_arg,
  background_b_launch_arg,
  chatter_ns_launch_arg,
  launch_include,
  launch_include_with_namespace,
  turtlesim_node,
  turtlesim_node_with_parameters,
  forward_turtlesim_commands_to_second_turtlesim_node,
  ])
20.6.2 编译工作空间
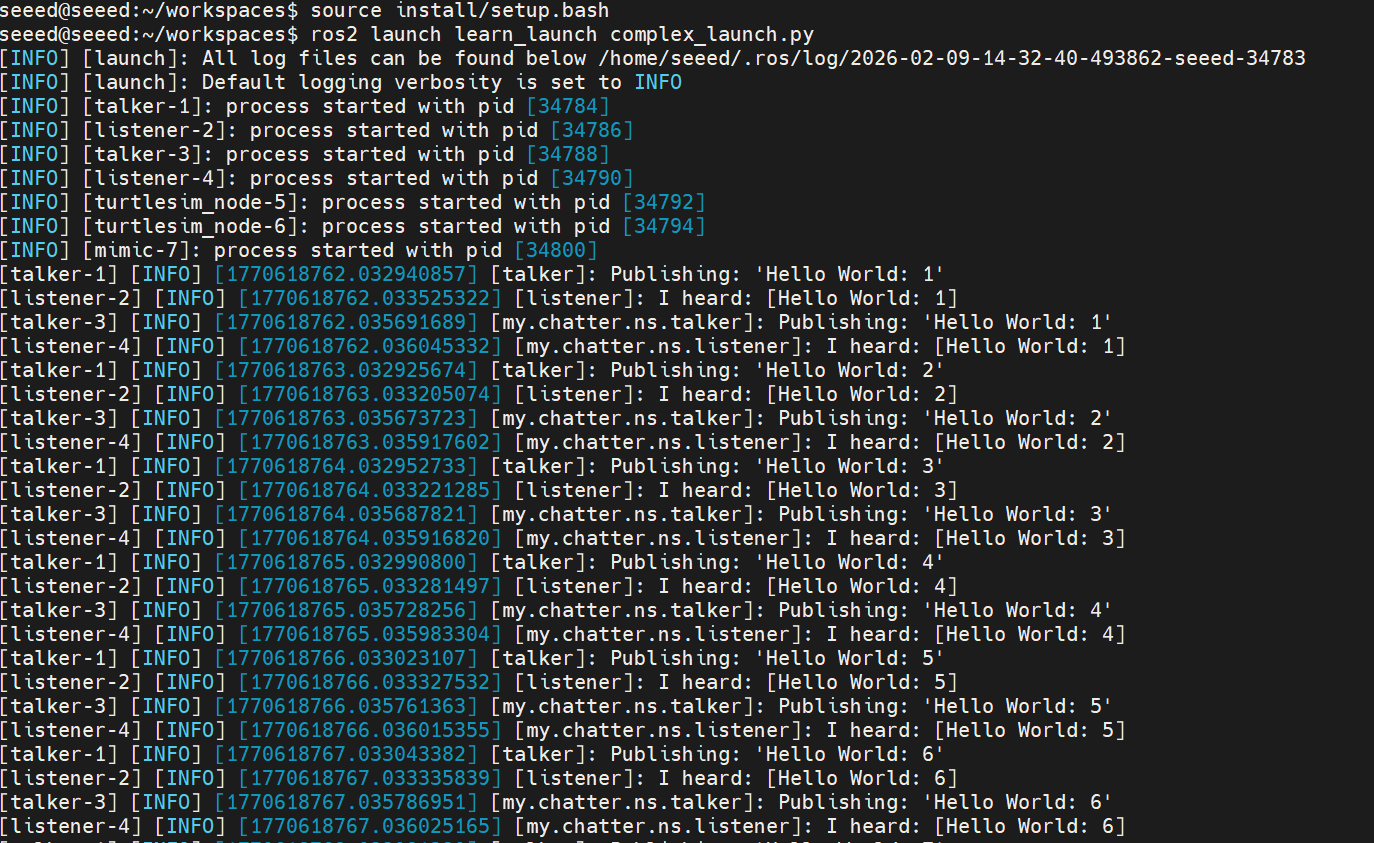
colcon build --packages-select learn_launch20.6.3 操作步骤
# source install/setup.bash
ros2 launch learn_launch complex_launch.py
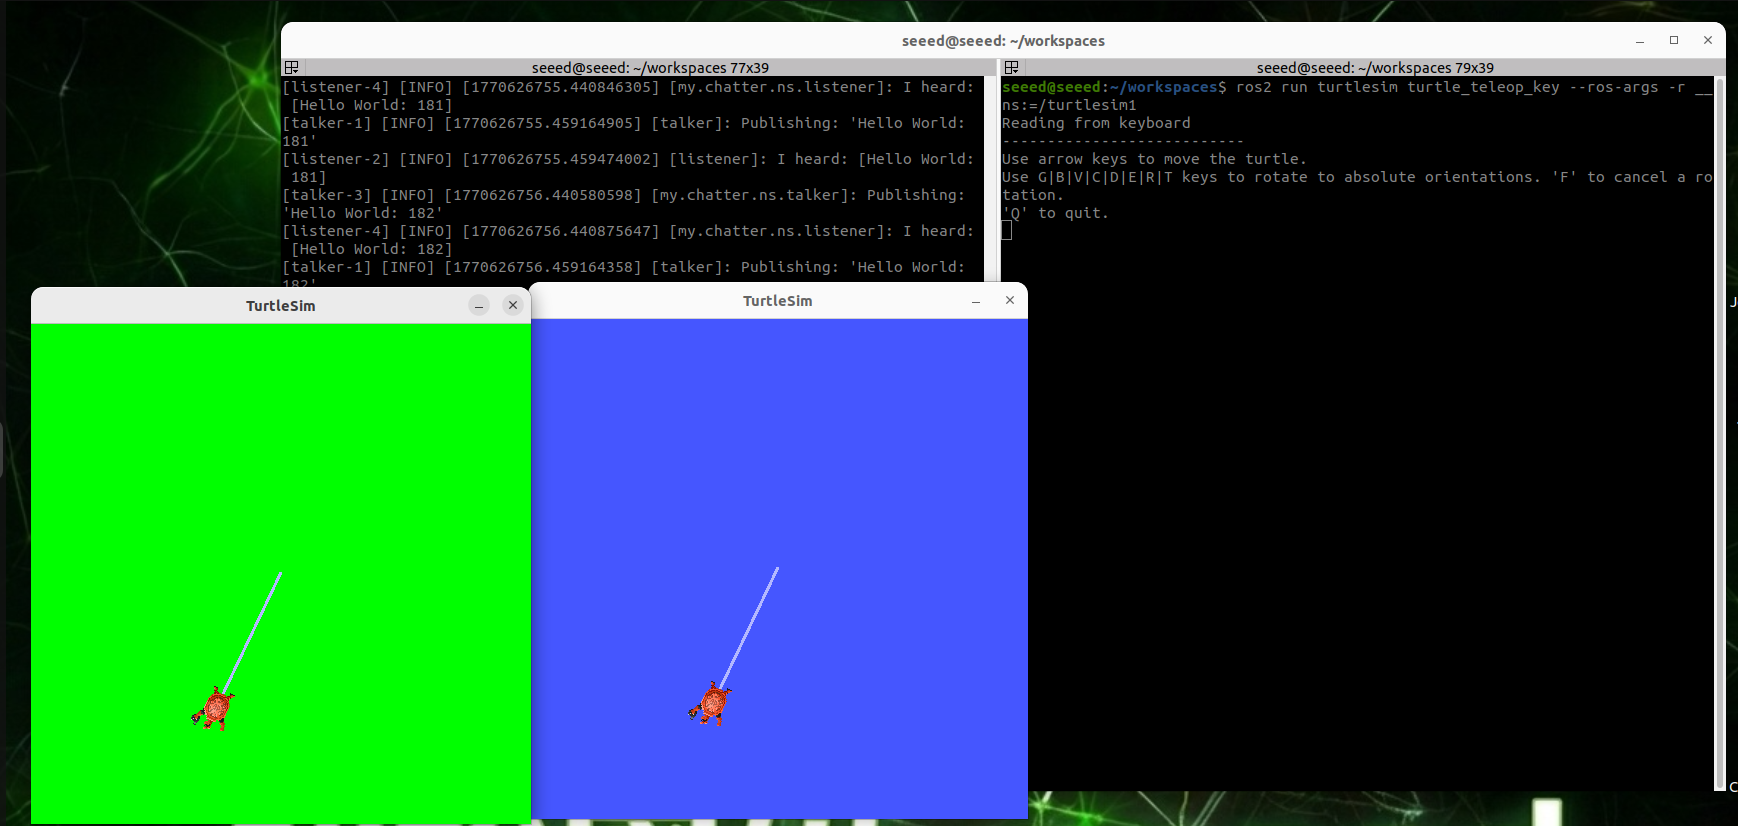
将在 Jetson 上显示两只小海龟。
启动键盘控制节点并添加命名空间(因为我们在 launch 文件中启动节点时添加了命名空间)
ros2 run turtlesim turtle_teleop_key --ros-args -r __ns:=/turtlesim1使用键盘上的左右键控制小海龟 1 移动。小海龟 2 是小海龟 1 的完美复制。
20.6.4 程序说明
该过程主要包括启动:
一,demo_nodes_cpp talker_listener,
- 带命名空间的 talker_listener 节点
三,turtlesim1 是命名空间中的小海龟。
- Turtlesim2 是 turtles2 的命名空间
五,重映射使两只小海龟都能听到相同的命令话题。
20.7 xml 实现
20.7.1 新建 launch 文件
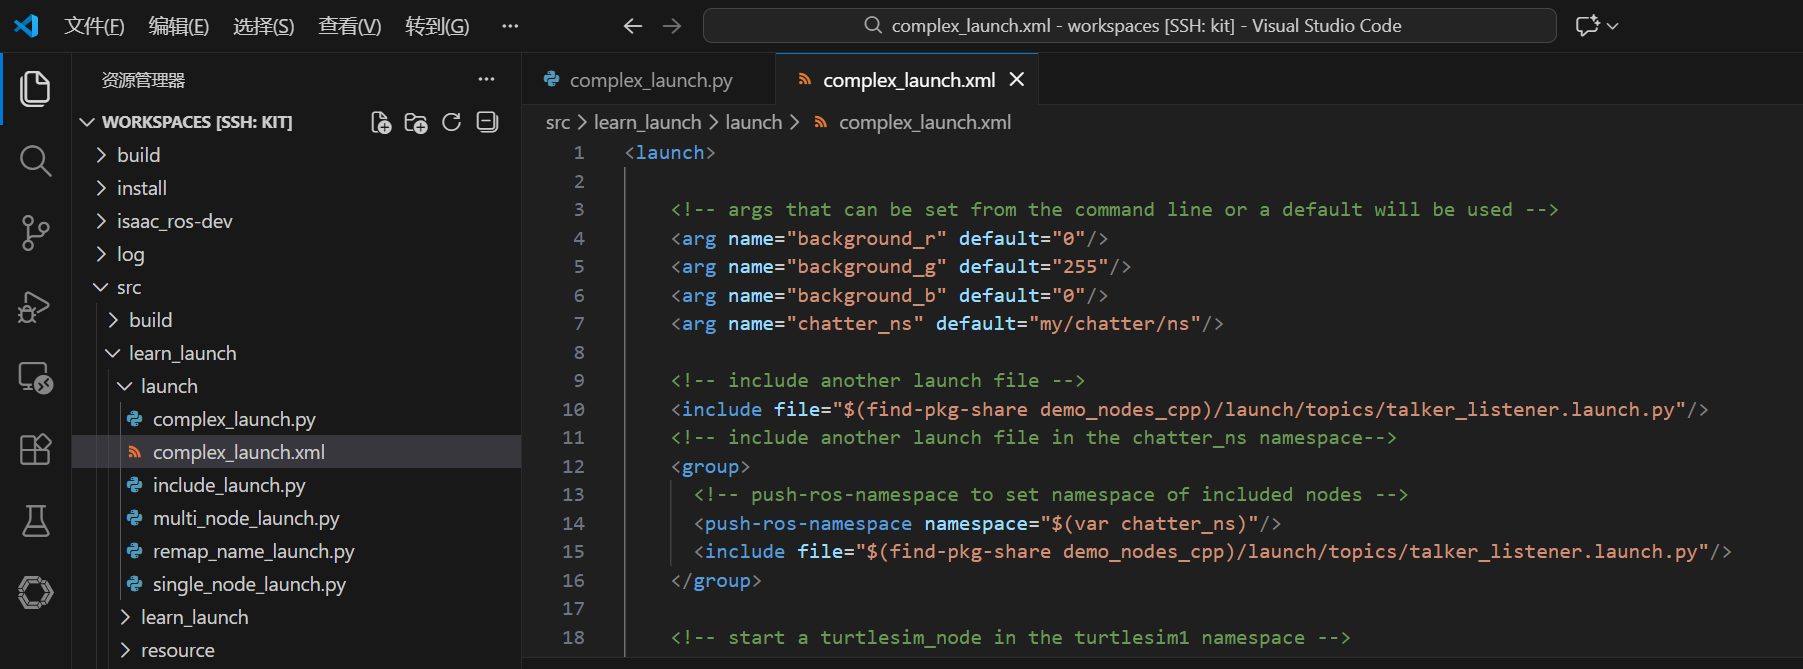
在 complex_launch.xml 目录下新建 Complex_Launch.py 文件,添加以下内容:
<launch>

  <!-- args that can be set from the command line or a default will be used -->
  <arg name="background_r" default="0"/>
  <arg name="background_g" default="255"/>
  <arg name="background_b" default="0"/>
  <arg name="chatter_ns" default="my/chatter/ns"/>

  <!-- include another launch file -->
  <include file="$(find-pkg-share demo_nodes_cpp)/launch/topics/talker_listener.launch.py"/>
  <!-- include another launch file in the chatter_ns namespace-->
  <group>
  <!-- push-ros-namespace to set namespace of included nodes -->
  <push-ros-namespace namespace="$(var chatter_ns)"/>
  <include file="$(find-pkg-share demo_nodes_cpp)/launch/topics/talker_listener.launch.py"/>
  </group>

  <!-- start a turtlesim_node in the turtlesim1 namespace -->
  <node pkg="turtlesim" exec="turtlesim_node" name="sim" namespace="turtlesim1"/>
  <!-- start another turtlesim_node in the turtlesim2 namespace
  and use args to set parameters -->
  <node pkg="turtlesim" exec="turtlesim_node" name="sim" namespace="turtlesim2">
  <param name="background_r" value="$(var background_r)"/>
  <param name="background_g" value="$(var background_g)"/>
  <param name="background_b" value="$(var background_b)"/>
  </node>
  <!-- perform remap so both turtles listen to the same command topic -->
  <node pkg="turtlesim" exec="mimic" name="mimic">
  <remap from="/input/pose" to="/turtlesim1/turtle1/pose"/>
  <remap from="/output/cmd_vel" to="/turtlesim2/turtle1/cmd_vel"/>
  </node>
</launch>
20.7.2 setup.py 文件配置
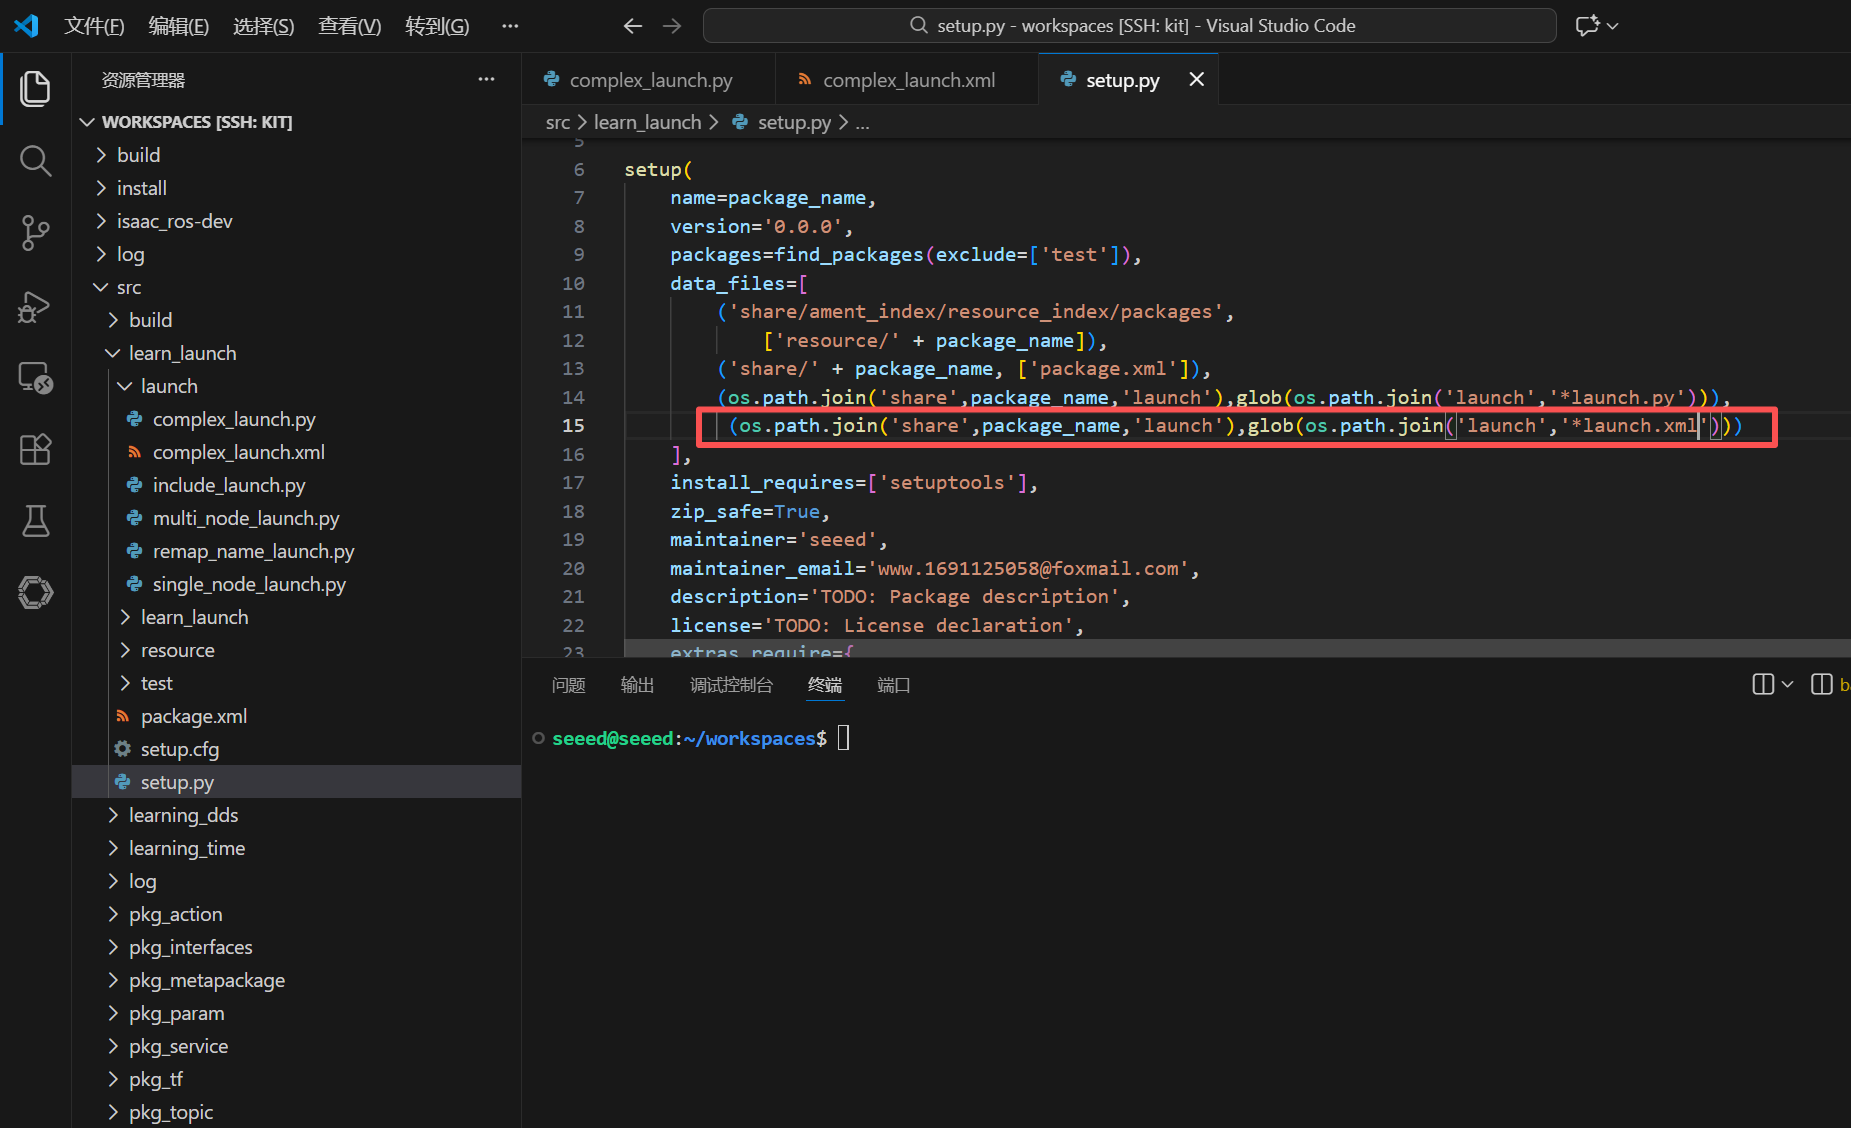
系统需要配置编译文件并将我们的 .xml launch 文件复制到 install 安装目录以查找我们的文件
(os.path.join('share',package_name,'launch'),glob(os.path.join('launch','*launch.xml'))),20.7.3 编译功能包
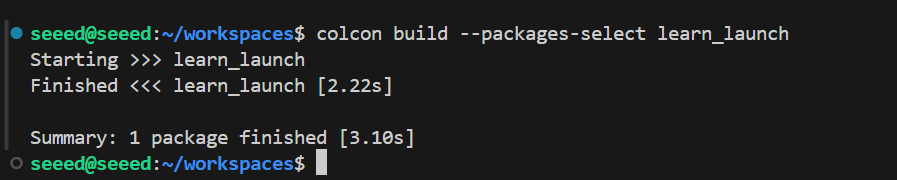
cd ~/workspaces
colcon build --packages-select learn_launch
20.7.4 操作步骤
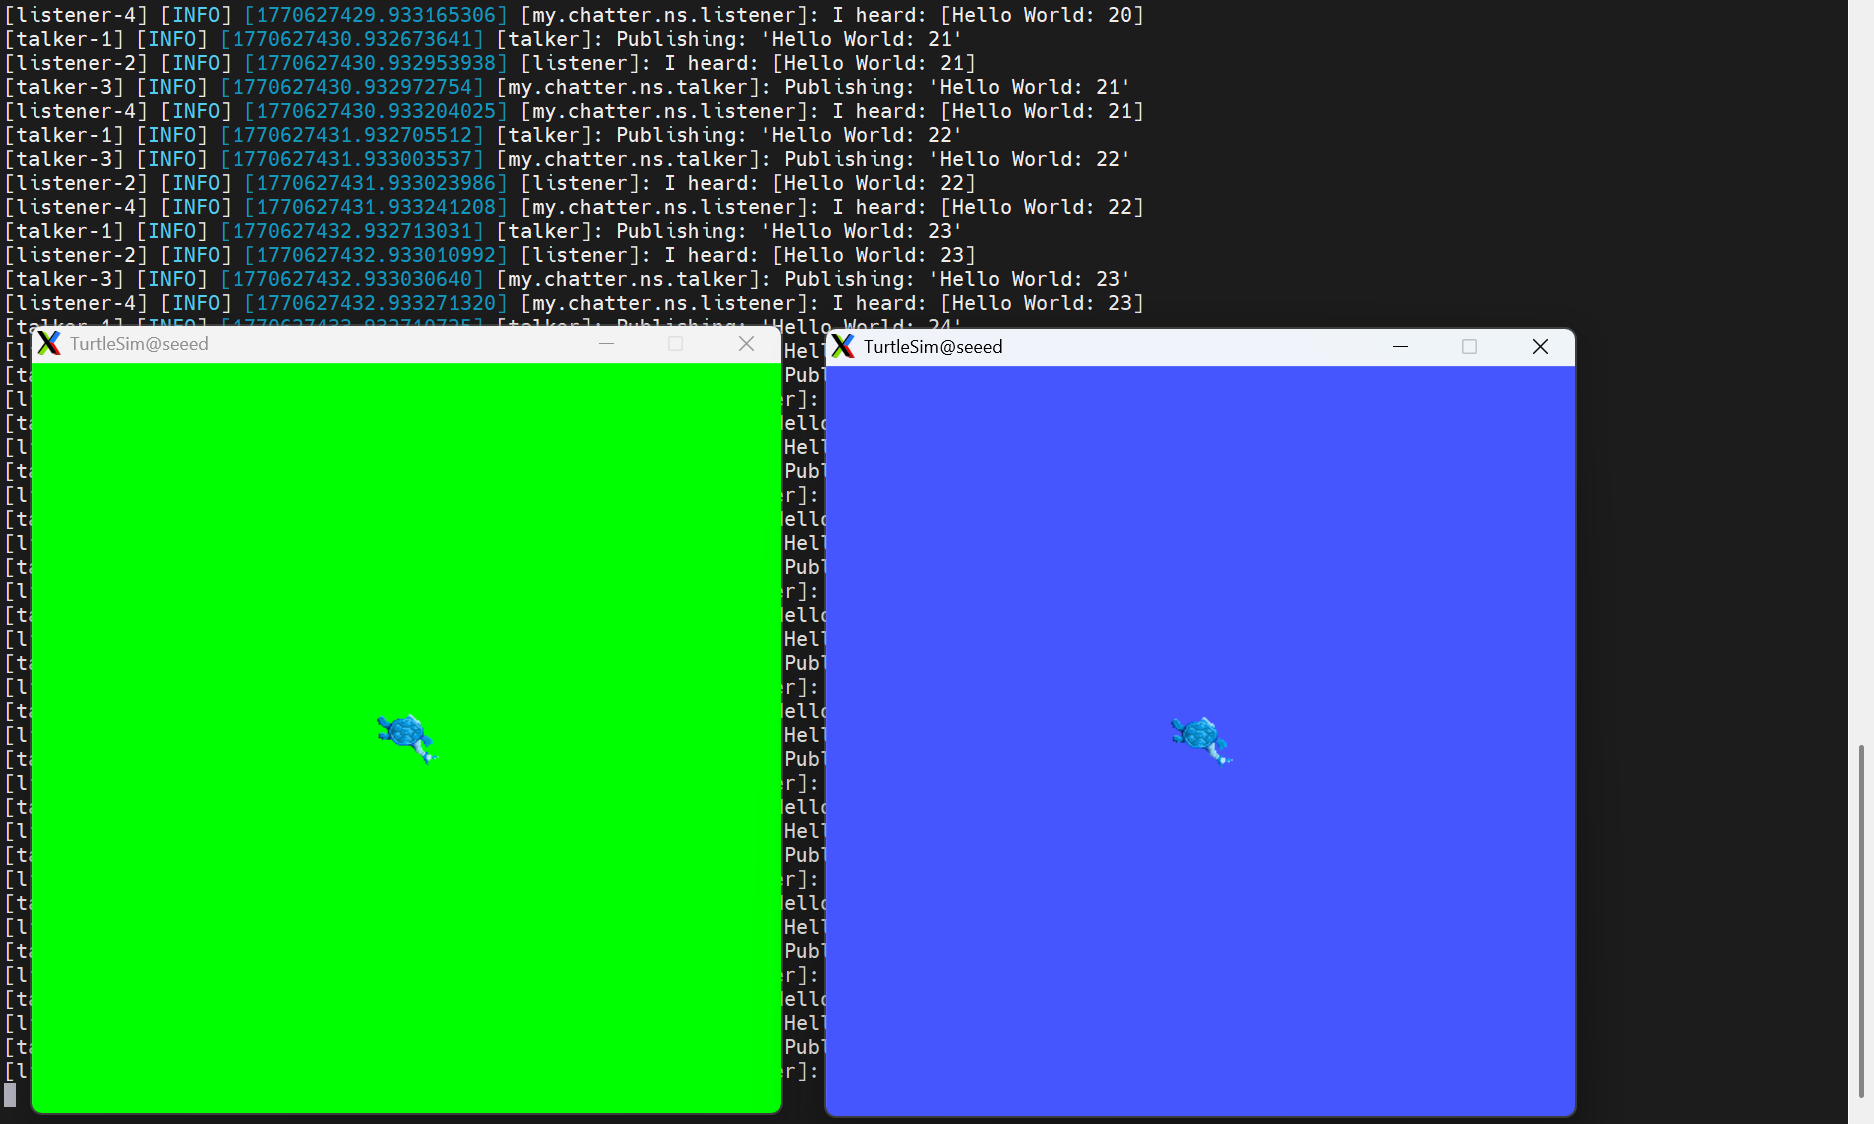
# ros2 launch learn_launch complex_launch.xml预期会有两只小海龟,并且终端会打印日志信息。
启动键盘控制节点并添加命名空间
ros2 run turtlesim turtle_teleop_key --ros-args -r __ns:=/turtlesim120.8 Yaml 实现
20.8.1 新建 launch 文件
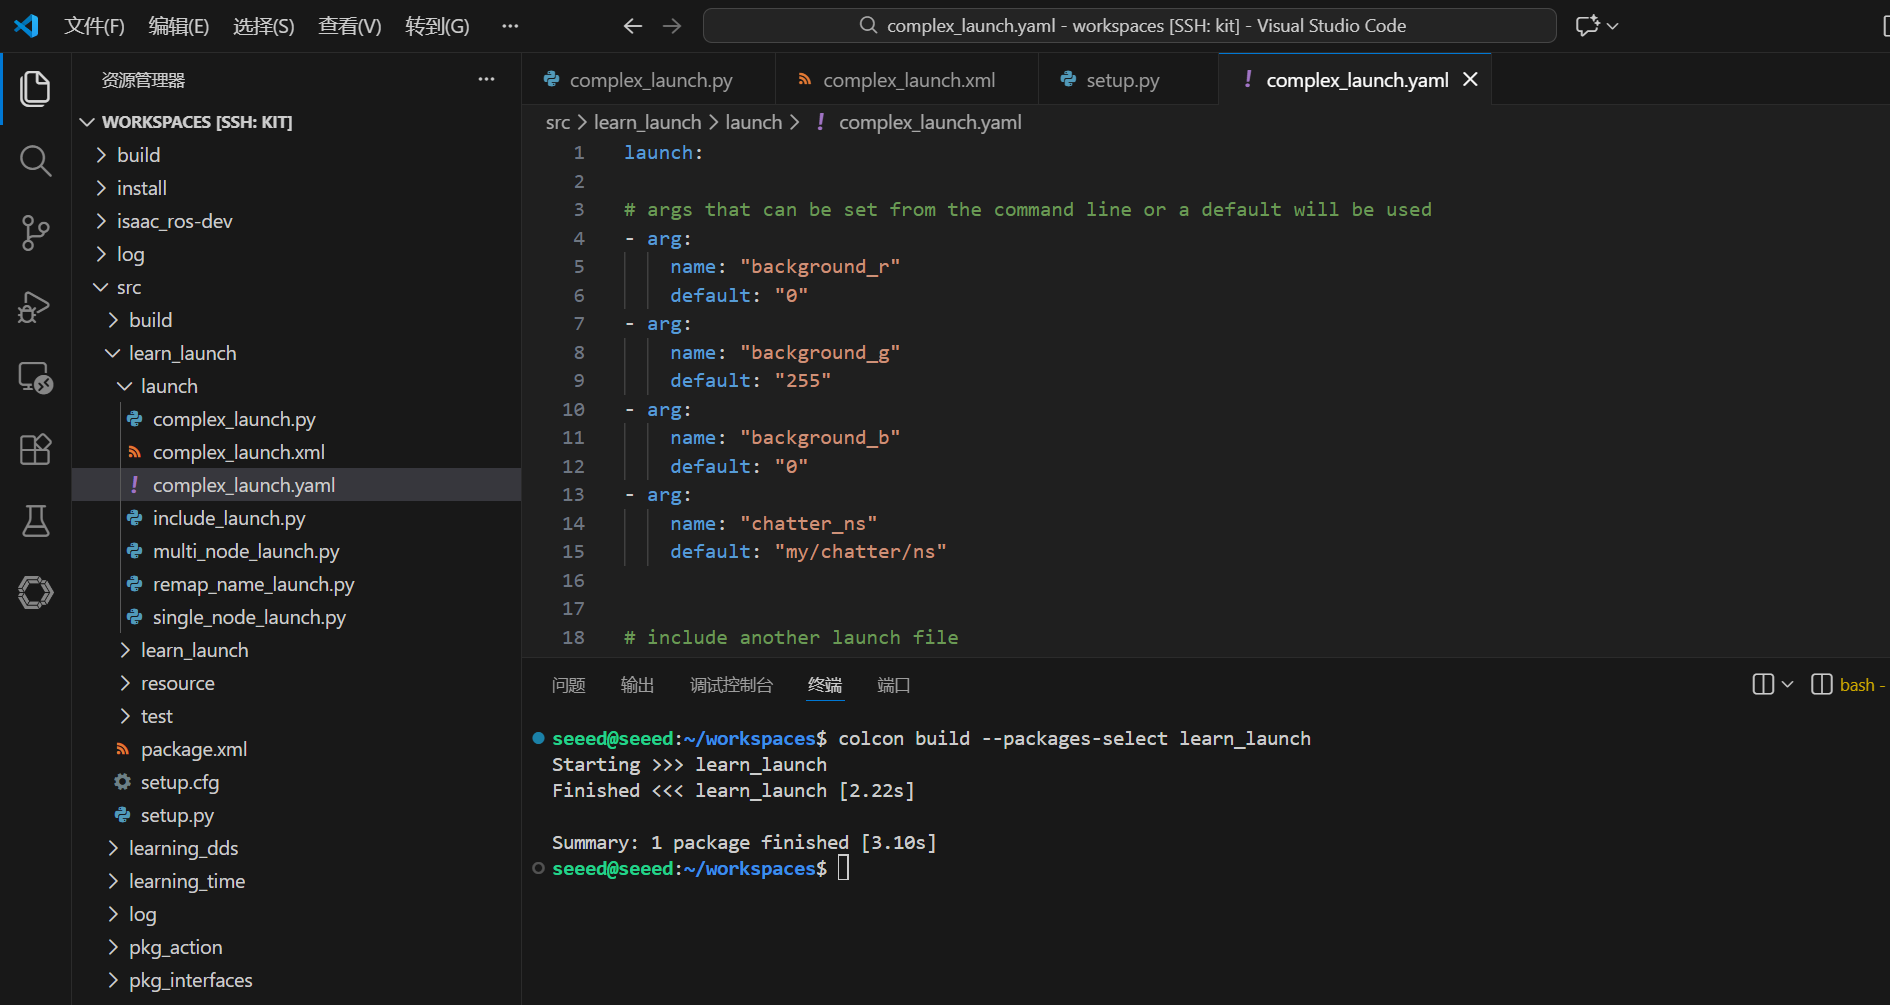
在 complex_launch.py 目录下新建 Complex_Launch.yaml 文件,添加以下内容:
launch:

# args that can be set from the command line or a default will be used
- arg:
  name: "background_r"
  default: "0"
- arg:
  name: "background_g"
  default: "255"
- arg:
  name: "background_b"
  default: "0"
- arg:
  name: "chatter_ns"
  default: "my/chatter/ns"


# include another launch file
- include:
  file: "$(find-pkg-share demo_nodes_cpp)/launch/topics/talker_listener.launch.py"

# include another launch file in the chatter_ns namespace
- group:
  - push-ros-namespace:
  namespace: "$(var chatter_ns)"
  - include:
  file: "$(find-pkg-share demo_nodes_cpp)/launch/topics/talker_listener.launch.py"

# start a turtlesim_node in the turtlesim1 namespace
- node:
  pkg: "turtlesim"
  exec: "turtlesim_node"
  name: "sim"
  namespace: "turtlesim1"

# start another turtlesim_node in the turtlesim2 namespace and use args to set parameters
- node:
  pkg: "turtlesim"
  exec: "turtlesim_node"
  name: "sim"
  namespace: "turtlesim2"
  param:
  -
  name: "background_r"
  value: "$(var background_r)"
  -
  name: "background_g"
  value: "$(var background_g)"
  -
  name: "background_b"
  value: "$(var background_b)"

# perform remap so both turtles listen to the same command topic
- node:
  pkg: "turtlesim"
  exec: "mimic"
  name: "mimic"
  remap:
  -
  from: "/input/pose"
  to: "/turtlesim1/turtle1/pose"
  -
  from: "/output/cmd_vel"
  to: "/turtlesim2/turtle1/cmd_vel"
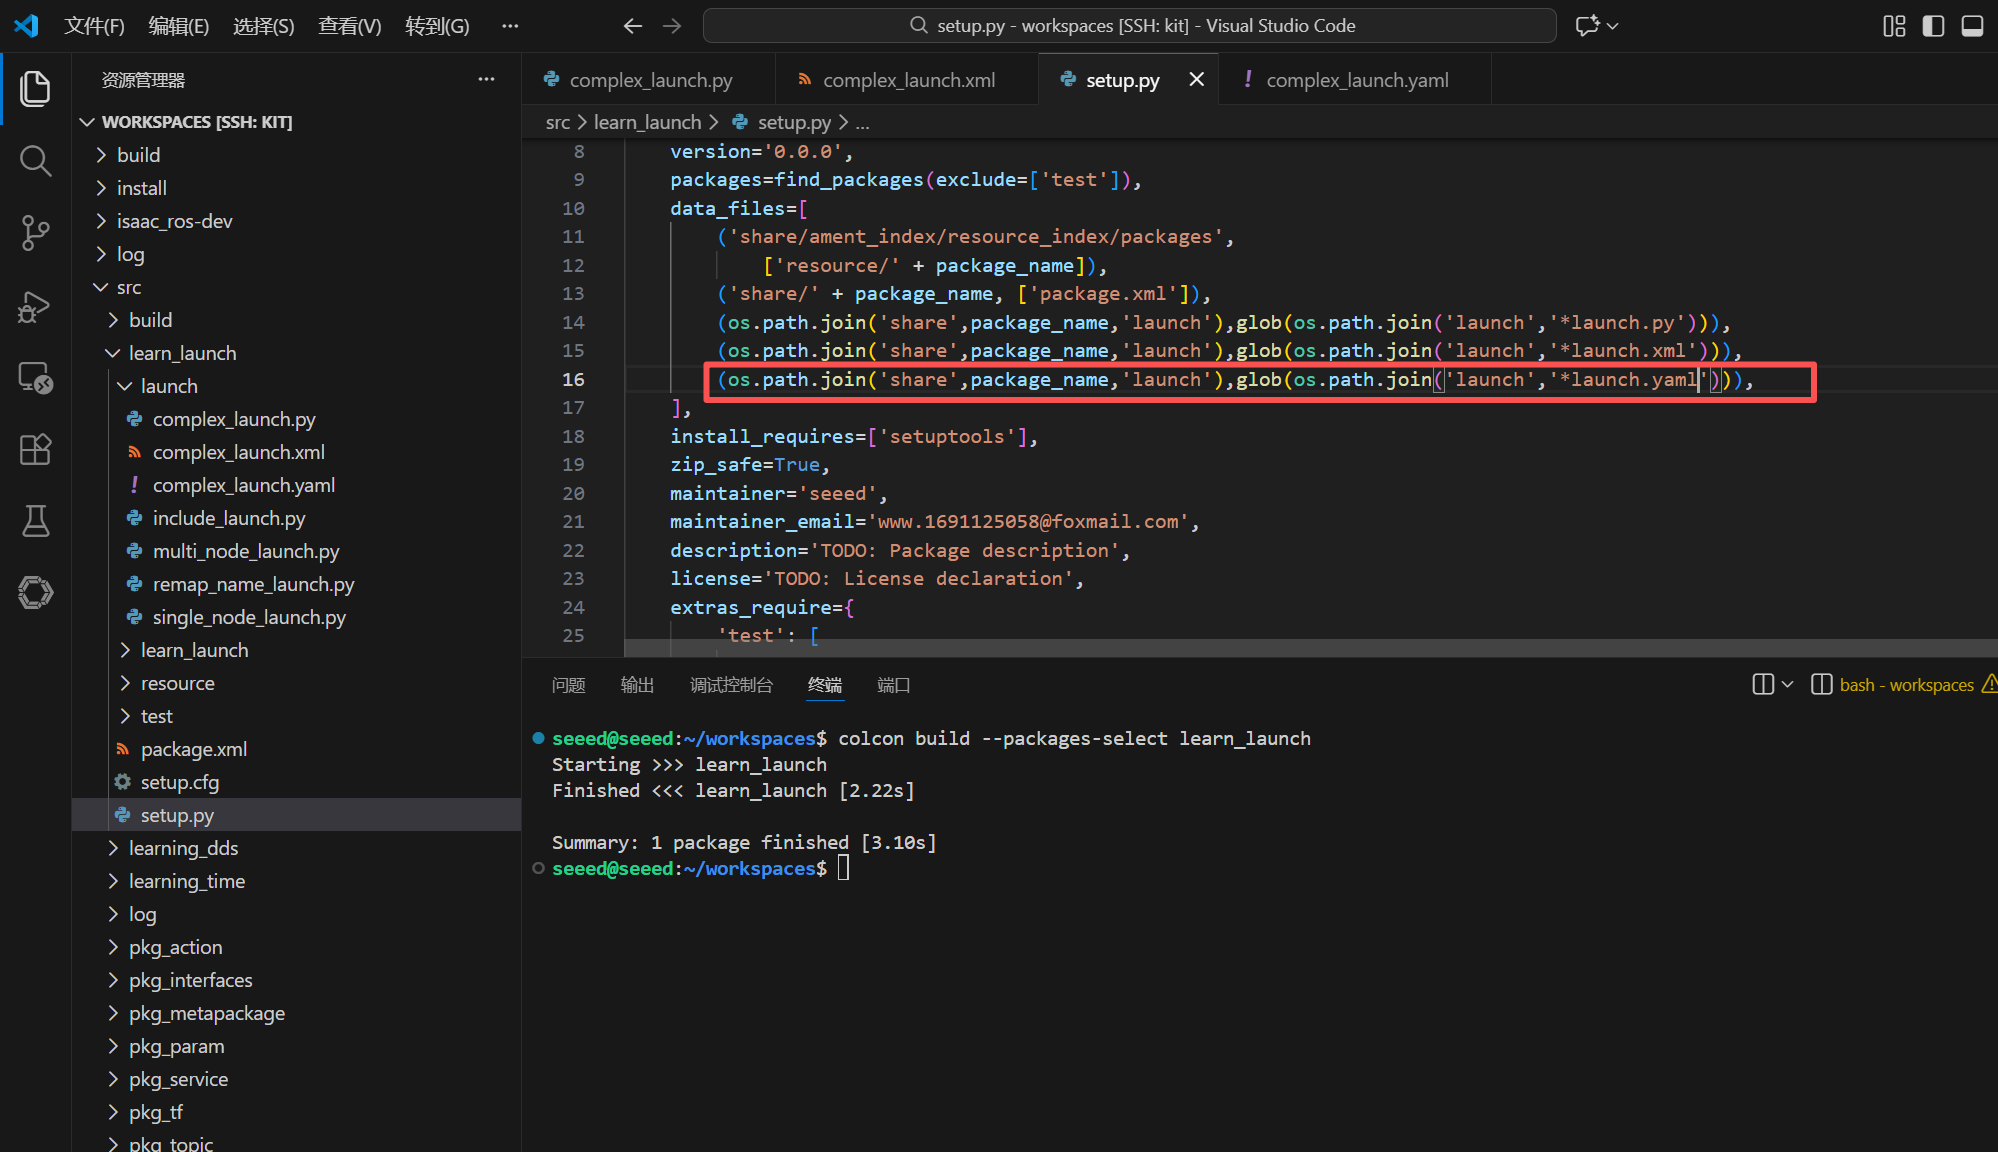
20.8.2 配置
您需要配置编译文件,将我们的 .yaml 格式的 launch 文件复制到 Install 安装目录,然后 ros 系统才能找到我们的文件
(os.path.join('share',package_name,'launch'),glob(os.path.join('launch','*launch.yaml'))),20.8.3 编译功能包
colcon build --packages-select learn_launch20.8.4 操作步骤
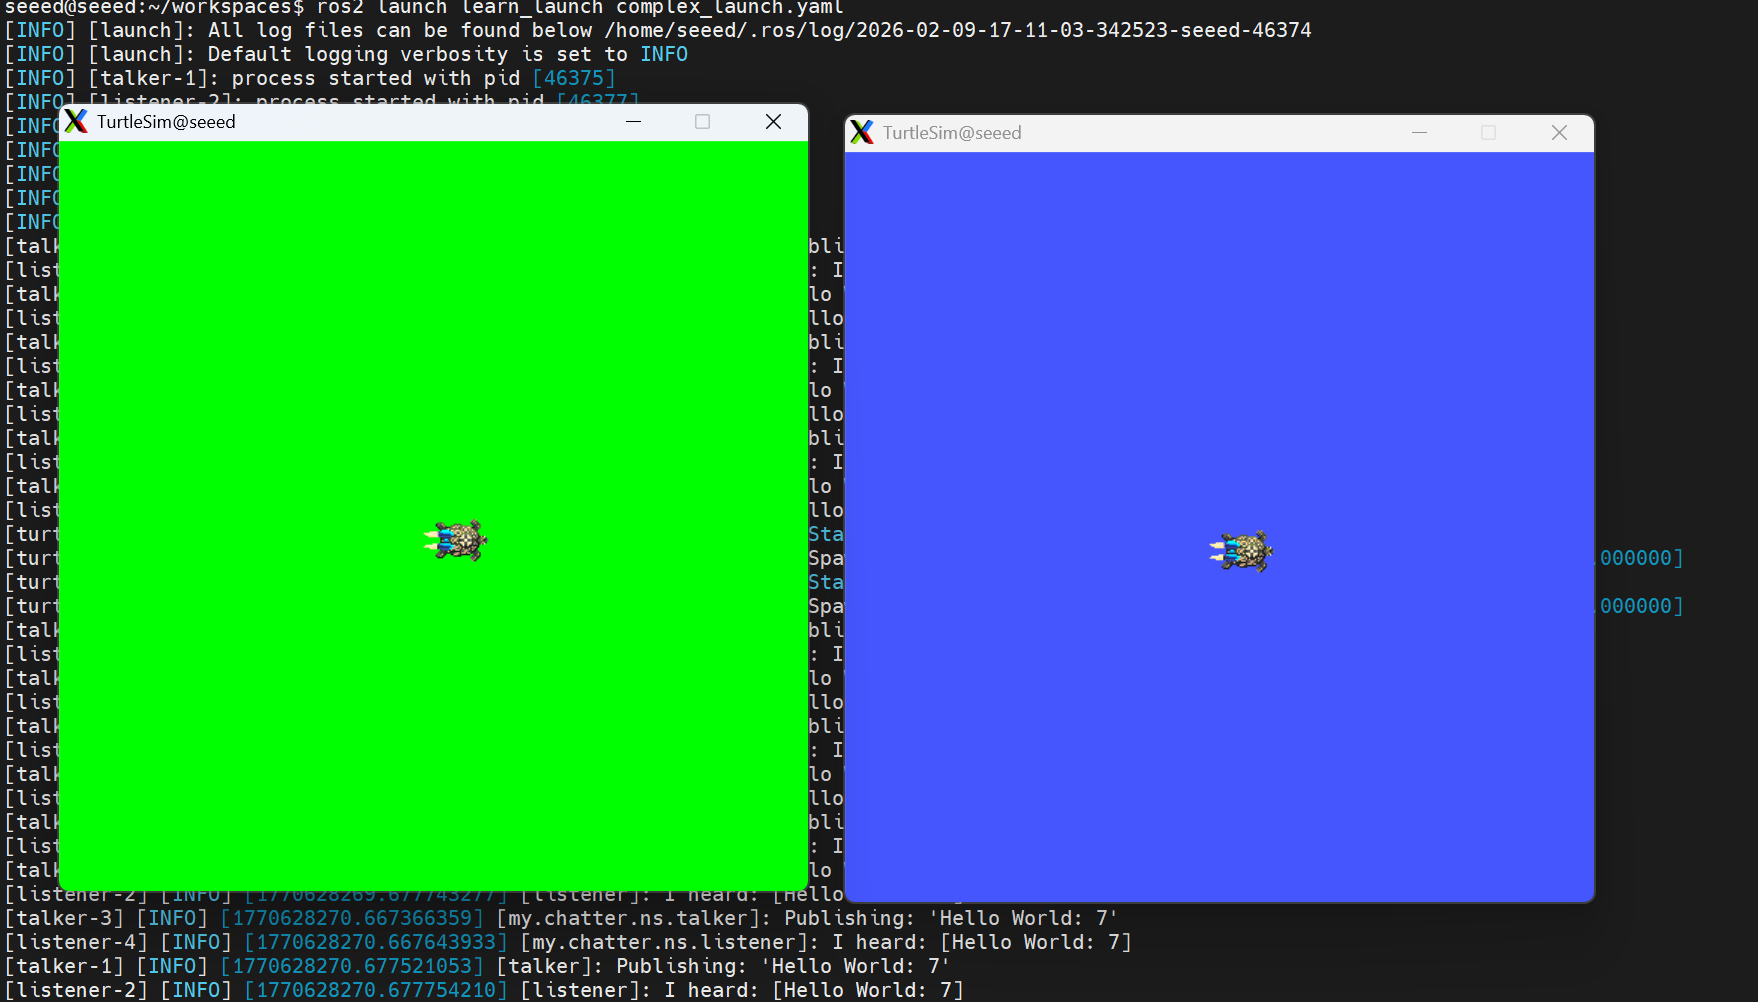
# Refresh environment variables
source install/setup.bash
ros2 launch learn_launch complex_launch.yaml
启动键盘控制节点并添加命名空间
ros2 run turtlesim turtle_teleop_key --ros-args -r __ns:=/turtlesim1使用键盘控制激活小海龟 1,小海龟 2 是小海龟 1 的完美模仿。
20.9 后续步骤
1.21 录制与回放 - 学习数据包记录
- 22 URDF 模型 - 学习机器人建模