ROS2 核心通信
最近更新:
06 节点
06 节点(Nodes)
6.1 节点摘要
6.1.1 什么是节点
节点是 ROS 2 中最基本的计算单元。一个节点是使用 ROS 2 API 与其他节点通信的进程。每个节点通常负责特定功能,如读取传感器数据、处理数据、控制执行器等。
Plain Text ROS 2 节点结构:
ROS 2 系统
Sensor / Processor / Executor 读取数据,数据,分析,控制,执行,数据 决策
6.1.2 节点的特性
| 特性 | 注释 |
|---|---|
| 轻量级 | 一个可执行文件可以包含多个节点 |
| 分布式 | 节点可以在不同的机器上运行。 |
| 解耦 | 节点之间通过接口进行通信,而不是直接依赖 |
| 可分组 | 多个节点执行复杂功能 |
| 独立生命周期 | 独立启动和关闭每个节点 |
6.1.3 节点命名规则
节点名称必须是唯一的(在同一命名空间中)
只能包含字母、数字和下划线
区分大小写
建议使用描述性名称
名称示例:
| 节点名称 | 评价 |
|---|---|
| Camera_driver | 优秀。 |
| path_planner | 优秀。 |
| Node1 | 不推荐(无描述性) |
| Oh, my-node. | 无效(带有连字符) |
6.2 Hello World 节点案例

6.2.1 创建 python 包
workspace 替换为实际工作空间路径
cd workspace/src
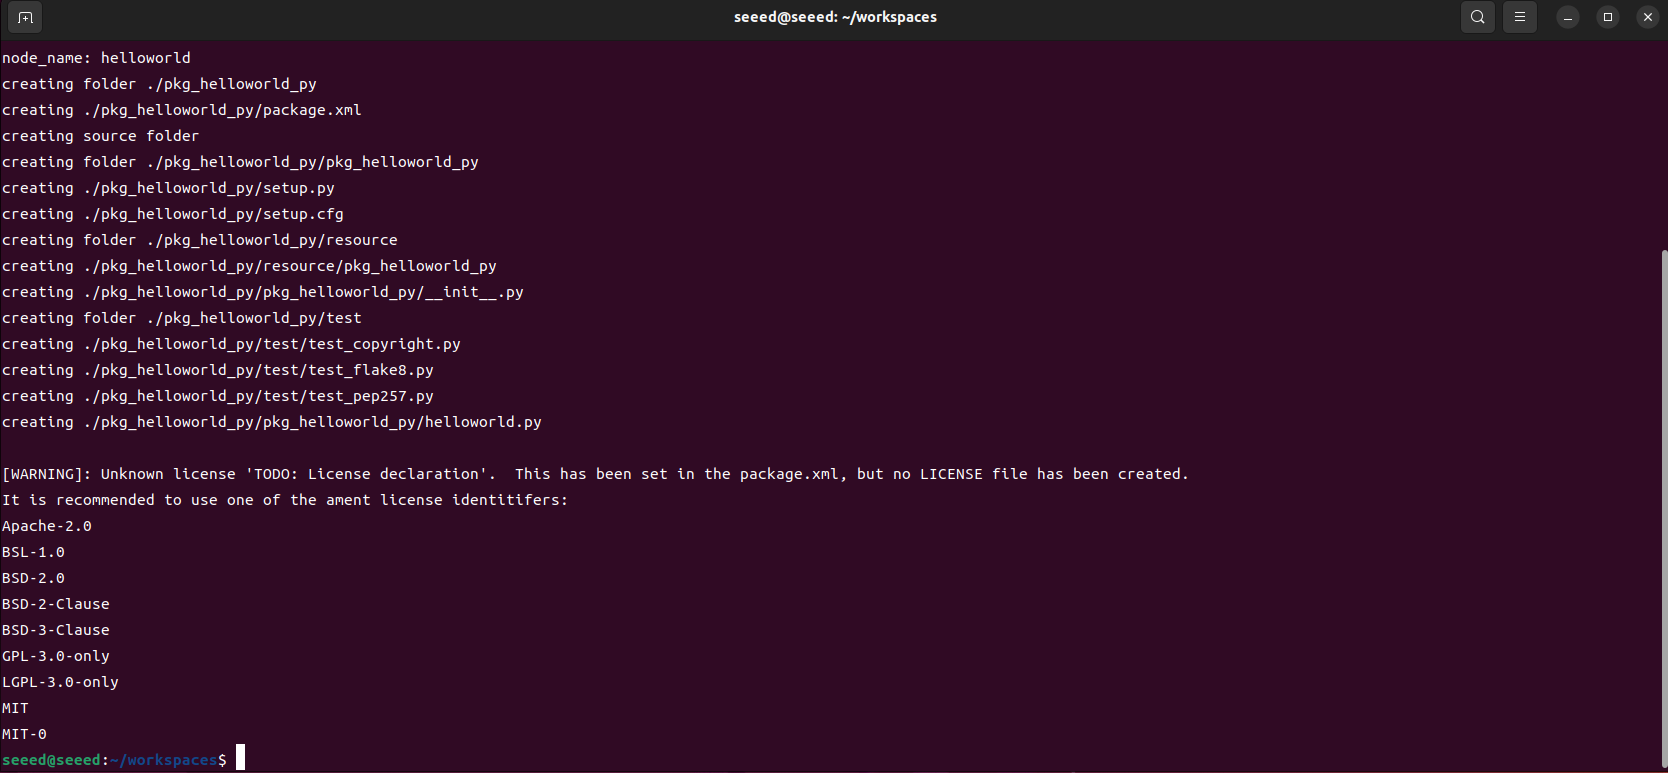
ros2 pkg create pkg_helloworld_py --build-type ament_python --dependencies rclpy --node-name helloworld
6.2.2 代码准备
上述命令将创建 pkg_helloworld_py,并创建 helloworld.py 文件来编写节点:
删除原始的 helloworld.py 代码并编写以下代码:
import rclpy  # ROS 2 Python client library
from rclpy.node import Node  # ROS 2 node class
import time

"""
Create a HelloWorld node. It prints the "hello world" log during initialization.
"""
class HelloWorldNode(Node):
  def __init__(self, name):
  super().__init__(name)  # initialize the ROS 2 node base class
  while rclpy.ok():  # Check whether ROS 2 is running normally
  self.get_logger().info("Hello World")  # ROS 2 log output
  time.sleep(0.5)  # Sleep to control the loop interval

def main(args=None):  # main entry function of the ROS 2 node
  rclpy.init(args=args)  # initialize the ROS 2 Python interface
  node = HelloWorldNode("helloworld")  # create and initialize the ROS 2 node object
  rclpy.spin(node)  # keep spinning until ROS 2 exits
  node.destroy_node()  # destroy the node object
  rclpy.shutdown()  # Shut down the ROS 2 Python client library
返回任务目录节点
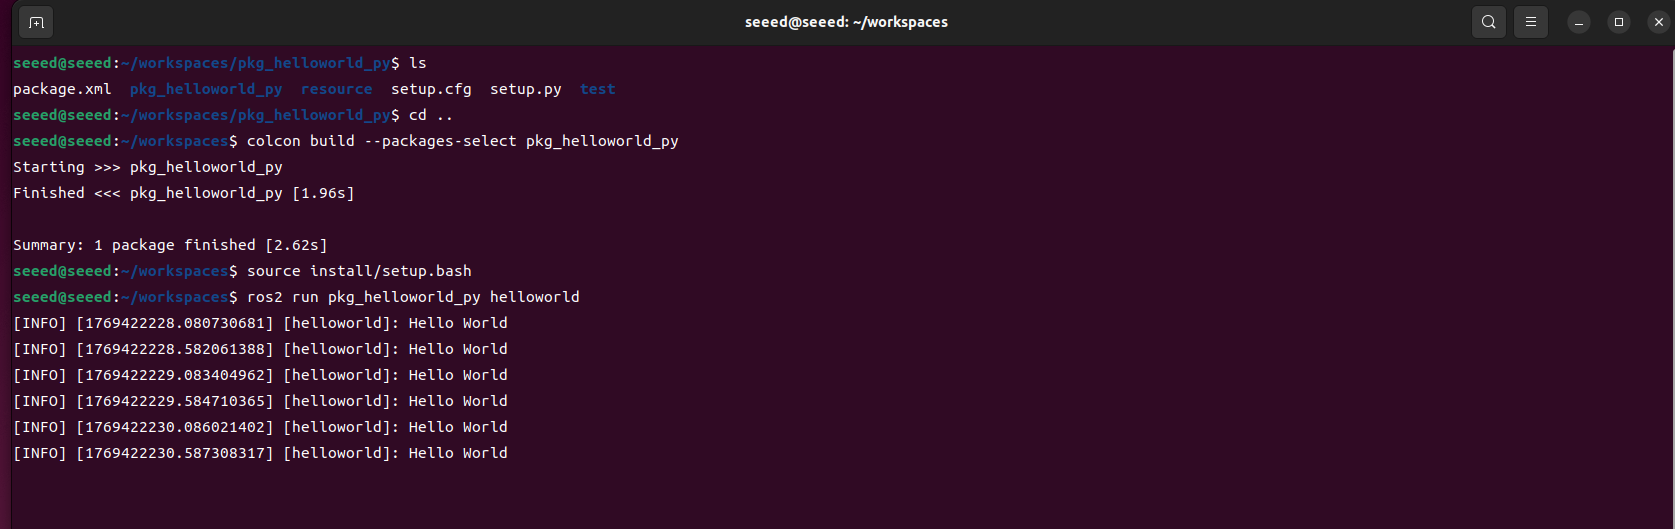
colcon build --packages-select pkg_helloworld_py
# Refresh the environment variables in the workspace
source install/setup.bash
运行节点
ros2 run pkg_helloworld_py helloworld6.3 后续步骤
学习后,您可以:
1.07 话题通信 - 深入学习话题通信
2.08 服务通信 - 学习服务通信
07 话题通信
07 话题通信(Topics)
7.1 话题通信摘要
7.1.1 什么是话题通信?
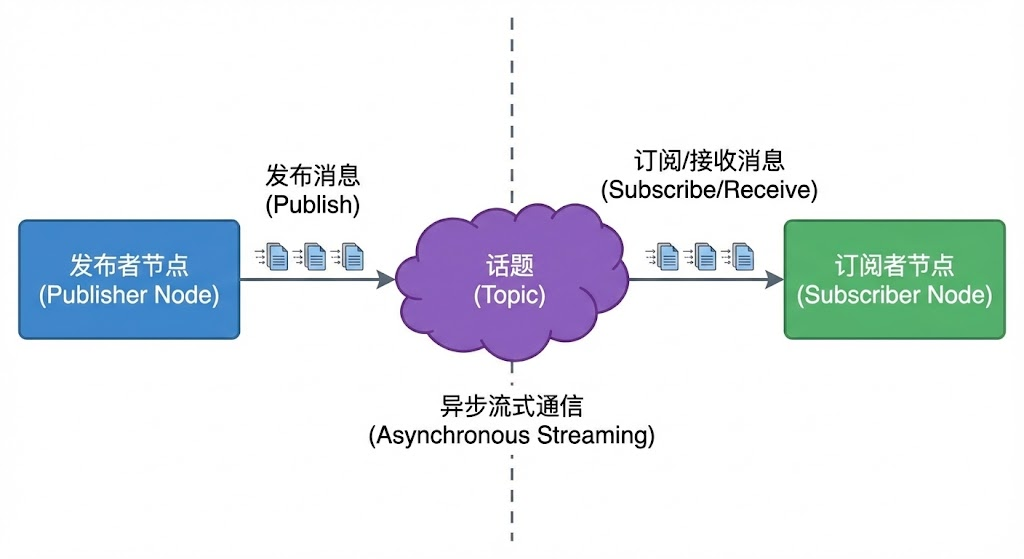
话题(Topic)是 ROS 2 节点之间异步通信的机制,使用发布/订阅(Pub/Sub)模式。发布者节点向话题发布消息,订阅者节点从话题接收消息,双方都不需要了解对方。
7.1.2 话题通信特性
| 特性 | 描述 | 应用场景 |
|---|---|---|
| 异步通信 | 发送方不等待订阅者响应 | 传感器数据流 |
| 多对多 | 多个发布者和订阅者 | 数据广播 |
| 弱耦合 | 解耦 | 模块化设计 |
| 流传输 | 持续数据流 | 持续监控 |
7.1.3 话题命名规则
| 规则 | 注释 |
|---|---|
| 必须以(全局命名空间)开头或相对名称 | |
| 使用小写字母、数字和下划线 | |
| 使用 / 分隔命名空间级别 | |
| 避免保留名称 |
名称示例:
| 话题名称 | 评价 |
|---|---|
| /cmd_vel | 标准,推荐 |
| /camera/image_raw | 层级清晰。推荐。 |
| /sensor/front_camera/image | 命名空间,推荐。 |
| /MyTopic | 不推荐(大写) |
| add_vel | 相对名称(添加节点命名空间) |
7.2 通信案例
7.2.1 新建功能包
cd ~/workspaces/src
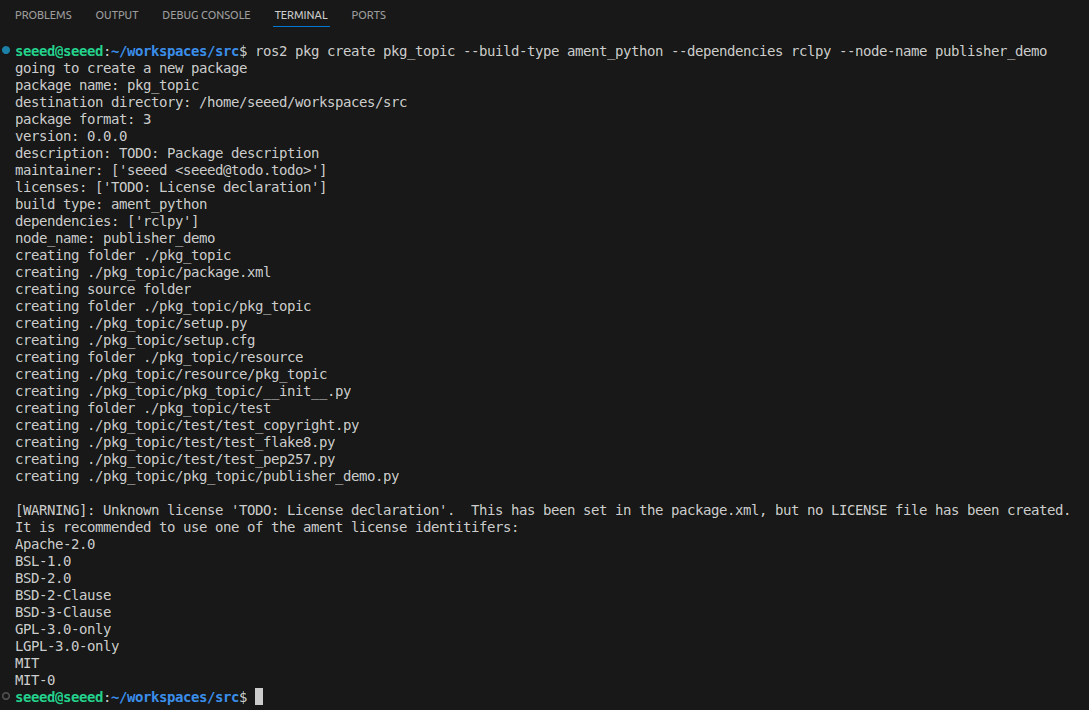
ros2 pkg create pkg_topic --build-type ament_python --dependencies rclpy --node-name publisher_demo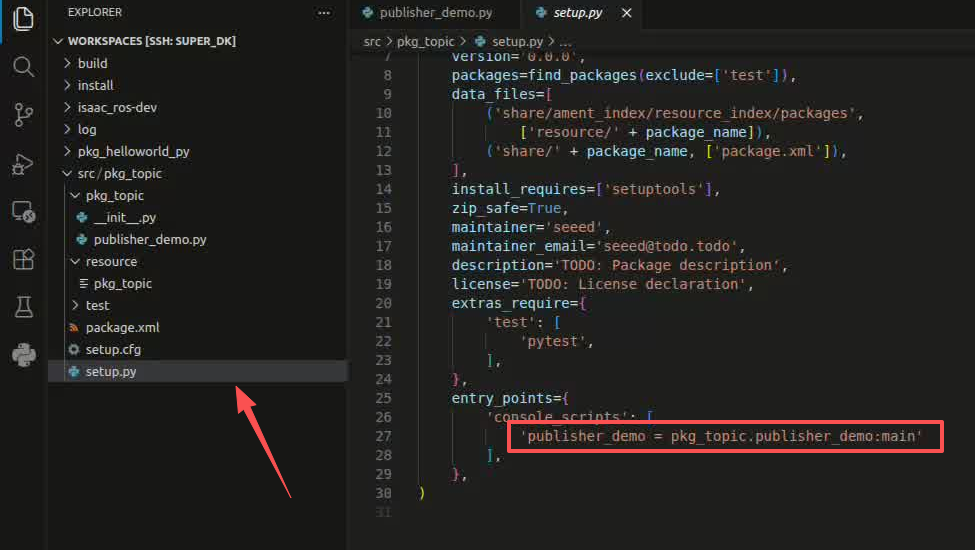
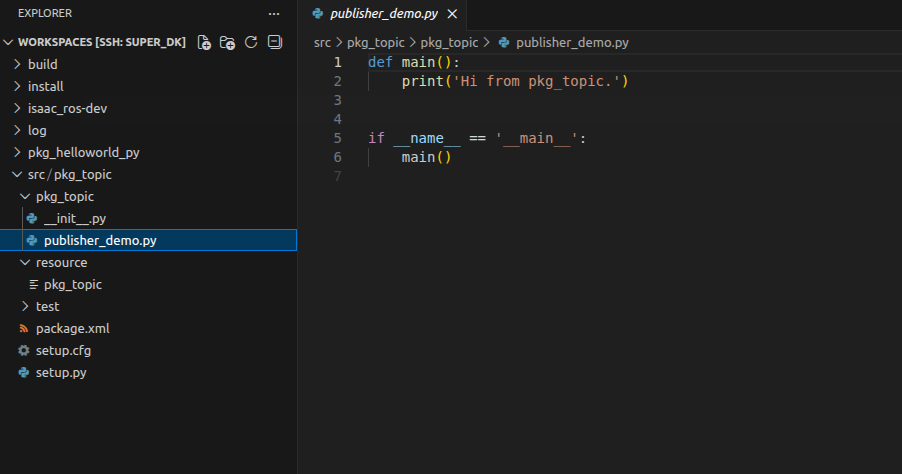
完成上述命令后,将创建一个 pkg_topic 包,并创建一个 publisher_demo 节点,并配置相关配置文件
7.2.2 发布者实现
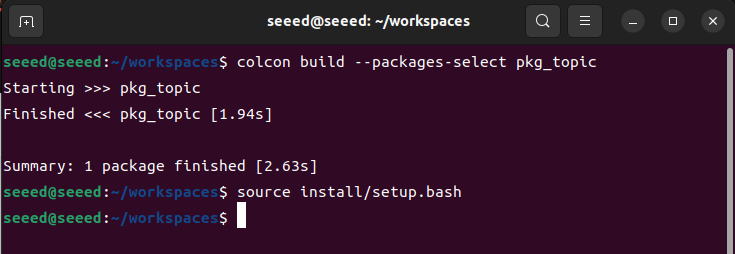
从 publisher_demo.py 中删除代码并按如下方式复制:
# Import the `rclpy` library
import rclpy
from rclpy.node import Node
# Import the `String` message type
from std_msgs.msg import String
# Create a `Topic_Pub` subclass of `Node` and pass the node name as an argument
class Topic_Pub(Node):
  def __init__(self,name):
  super().__init__(name)
  # Create a publisher with `create_publisher()`. The arguments are:
  # Topic data type, topic name, and message queue depth
  self.pub = self.create_publisher(String,"/topic_demo",1)
  # Create a timer that triggers the callback every 1 second. The arguments are:
  # Callback interval and callback function
  self.timer = self.create_timer(1,self.pub_msg)
  # Define the callback function
  def pub_msg(self):
  msg = String()  #Create a `String` message variable named `msg`
  msg.data = "Hi,I send a message." #Assign a value to `msg.data`
  self.pub.publish(msg) #Publish the topic data

# Main function
def main():
  rclpy.init() #Initialize
  pub_demo = Topic_Pub("publisher_node") #Create a `Topic_Pub` object and pass in the node name
  rclpy.spin(pub_demo)  #Call `rclpy.spin()` and pass the `Topic_Pub` object created above
  pub_demo.destroy_node()  #destroy the node object
  rclpy.shutdown()  #Shut down the ROS 2 Python client library
7.2.3 编辑配置文件
7.2.4 编译功能包
cd ~/workspace
# Build
colcon build --packages-select pkg_topic
# Refresh environment variables
source install/setup.bash
7.2.5 运行发布节点
ros2 run pkg_topic publisher_demo
# Open another terminal and use the `ros2 topic` tool to inspect the data
ros2 topic list# Use `ros2 topic echo` to print the data
ros2 topic echo /topic_demo打印出 "Hi, I send a message."
7.2.6 创建订阅者
在 publisher_demo.py 目录下新建文件 subscriber_demo.py。将以下代码粘贴到 subscriber_demo.py 文件中:
#Import related libraries
import rclpy
from rclpy.node import Node
from std_msgs.msg import String

class Topic_Sub(Node):
  def __init__(self,name):
  super().__init__(name)
  #Create a subscriber with `create_subscription()`. The arguments are the topic data type, topic name, callback function, and queue depth
  self.sub = self.create_subscription(String,"/topic_demo",self.sub_callback,1)
  #Callback function: print the received message
  def sub_callback(self,msg):
  # print(msg.data,flush=True)
  self.get_logger().info(msg.data)


def main():
  rclpy.init() #initialize the ROS 2 Python interface
  sub_demo = Topic_Sub("subscriber_node") # Create and initialize the object
  rclpy.spin(sub_demo)
  sub_demo.destroy_node()  #destroy the node object
  rclpy.shutdown()  #Shut down the ROS 2 Python client library
7.2.7 编辑配置文件
7.2.8 编译功能包
cd ~/workspace
colcon build --packages-select pkg_topic
# Refresh environment variables
source install/setup.bash
7.2.9 运行节点
打开两个终端各运行一个节点:
# Start the publisher node
ros2 run pkg_topic publisher_demo
# Start the subscriber node
ros2 run pkg_topic subscriber_demo
如上图所示,运行订阅者的终端将打印发布者发布的 /topic_demo 信息。
7.3 后续步骤
学习如何通信后,您可以:
1.08 服务通信 - 学习服务通信
2.09 动作通信 - 学习动作通信
08 服务通信
08 服务通信(Services)
8.1 服务通信概述
8.1.1 什么是服务通信
服务(Service)是 ROS 2 中节点之间同步通信的机制,使用客户端/服务器(Client/Server)模型。客户端发送请求,服务处理并返回响应。
8.1.2 服务与话题对比
| 特性 | 服务 | 话题 |
|---|---|---|
| 通信模式 | 同步(请求-响应) | 异步(发布-订阅) |
| 连接 | 一对一。 | 多对多。 |
| 应用场景 | 短操作查询 | 持续数据流 |
| 阻塞 | 客户端阻塞等待。 | 无阻塞。 |
| 返回值 | 必须返回响应。 | 无响应 |
8.1.3 服务类型定义
服务类型使用 .srv 文件定义,其中包含请求和响应:
Plain Text
Data type definition
File: example interfaces/srv/AddTwoInts.srv
Request part ( -- above)
int64 a int64 b
Response part ( -- below)
int64 sum
8.2 服务通信示例
8.2.1 新建功能包
在 ~/workspace/src 目录下
ros2 pkg create pkg_service --build-type ament_python --dependencies rclpy --node-name server_demo8.2.2 创建服务端
修改 server_demo.py 代码如下:
# Import related library files
import rclpy
from rclpy.node import Node
from example_interfaces.srv import AddTwoInts

class Service_Server(Node):
  def __init__(self,name):
  super().__init__(name)
  # Create a service server with `create_service()`. The arguments are:
  # Service data type, service name, and service callback function
  self.srv = self.create_service(AddTwoInts, '/add_two_ints', self.Add2Ints_callback)
  # This service callback adds two integers and returns the result
  def Add2Ints_callback(self,request,response):
  response.sum = request.a + request.b
  print("response.sum = ",response.sum)
  return response
def main():
  rclpy.init()
  server_demo = Service_Server("publisher_node")
  rclpy.spin(server_demo)
  server_demo.destroy_node()  # destroy the node object
  rclpy.shutdown()  # Shut down the ROS 2 Python client library
重点关注服务回调函数 Add2Ints_callback,除 self 外需要携带的参数是 request 和 response,request 是服务需要的参数,response 是服务的反馈。request.a 和 request.b 是请求的一部分,response.sum 是响应的一部分。
可以通过以下命令查看:
ros2 interface show example_interfaces/srv/AddTwoInts- 将这种数据类型分为两部分,顶部表示请求,底部表示响应。然后是各自字段中的变量,如 int64 a, int64 b,都是重新传输的参数,指定 a, b 的值。同样,反馈的结果需要指定 sum 的值。
8.2.3 编辑配置文件
打开 setup.py,在 console_scripts 列表中添加
'server_demo = pkg_service.server_demo:main',8.2.4 编译功能包
colcon build --packages-select pkg_service
# Refresh environment variables
source install/setup.bash
# Run the node
ros2 run pkg_service server_demo
运行后,因为没有调用服务,所以没有反馈数据,可以通过命令行调用服务,先询问当前服务,然后另一个终端输入:
ros2 service list/add_two_ints 是我们需要通过以下命令调用的服务,终端输入:
ros2 service call /add_two_ints example_interfaces/srv/AddTwoInts "{a: 1,b: 4}"这里我们将 a 的值给 1,b 的值给 4,即调用服务计算 1 和 4 的和。从上图可以看出,在服务传递之后,反馈的结果是 5。运行服务的终端也打印了反馈值。
8.2.5 创建客户端
在 server_demo.py 下创建一个新文件
将以下代码写入 client_demo.py:
#Import related libraries
import rclpy
from rclpy.node import Node
from example_interfaces.srv import AddTwoInts

class Service_Client(Node):
  def __init__(self,name):
  super().__init__(name)
  # Create a client with `create_client()`. The arguments are the service data type and service topic name
  self.client = self.create_client(AddTwoInts,'/add_two_ints')
  # Wait in a loop until the service server starts successfully
  while not self.client.wait_for_service(timeout_sec=1.0):
  print("service not available, waiting again...")
  # Create the service request data object
  self.request = AddTwoInts.Request()

  def send_request(self):
  self.request.a = 10
  self.request.b = 90
  #send the service request
  self.future = self.client.call_async(self.request)

def main():
  rclpy.init() # Initialize the node
  service_client = Service_Client("client_node") #Create the object
  service_client.send_request() #send the service request
  while rclpy.ok():
  rclpy.spin_once(service_client)
  #Check whether the data processing is complete
  if service_client.future.done():
  try:
  #Get the service response and print it
  response = service_client.future.result()
  print("service_client.request.a = ",service_client.request.a)
  print("service_client.request.b = ",service_client.request.b)
  print("Result = ",response.sum)
  except Exception as e:
  service_client.get_logger().info('Service call failed %r' % (e,))
  break
  service_client.destroy_node()
  rclpy.shutdown()
8.2.6 编辑配置文件
打开 setup.py,在 console_scripts 列表中添加
'client_demo = pkg_service.client_demo:main'8.2.7 编译功能包
cd ~/workspace
colcon build --packages-select pkg_service
# Refresh environment variables
source install/setup.bash
# Start the service server node
ros2 run pkg_service server_demo
打开另一个运行终端:
# Refresh environment variables
source install/setup.bash
# Start the client node
ros2 run pkg_service client_demo
客户端提供 a = 10,b = 90,服务端进行计算,结果为 100,两端结束。
8.3 后续步骤
您可以:
1.09 动作通信 - 学习动作通信(长任务)
- 10 TF2 坐标变换 - 创建自定义服务类型
09 动作通信
09 动作通信(Actions)
9.1 动作通信摘要
9.1.1 什么是动作通信?
动作(Action)是 ROS 2 中用于处理长任务的通信机制。类似于服务,动作是客户端-服务器模式,但支持:
-
任务执行期间的实时反馈
-
客户端可以取消活动任务。
-
适合处理可能需要数秒到数分钟的操作。
9.1.2 动作与服务对比
| 特性 | 服务 | 动作 |
|---|---|---|
| 应用时长 | 短操作(毫秒-秒) | 长任务(秒-分钟) |
| 反馈 | 无实时反馈 | 持续发送反馈 |
| 取消 | 不支持 | 但可以取消。 |
| 阻塞 | 客户端阻塞 | 不阻塞 |
| 应用场景 | 查询,简单操作 | 导航,抓取 |
9.2 动作通信案例
动作客户端提交一个整数数据 N,动作服务接收请求的数据并将 1 到 N 之间的所有整数相加,将最终结果返回给动作客户端,并在每次相加时计算当前计算进度并反馈给动作客户端。
9.2.1 新建功能包
在 ~/workspace/src 目录下新建 pkg_interfaces
ros2 pkg create --build-type ament_cmake pkg_interfaces然后在 pkg_interfaces 包下创建 action 文件夹并在 action 文件夹中创建一个新的 Progress.action 文件,内容如下:
int64 num
---
int64 sum
---
float64 progress
需要在 package.xml 中添加许多依赖包,如下所示:
<buildtool_depend>rosidl_default_generators</buildtool_depend>
<exec_depend>rosidl_default_runtime</exec_depend>
<depend>action_msgs</depend>
<member_of_group>rosidl_interface_packages</member_of_group>- 将以下配置添加到 CMakeLists.txt:
find_package(rosidl_default_generators REQUIRED)

rosidl_generate_interfaces(${PROJECT_NAME}
"action/Progress.action")- 编译功能包:
cd ~/workspace
colcon build --packages-select pkg_interfaces- 编译完成后,工作空间下的 install 目录中将生成与 Progress.action 文件对应的 C++ 和 Python 文件。我们还可以在终端中进入工作空间,通过以下命令检查文件的定义和翻译是否正常:
# source install/setup.bash
ros2 interface show pkg_interfaces/action/Progress
通常,终端将输出与 Progress.action 文件一致的内容
3.2 创建动作通信功能包
在 ~/workspace/src 目录下新建 pkg_action
ros2 pkg create pkg_action --build-type ament_python --dependencies rclpy pkg_interfaces --node-name action_server_demo完成上述命令后,将创建 pkg_action 包,并创建 action_server_demo 节点,并配置相关配置文件
4. 服务端实现
4.1 创建服务提供者
编辑 action_server_demo.py 通过添加以下代码执行服务端功能:
import time
import rclpy
from rclpy.action import ActionServer
from rclpy.node import Node

from pkg_interfaces.action import Progress

class Action_Server(Node):
  def __init__(self):
  super().__init__('progress_action_server')
  # Create the action server
  self._action_server = ActionServer(
  self,
  Progress,
  'get_sum',
  self.execute_callback)
  self.get_logger().info('The action server has started!')

  def execute_callback(self, goal_handle):
  self.get_logger().info('Starting task execution...')

  # Generate continuous feedback.
  feedback_msg = Progress.Feedback()

  total = 0
  for i in range(1, goal_handle.request.num + 1):
  total += i
  feedback_msg.progress = i / goal_handle.request.num
  self.get_logger().info('Continuous feedback: %.2f' % feedback_msg.progress)
  goal_handle.publish_feedback(feedback_msg)
  time.sleep(1)

  # Generate the final response.
  goal_handle.succeed()
  result = Progress.Result()
  result.sum = total
  self.get_logger().info('Task completed!')

  return result

def main(args=None):

  rclpy.init(args=args)
  # Call `spin()` and pass in the node object
  Progress_action_server = Action_Server()
  rclpy.spin(Progress_action_server)
  Progress_action_server.destroy_node()
  # Release resources
  rclpy.shutdown()
4.2 编辑配置文件
打开 setup.py,在 console_scripts 列表中添加
'action_server_demo = pkg_action.action_server_demo:main',4.3 编译功能包
cd ~/workspace
colcon build --packages-select pkg_action
# Refresh environment variables
source install/setup.bash
# Run the action server node
ros2 run pkg_action action_server_demo
另一个终端输入:
ros2 action list/get_sum 是我们需要通过以下命令调用的动作,终端输入:
ros2 action send_goal /get_sum pkg_interfaces/action/Progress "{num: 10}"这里我们要求 1 到 10 的和:
上图显示服务端和下面的客户端。您可以看到服务端如何持续反馈 1 到 10 的进度和计算过程,最终显示任务已完成,客户端已收到反馈,客户端已收到反馈 55