ROS2 Tools, Launch, and Visualization
17 Common command tool
17 Common Command Tool (CLI Tools)
17.1 Package management tool ros2 pkg
17.1.1 rose2 pkg create
Function: Create a functional package, which requires the name of the package, the way it is compiled, the dependencies, etc.
Format:
ros2 pkg create <package_name> --build-type <build-type> --dependencies <dependencies>In the ros2 command:
pkg: indicates functions associated with the functional kit;
create: indicates the creation of a functional package;
Package name: must: name of the new functional package;
bild-type: must be: indicates whether the newly created feature kit is C++ or Python, if C++ or C is used, then this is ament cmake, and if Python is used, ament python;
Options: the C++ feature package needs to contain rclcpp, the Python feature package needs to contain rclpy, and other dependents;
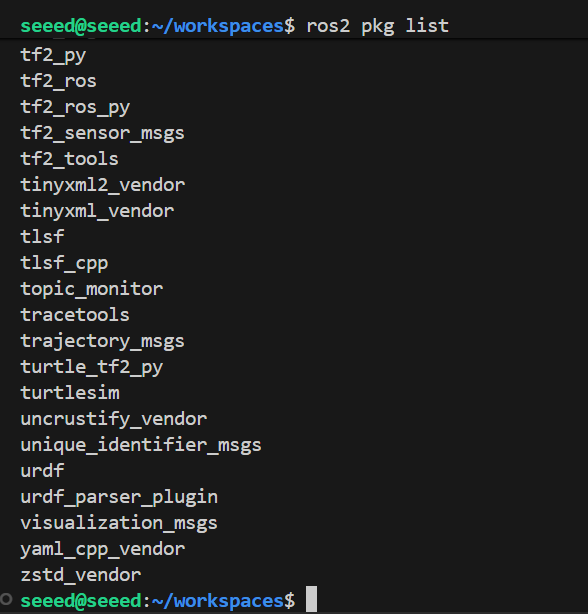
17.1.2 ros2 pkg list
Function: View the list of functional packages in the system
Format:
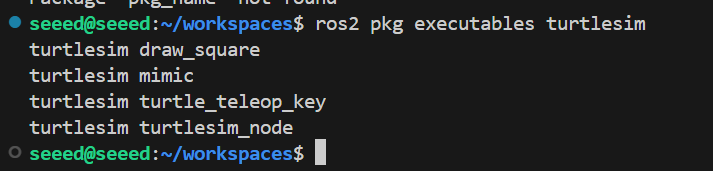
ros2 pkg list17.1.3 ros2 pkg executes
Function: View all executables in a package
Format:

ros2 pkg executables <pkg_name>17.2 Node Runs ros2 run
Function: Run the functional package node program
Format:
ros2 run <pkg_name> <node_name>
pkg name: Functional package name
Node name: Name of executable
17.3 Node-related tools
17.3.1 rose2 node list
Function: List all nodes in the current domain
Format:
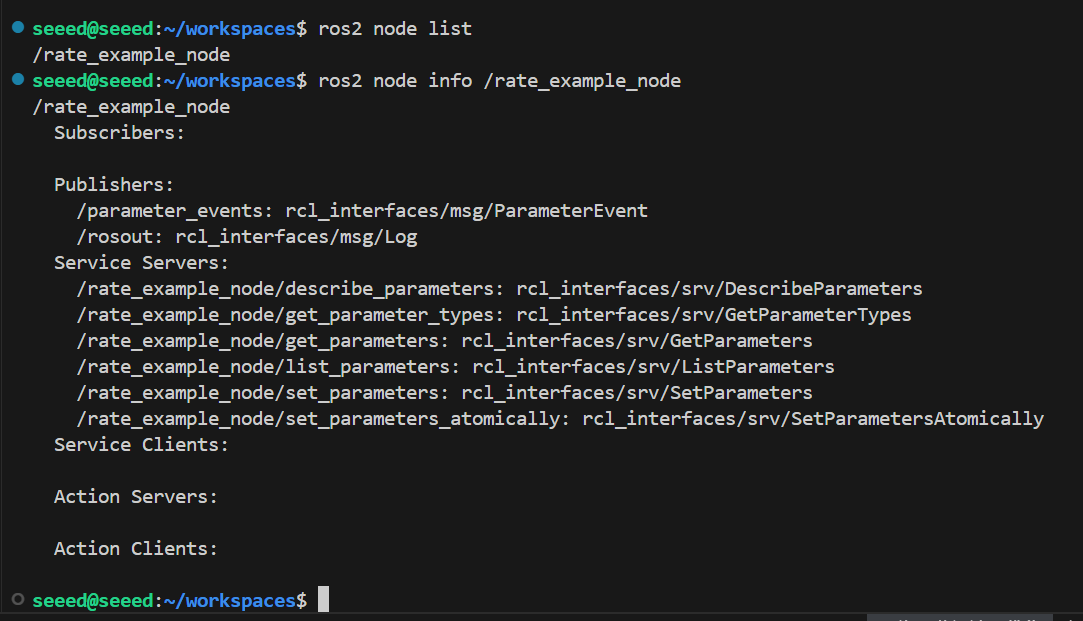
ros2 node list17.3.2 rose2 nodeinfo
Function: View node details, including subscriptions, published messages, services and actions, etc.
Format:
ros2 node info <node_name>Node name: Node name to see
17.4 Topic-related tools
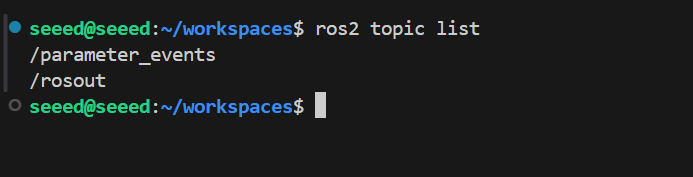
17.4.1 rose2 topic list
Function: List all topics in the current domain
Format:
ros2 topic list
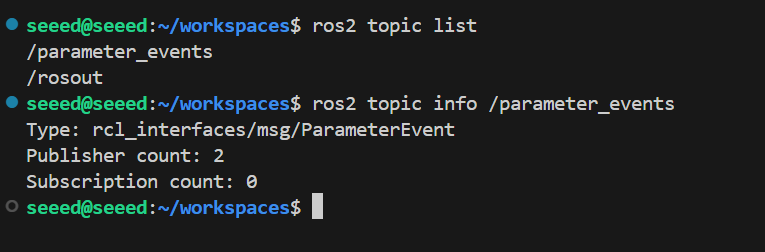
17.4.2 rose2 topicinfo
Function: Display the subject message type, number of subscribers/issuers
Format:
ros2 topic info <topic_name>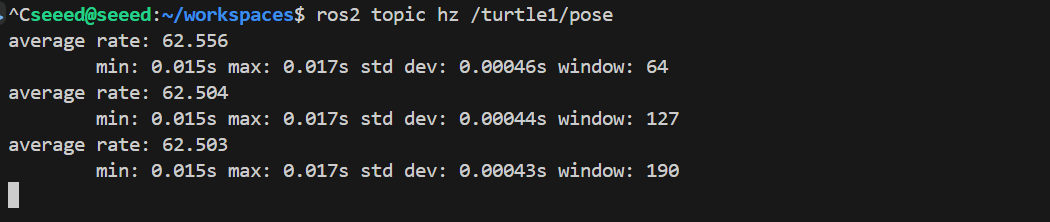
Topic name: name of topic to search for
17.4.3 rose2 topic type
Function: Type of message to view the topic
Format:
ros2 topic type <topic_name>Topic name: Name of subject type to search for
17.4.4 ros2 topic hz
Function: Show the average frequency of topic release
Format:
ros2 topic hz <topic_name>Topic name: Name of subject frequency to query

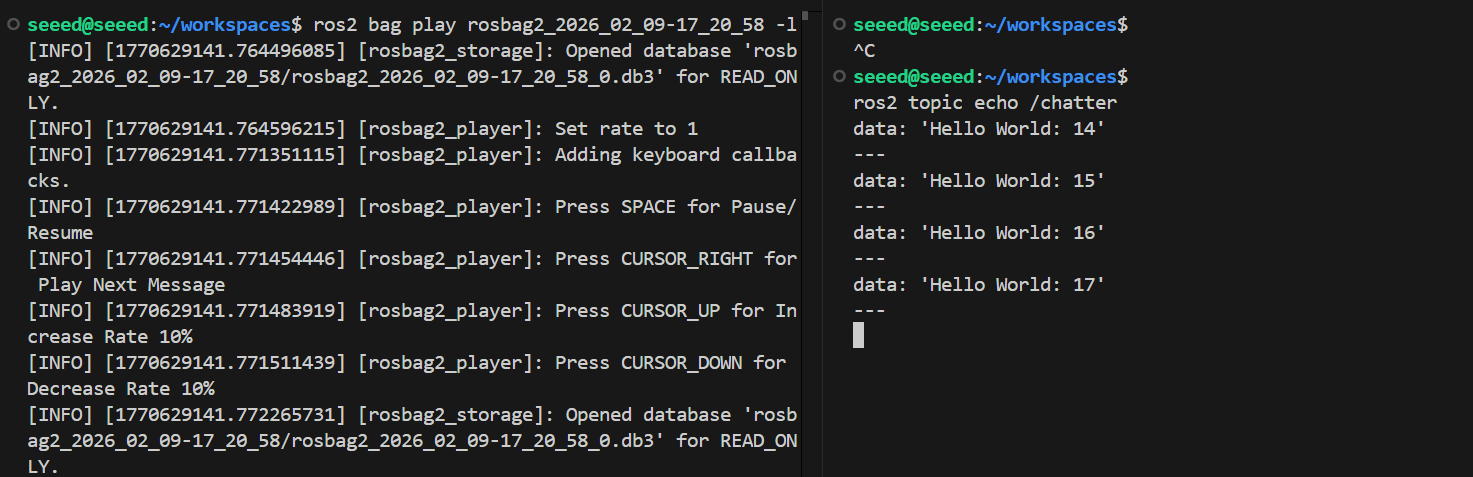
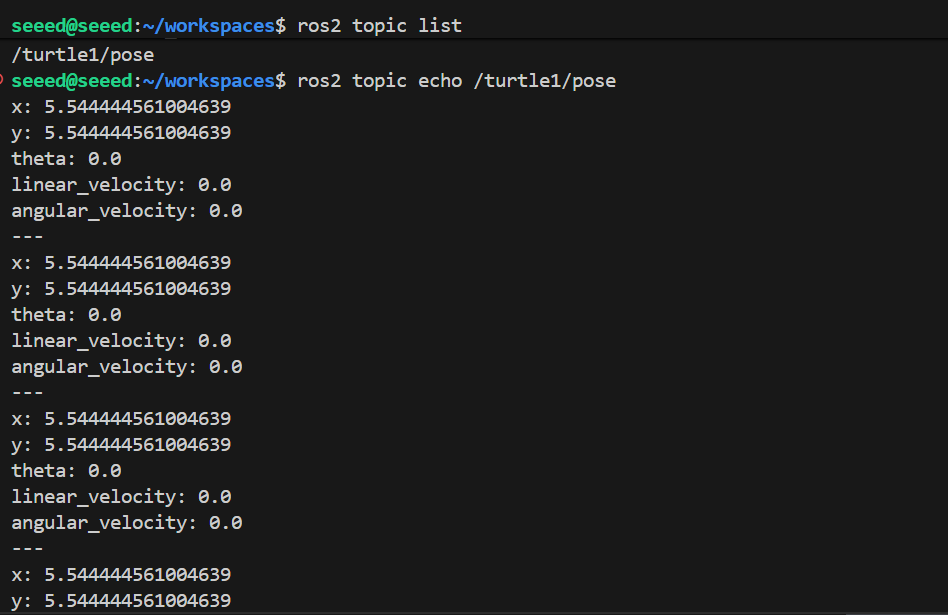
17.4.5 ros2 topic epho
Function: Print topic messages at terminal, similar to a subscriber
Format:
ros2 topic echo <topic_name>Topic name: The name of the subject for which you need to print the message
17.4.6 rose2 topic pub
Function: Send specified topic messages at terminal
Format:
ros2 topic pub <topic_name> <message_type> <message_content>
Topic name: The name of the subject that needs to be published
message type: data type of topic
message content: message content
The default is published at a frequency of 1 Hz, setting the following parameters:
Parameter 1 is published once, ros2 topic pub-1 topic name message type message content
Parameter-t count loop release count end, ros2 topic pub-t count topic name message type message content
Arguments-r count published at the frequency of the count Hz, ros2 topic pub-r count topic name message type message content
Example:
Issue speed commands by command line
What needs to be noted here is that there's a space behind each colon, or else there's an error in format.
ros2 topic pub turtle1/cmd_vel geometry_msgs/msg/Twist "{linear: {x: 0.5, y: 0.0, z: 0.0}, angular: {x: 0.0, y: 0.0, z: 0.2}}"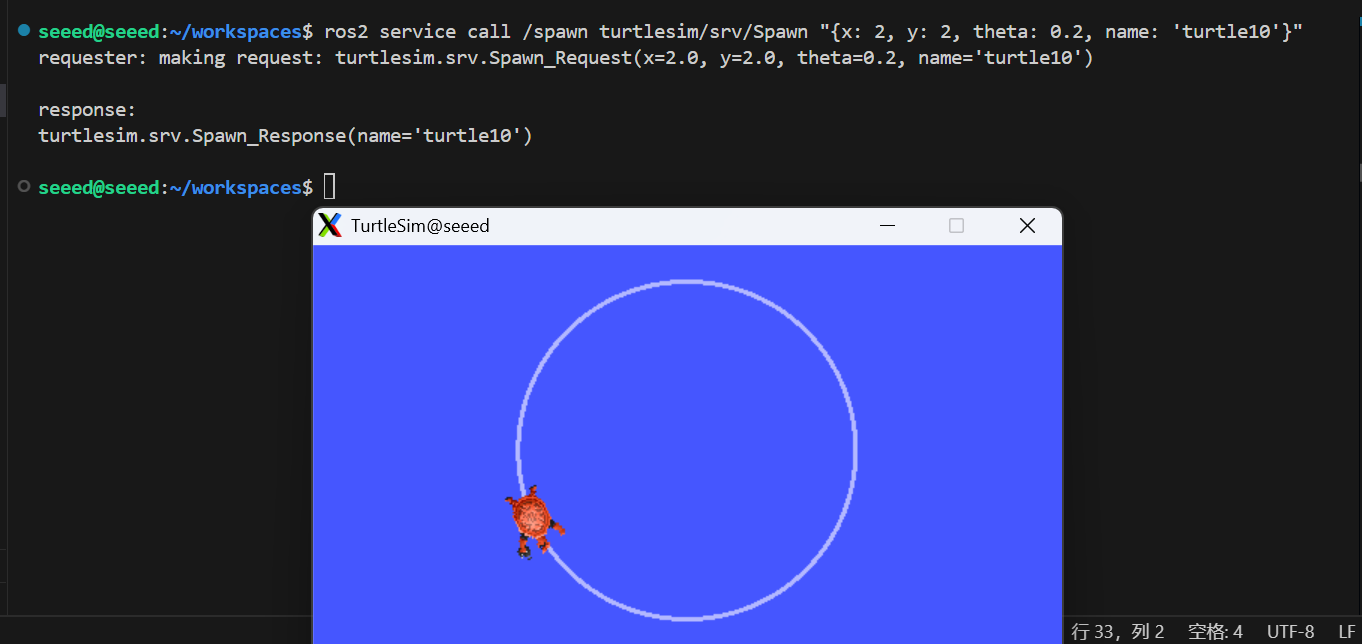
17.5 Ros2 interface-related tools
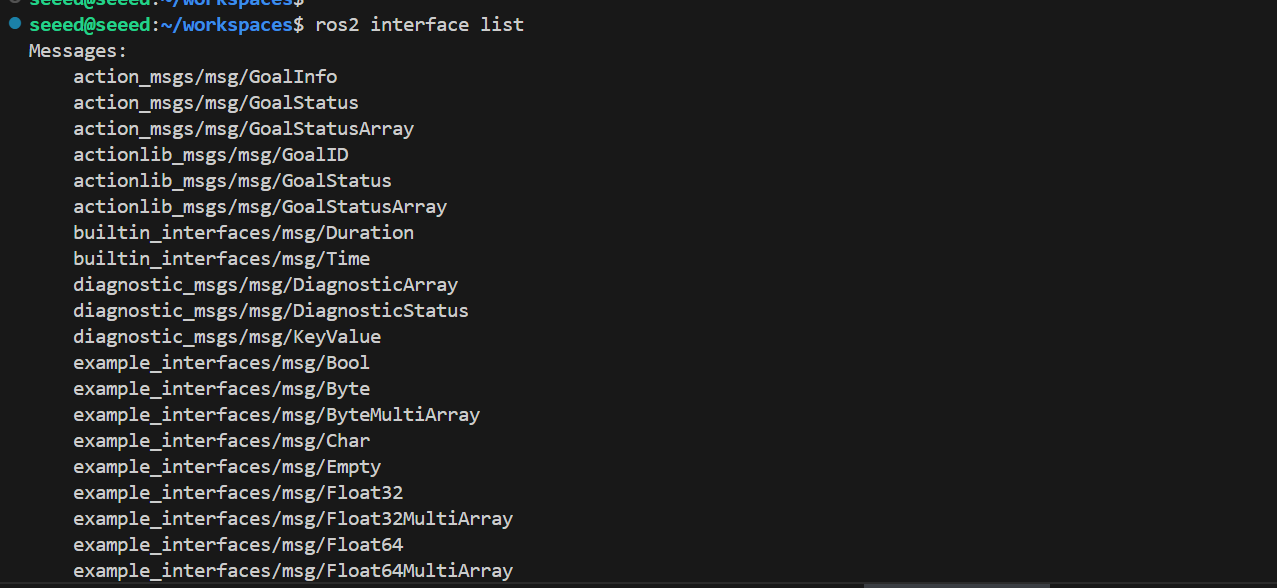
17.5.1 rose2 interface list
Function: Lists all interfaces of the current system, including topics, services, actions.
Format:
ros2 interface list17.5.2 rose2 interface show
Function: Show details of the specified interface
Format:
ros2 interface show <interface_name>Interface name: name of interface content to display
17.6 Services-related tools
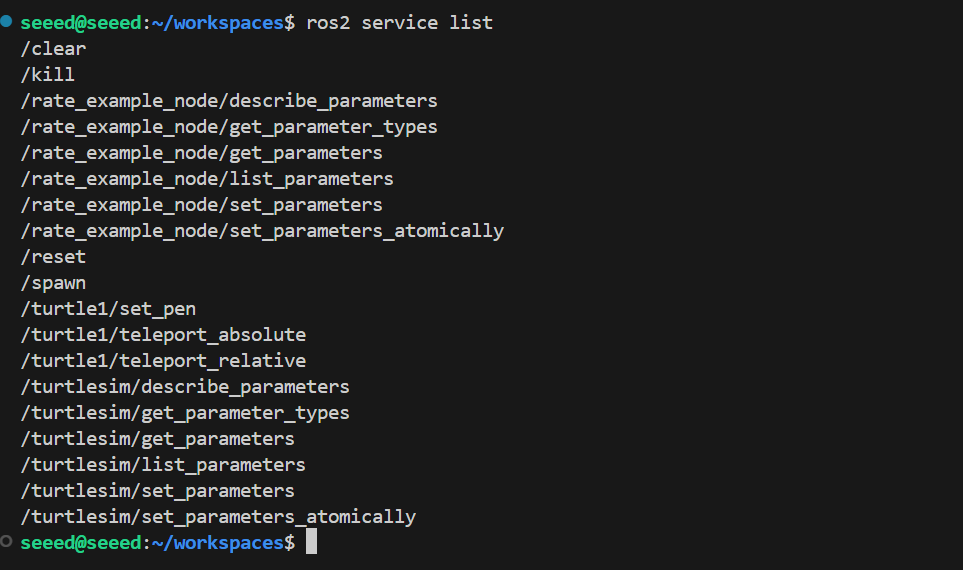
17.6.1 rose2 service list
Function: List all services in the current domain
Format:

ros2 service list17.6.2 rose2 service call
Function: Call specified service
Format:
ros2 interface call <service_name> <service_Type> <arguments>Service name: service to be called
Service Type: service data type
Arguments: parameters for service delivery
For example, calling to generate turtle services
ros2 service call /spawn turtlesim/srv/Spawn "{x: 2, y: 2, theta: 0.2, name: 'turtle10'}"17.7 Next steps
18 RViz2 Use - Learning RViz2 Visualization
- 19 Rqt Toolbox - Learning Rqt Tool
18 RViz2 Use
18 RViz2 Usage (RViz2 Vision)
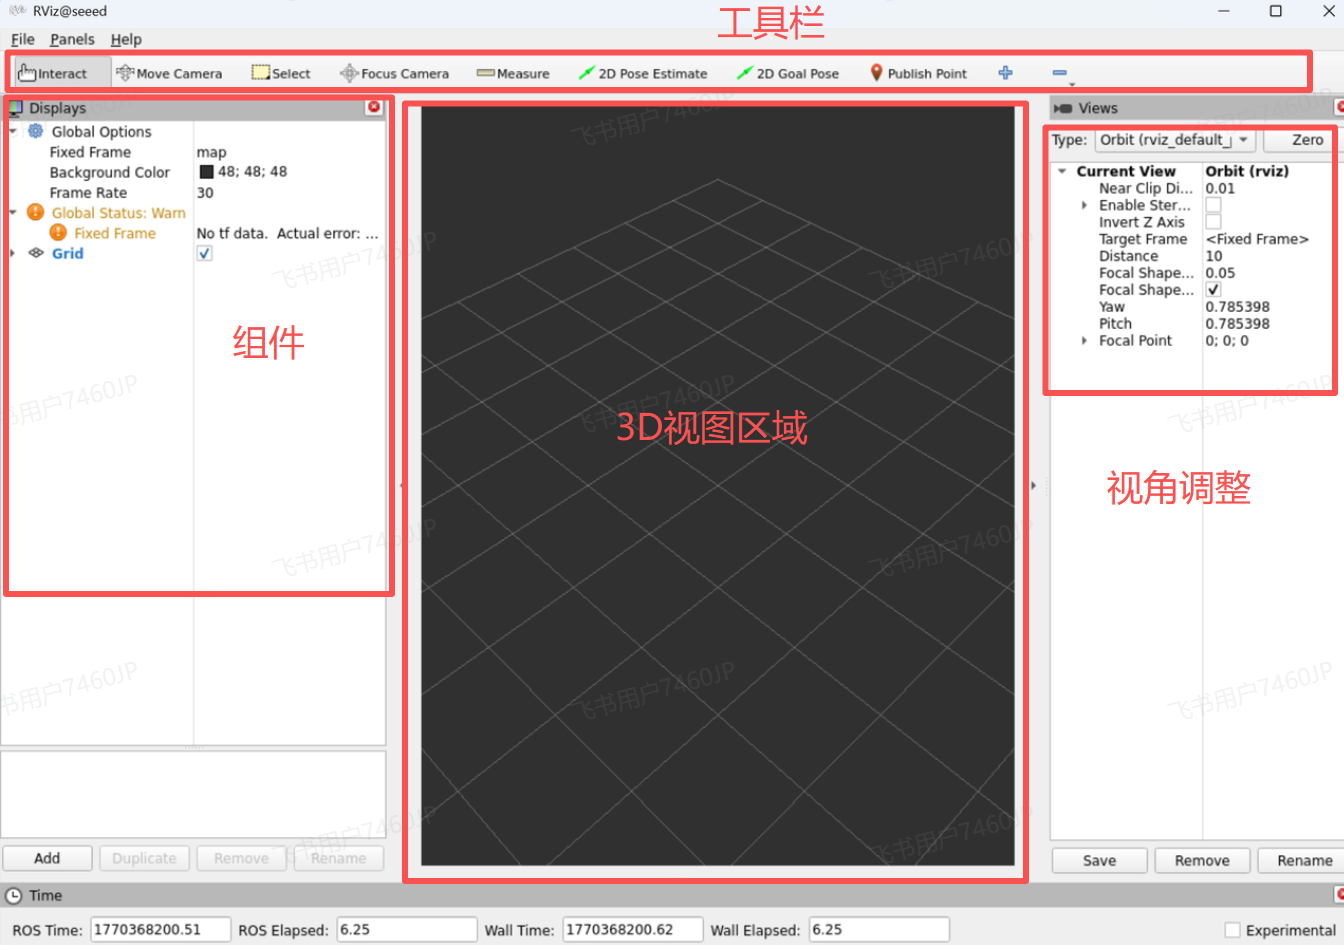
18.1 RViz2 Overview
Rviz2 is the most commonly used three-dimensional visualization tool in ROS 2 to visualize the operational status of robotic systems. It can subscribe to and display a variety of ROS 2 subject data, such as laser radar cloud, maps, robotic model (URDF), TF coordinate conversion, path-planning trajectory and camera images, and help developers quickly verify whether sensor, positioning, navigation, etc. are working. Through Rviz2, users can observe the relationship between robots and the environment in real time in the same interface, significantly increasing the efficiency of commissioning and development.
18.2 Preparatory work
If there's a real robot that can start the rviz exercise at the robot master control end, if there's no real robot, we can start the turtlebot3 in a real way by gazebo, imitating laser radar, camera, etc., so that the next data can be visualized.
Note that the following installation steps are not necessary, and if there are physical robots in their hands, with a large number of machine communications that allow direct use of real machine radar information, they can use real radar or virtual simulation robots of their choice; The following are suitable for users who do not have a live machine.
This section of the curriculum uses simulation robots as an example, teaching rviz2 visualization, real or mimic robots, and rviz2 processes are the same.
Install Tutlebot3 emulator kit
sudo apt install ros-${ROS_DISTRO}-turtlebot3*Installation of ros and gazebo bridges
sudo apt install ros-humble-ros-gz -ySet the turtlebot3 environment variable
export TURTLEBOT3_MODEL=waffle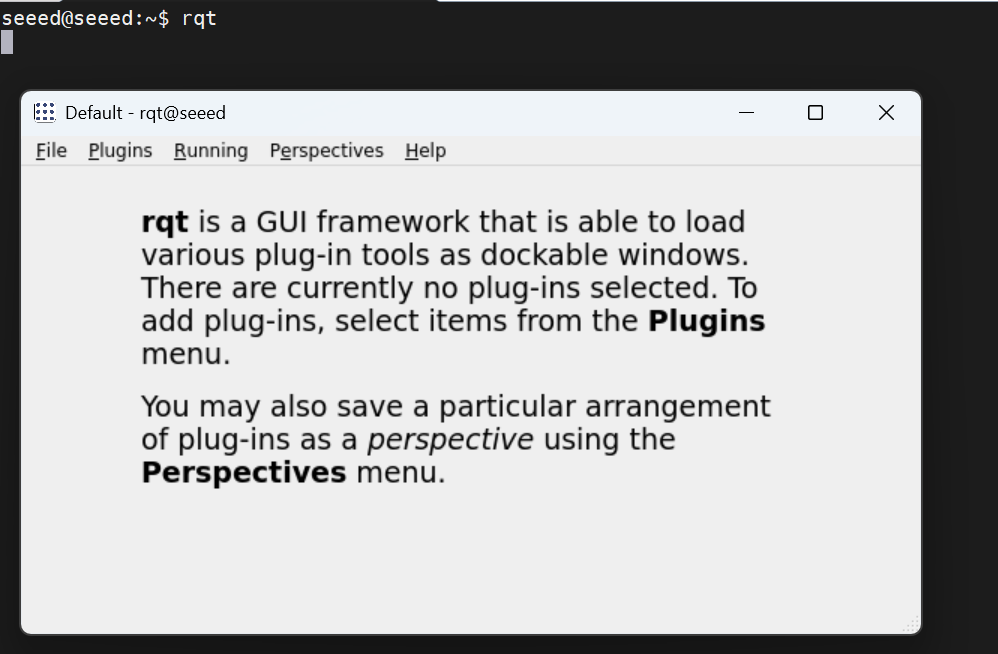
Start gazebo simulation environment
# source /opt/ros/humble/setup.bash
ros2 launch turtlebot3_gazebo turtlebot3_world.launch.py
Note: Jetson may not be able to start, this operation is running on X86 PC
18.3 Rviz2 start
Starts a terminal and can be activated with the following command:
rviz2Note: If started in docker, make sure that the GUI display has been opened.
18.4 Visualization of image data
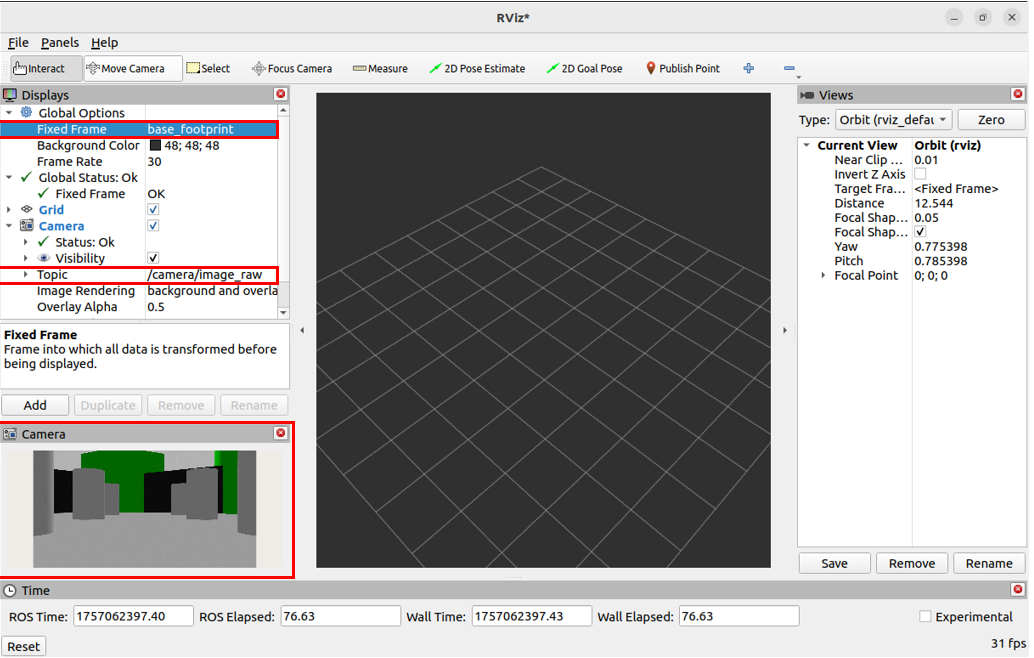
Click on Add in the left Displays window to find the Image display item, OK to add the display list after confirmation, and then configure the image topic for the display item, so that you can see the robot's camera image.
[ Picture download failed]
Select Fixed Frame to base footprint coordinates
Select Camera Color Topic
Now, we can see the vision of the current simulation robot in the Camera window.
18.5 Radar data visualization
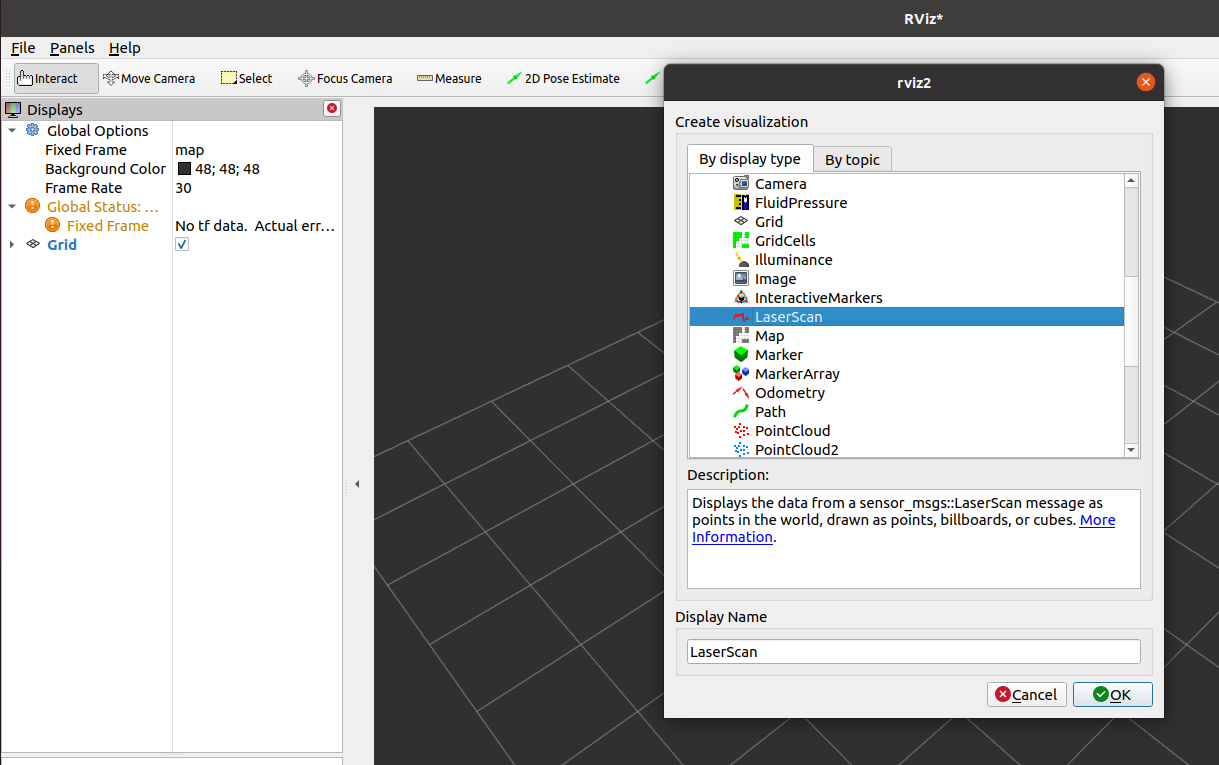
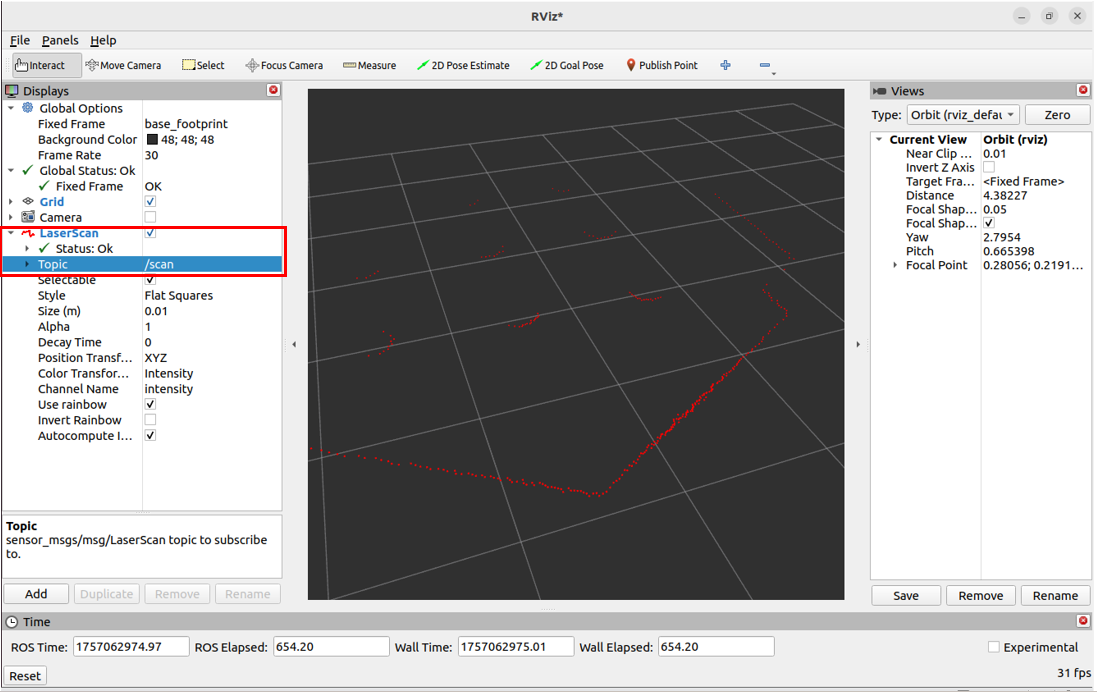
Click on Add in the Displays window to the left, select Laserscan, and configure the subject name for the subscription.
Topic selection for LaserScan
At this point, we can see the contours of the laser radar.
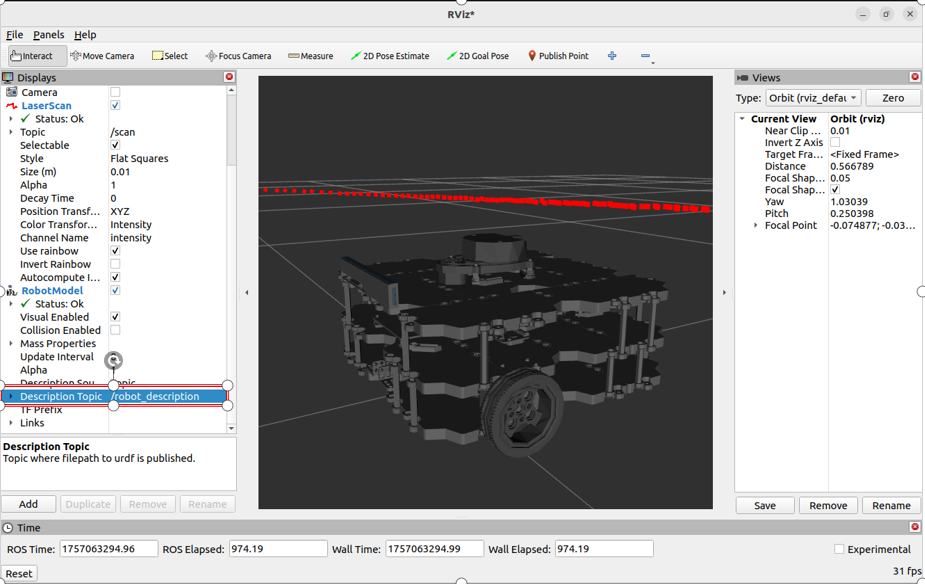
18.6 Visualization of robotic models
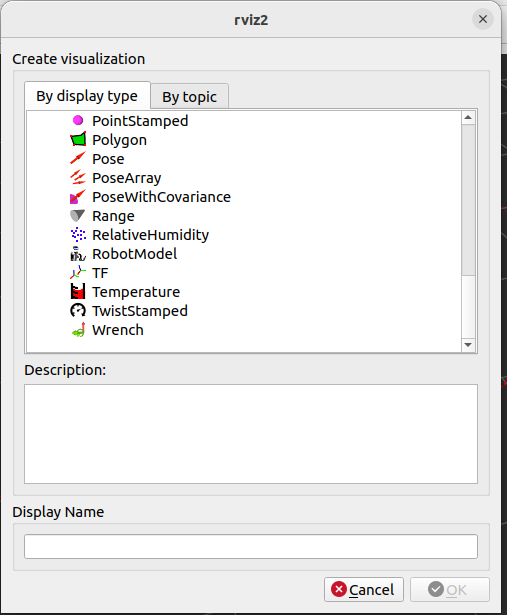
Click Add in the left Displays window, select RobotModel
Select the topic for robotDescriptionTopic
We can see the visualization of robots in Rviz2.
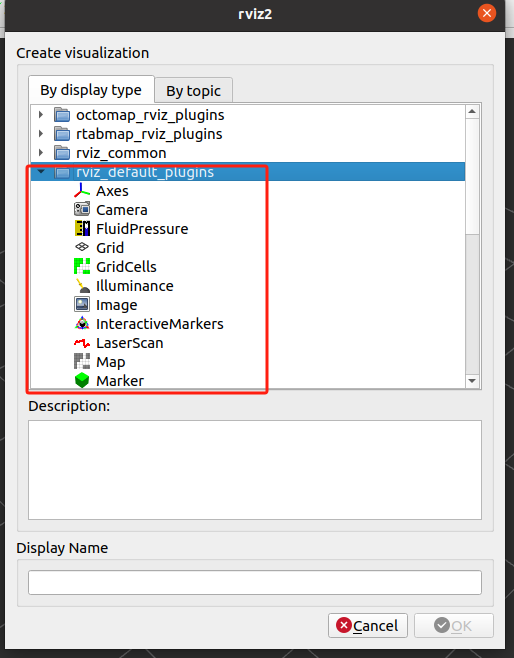
18.7 Visualization of other data
The rivz default plugins list many commonly used data visualization plugins that you can use at one time or another.
18.8 Next steps
-
19 Rqt Toolbox - Learning Rqt Tool
-
20 Launch Configuration - Learn Launch Configuration
19 Rqt Toolbox
19 Rqt Toolbox (Rqt Tools)
19.1 Rqt Overview
| rqt is a graphical Qt-based tool frame in ROS that integrates many common functions into a visual interface by plugining. The developers can visualize and debug the system by viewing rqt, e.g. the distribution/subscription of Topic, monitoring nodes and communications (rqt graph), real-time viewing of logs (rqt console), dynamic referencing (rqt reconfigure) and drawing analysis data (rqt plot). Simply put, rqt, like ROS's Multifunctional Visualized Debug Sheet, can significantly increase the efficiency of development, miscalculation and system understanding. |
|---|
Plain Text Rqt plugin ecology:
That's right. That's right. Rqt frame I'm sorry. Zenium
│rqt graph│rqt plot│rqt console�? �?(nodes) �?(data drawing) �?(log view) �?
Zenium
│rqt reconfigure �?(parameter configuration) T (TF tree) T (data package) �?
Zenium

19.2 Installation
The rqt toolbox is usually installed by default as long as the desktop version is installed; If the installation of ros2 is not a complete version of the installation, it may be installed as follows:
sudo apt install ros-${ROS_DISTRO}-rqt*19.3 Commencement
Common rqt start-up orders are:
# Method 1: run `rqt` in the terminal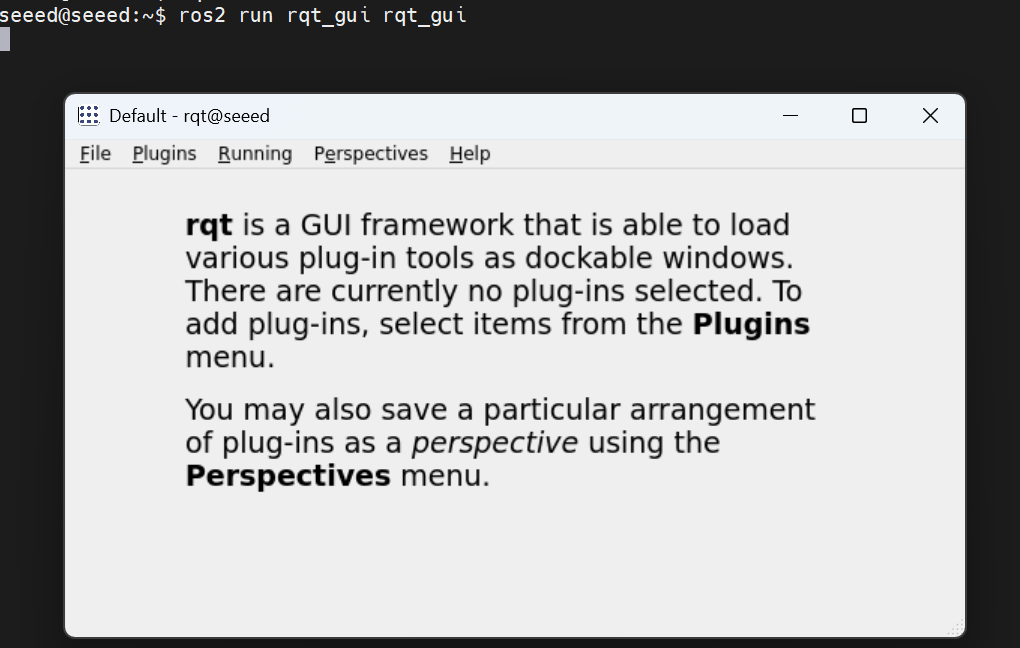
rqt# Method 2
ros2 run rqt_gui rqt_gui19.4 Use of plugins
After starting rqt, you can add the required plugins through plugins:
Open a small turtle example to see subscriptions to nodes:
# Terminal 1:
ros2 run turtlesim turtlesim_node
# Terminal 2:
ros2 run turtlesim turtle_teleop_key
# Terminal 3:
rqt
The plugins contain topics, services, actions, parameters, logs, etc., which can be adapted to facilitate the ROS2 debugging. The following examples are used.
19.4.1 topic plugins
Add topic plugins and send speed commands to control turtle movement.
19.4.2 service plugin
Adds a service plugin and sends a request to create a turtle at a given location.
[ Picture download failed]
19.4.3 Parameter plugins

Changes the background colour of the turtle form through the parameter plugin dynamically.
19.5 Next steps
- 20 Launch Configuration - Learn Launch Configuration
Record and Playback - learning package recording
20 Launch Configuration
20 Launch Configuration (Launch Files)
20.1 Launch Overview
The Launch startup file in ROS is used for the integrated management and activation of multiple nodes/components and is essentially a system-level startup script. It can be prepared by Python (most commonly), XML or YAML, supporting the simultaneous activation of multiple nodes, setting parameters, remapping topics, loading namespaces, configuration of environment variables, and making more advanced logical controls, such as conditional start-up, delayed start-up, trigger-by-incident, etc. In short, the Launch file is the core tool of the ROS 2 project to package and configure "start in one key" a set of nodes, especially for the deployment and commissioning of complex robotic systems.
20.2 Launch of a single Node node
20.2.1 Preparatory kits
cd ~/workspaces/src
ros2 pkg create learn_launch --build-type ament_python
20.2.2 New launch file
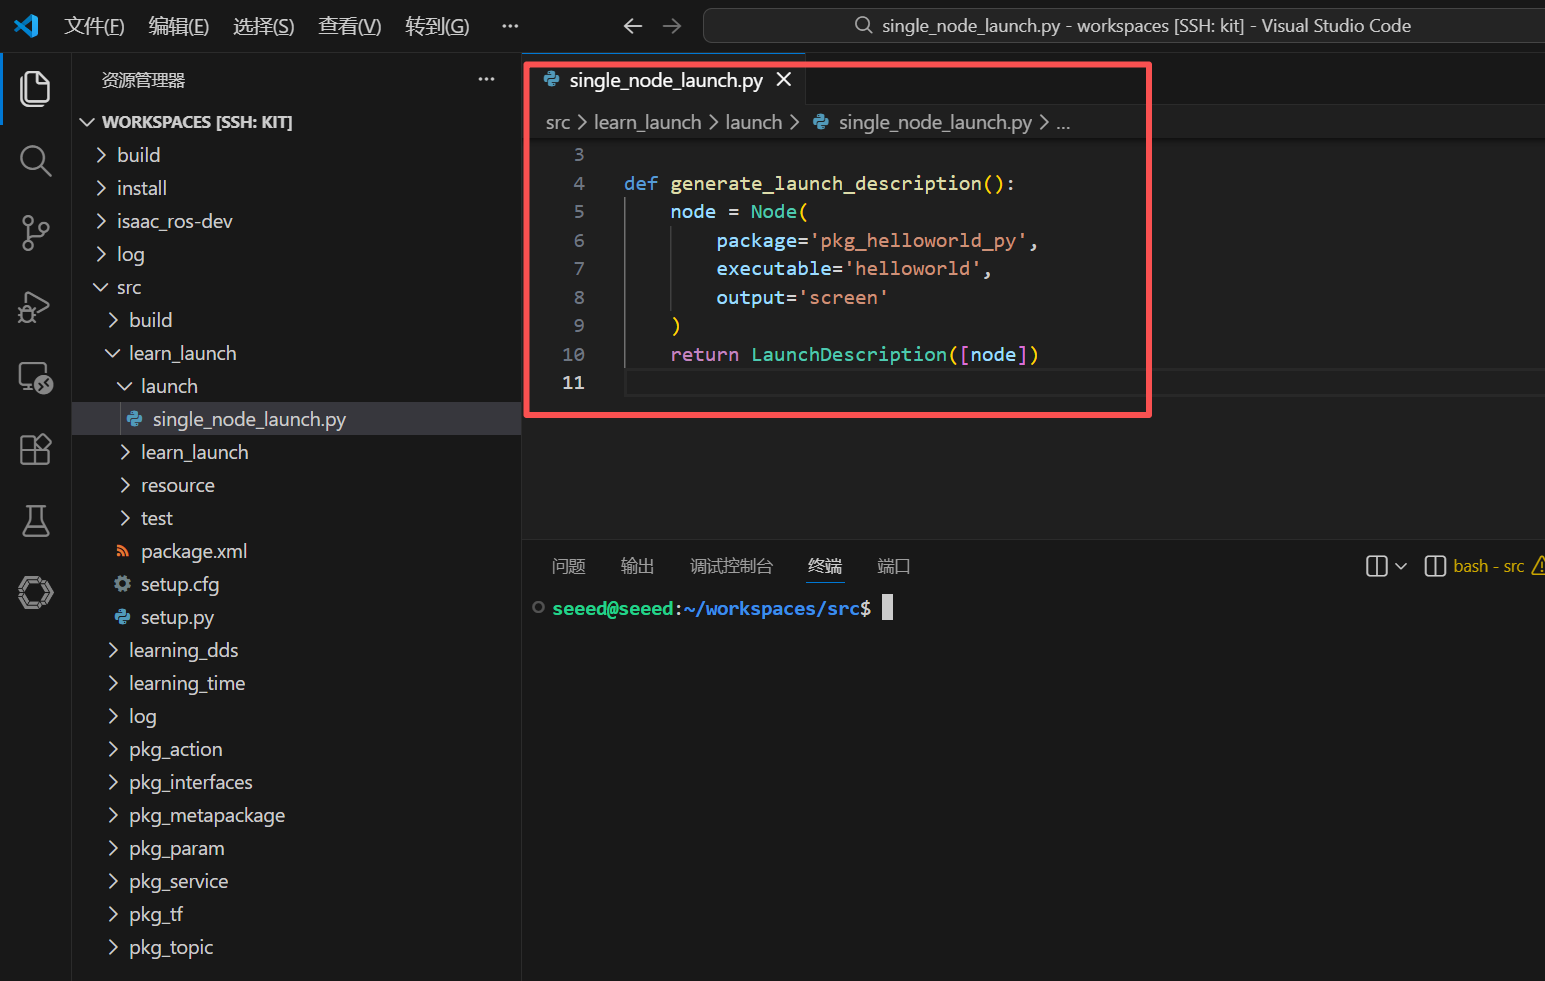
Creates a new lanch folder under the functional package, then creates a new single node launch.py file in the launch folder to copy the following:
from launch import LaunchDescription
from launch_ros.actions import Node

def generate_launch_description():
  node = Node(
  package='pkg_helloworld_py',
  executable='helloworld',
  output='screen'
  )
  return LaunchDescription([node])
20.2.3 Configuration setup.py files
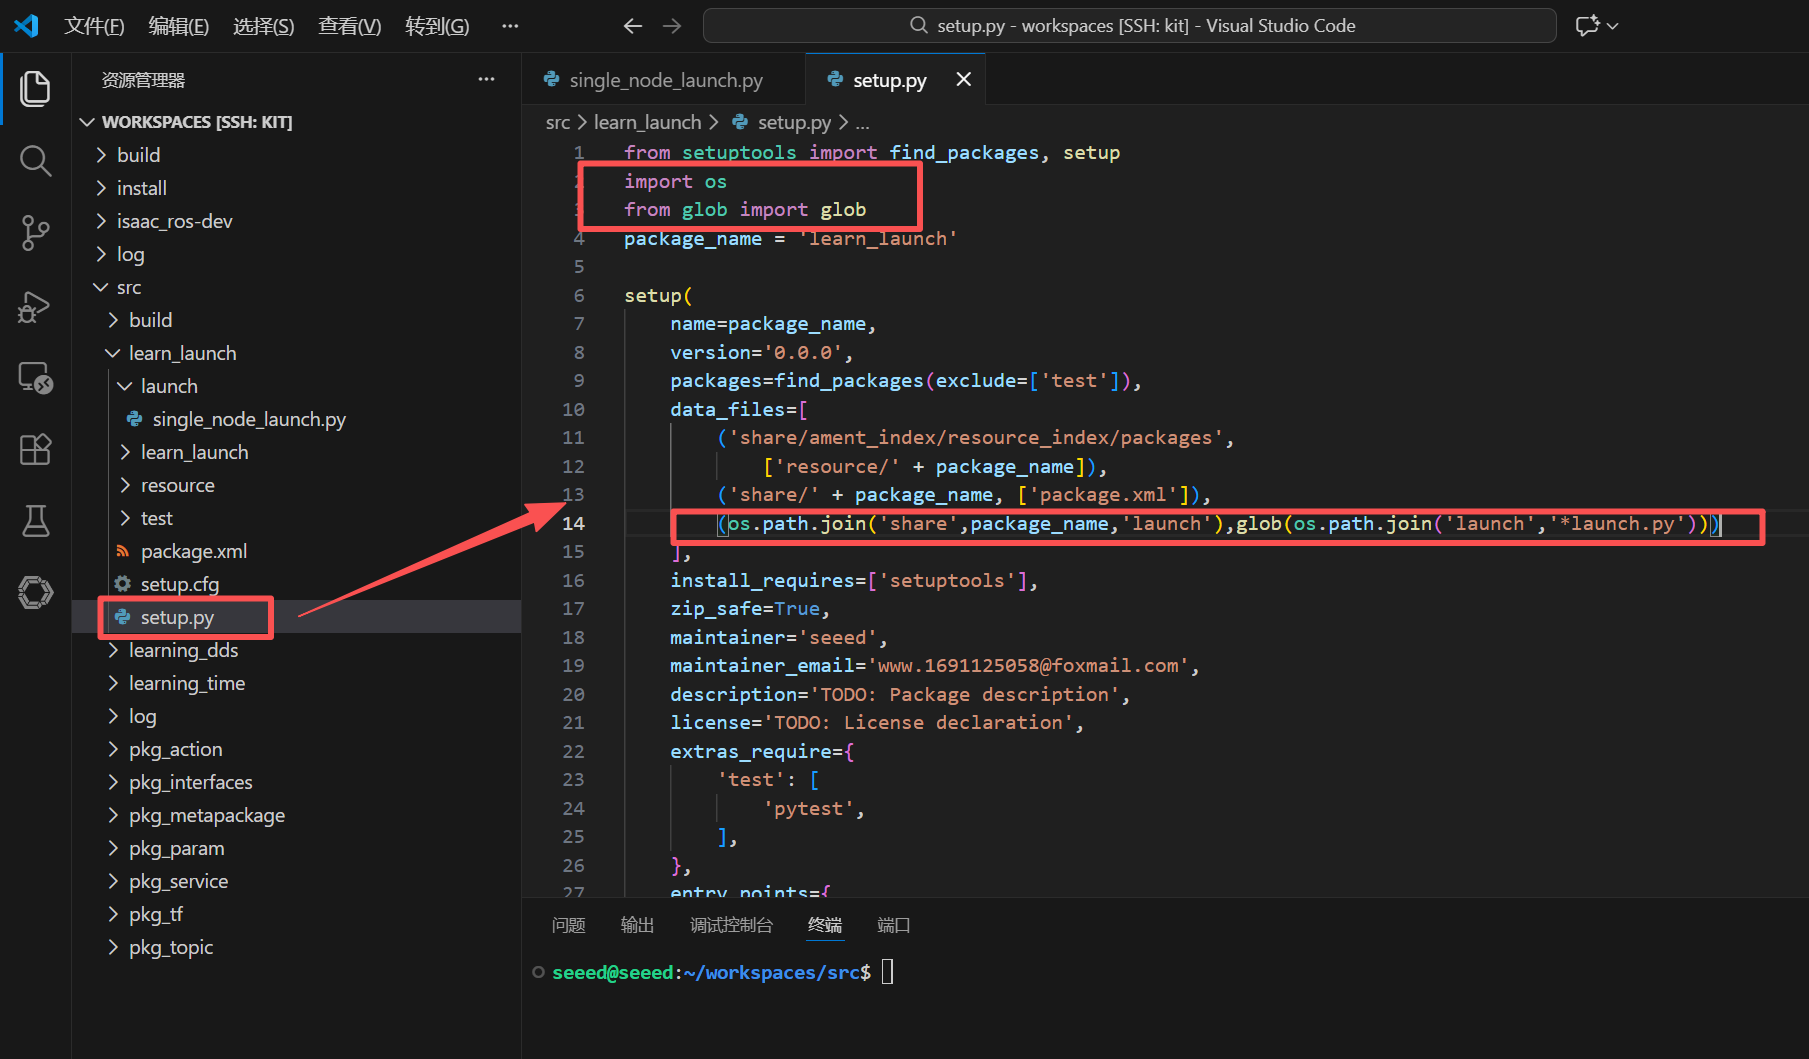
The launch file is often named after LaunchName launch.py, where LaunchName is customised and launch.py is often considered fixed. You need to modify the setup.py file under the functional package to add the document under the launch path so that you can compile the .py file for execution
# 1. Import the required header files
import os
from glob import glob

# 2. Add the `launch` path and its `launch.py` file to the `data_files` list
(os.path.join('share',package_name,'launch'),glob(os.path.join('launch','*launch.py')))
20.2.4 Compiler functional kit
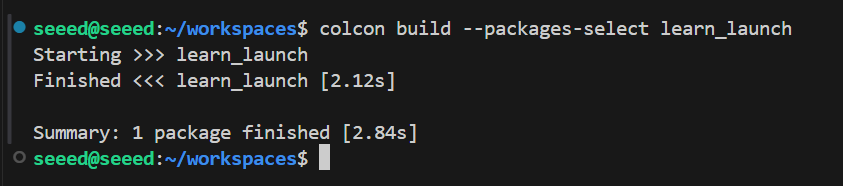
cd ~/workspaces
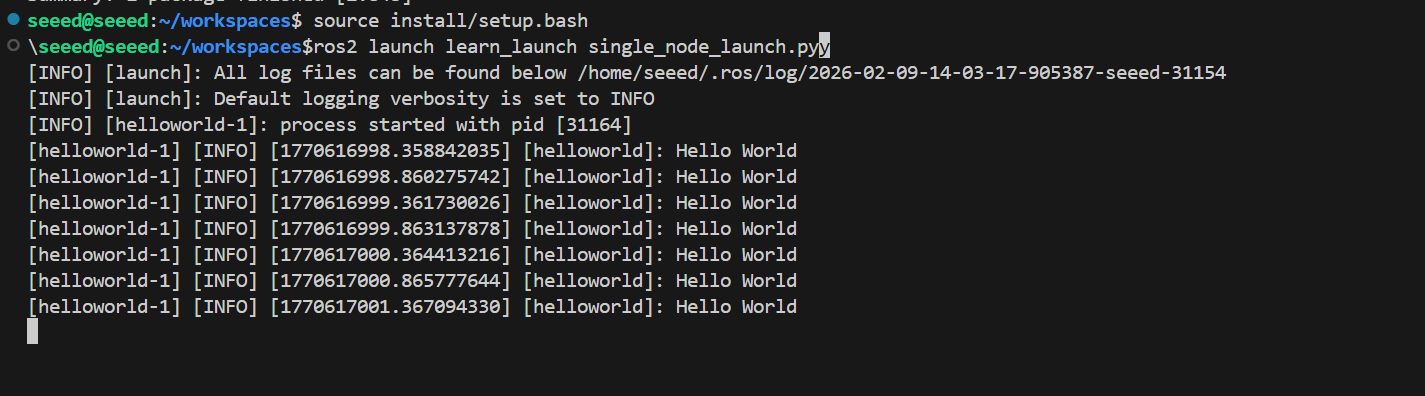
colcon build --packages-select learn_launch20.2.5 Operational procedures
# Refresh environment variables
source install/setup.bash
ros2 launch learn_launch single_node_launch.py
20.2.6 Source analysis
Import Related Library
from launch import LaunchDescription
from launch_ros.actions import Node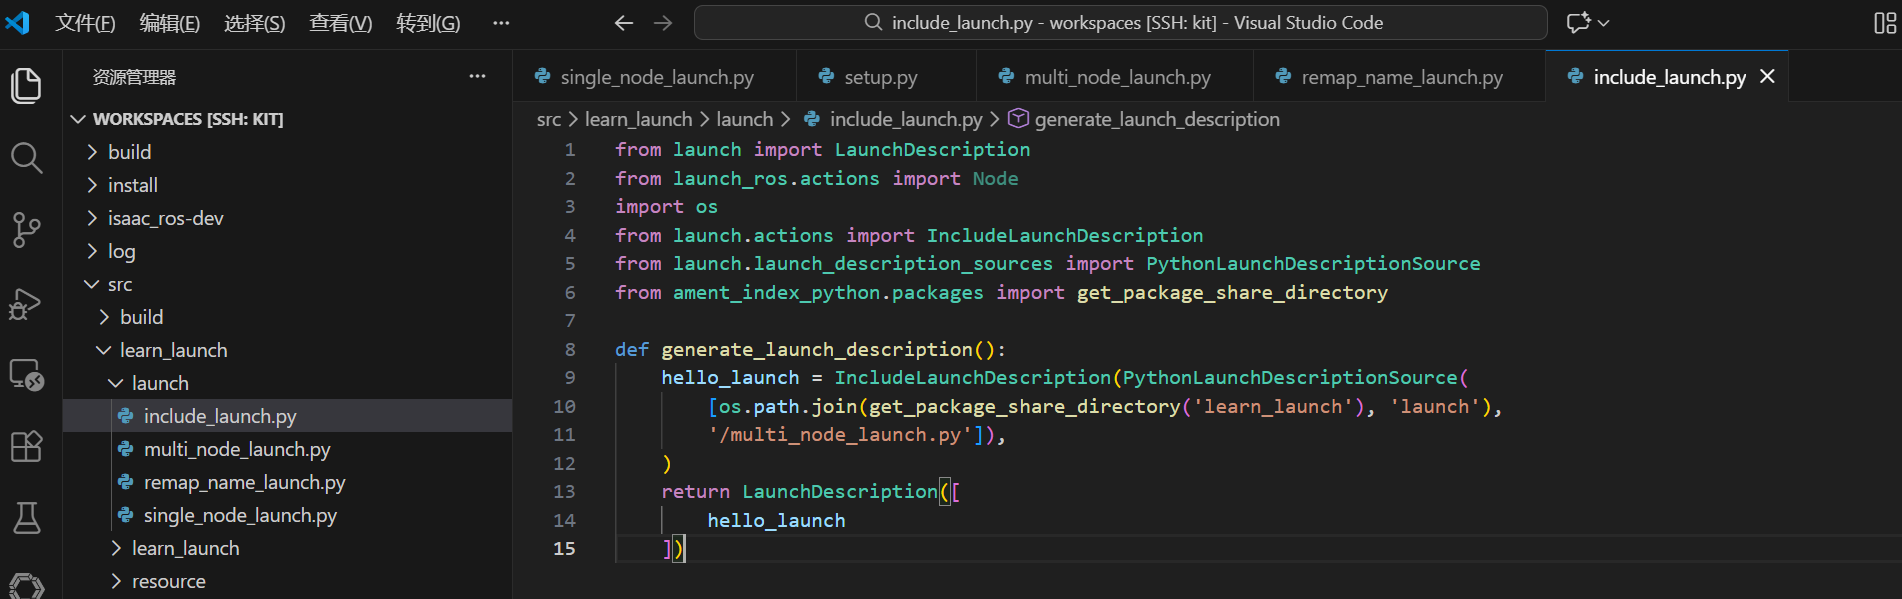
Defines a function generate launch description and returns a launch description
def generate_launch_description():
  node = Node(
  package='pkg_helloworld_py',
  executable='helloworld',
  )
  return LaunchDescription([node])
Defines the return value that a variable Node starts as a node, calls the Node function and starts two important parameters, type and exitable.
Package: indicates the functional package, representing the name of the functional package.
Executable: indicates the procedure performed, the name of the enforceable procedure.
The last call to the LaunchDescription function is to enter the node parameter to execute the return.
return LaunchDescription([node])20.3 lanch of multiple Node nodes
20.3.1 New lanch file
New multi node launch.py file, add the following:
from launch import LaunchDescription
from launch_ros.actions import Node

def generate_launch_description():
  publisher_node = Node(
  package='pkg_topic',
  executable='publisher_demo',
  output='screen'
  )
  subscriber_node = Node(
  package='pkg_topic',
  executable='subscriber_demo',
  output='screen'
  )
  return LaunchDescription([
  publisher_node,
  subscriber_node
  ])
20.3.2 Compiler functional kit
colcon build --packages-select learn_launch20.3.3 Operational procedures
# Refresh environment variables
source install/setup.bash
ros2 launch learn_launch multi_node_launch.py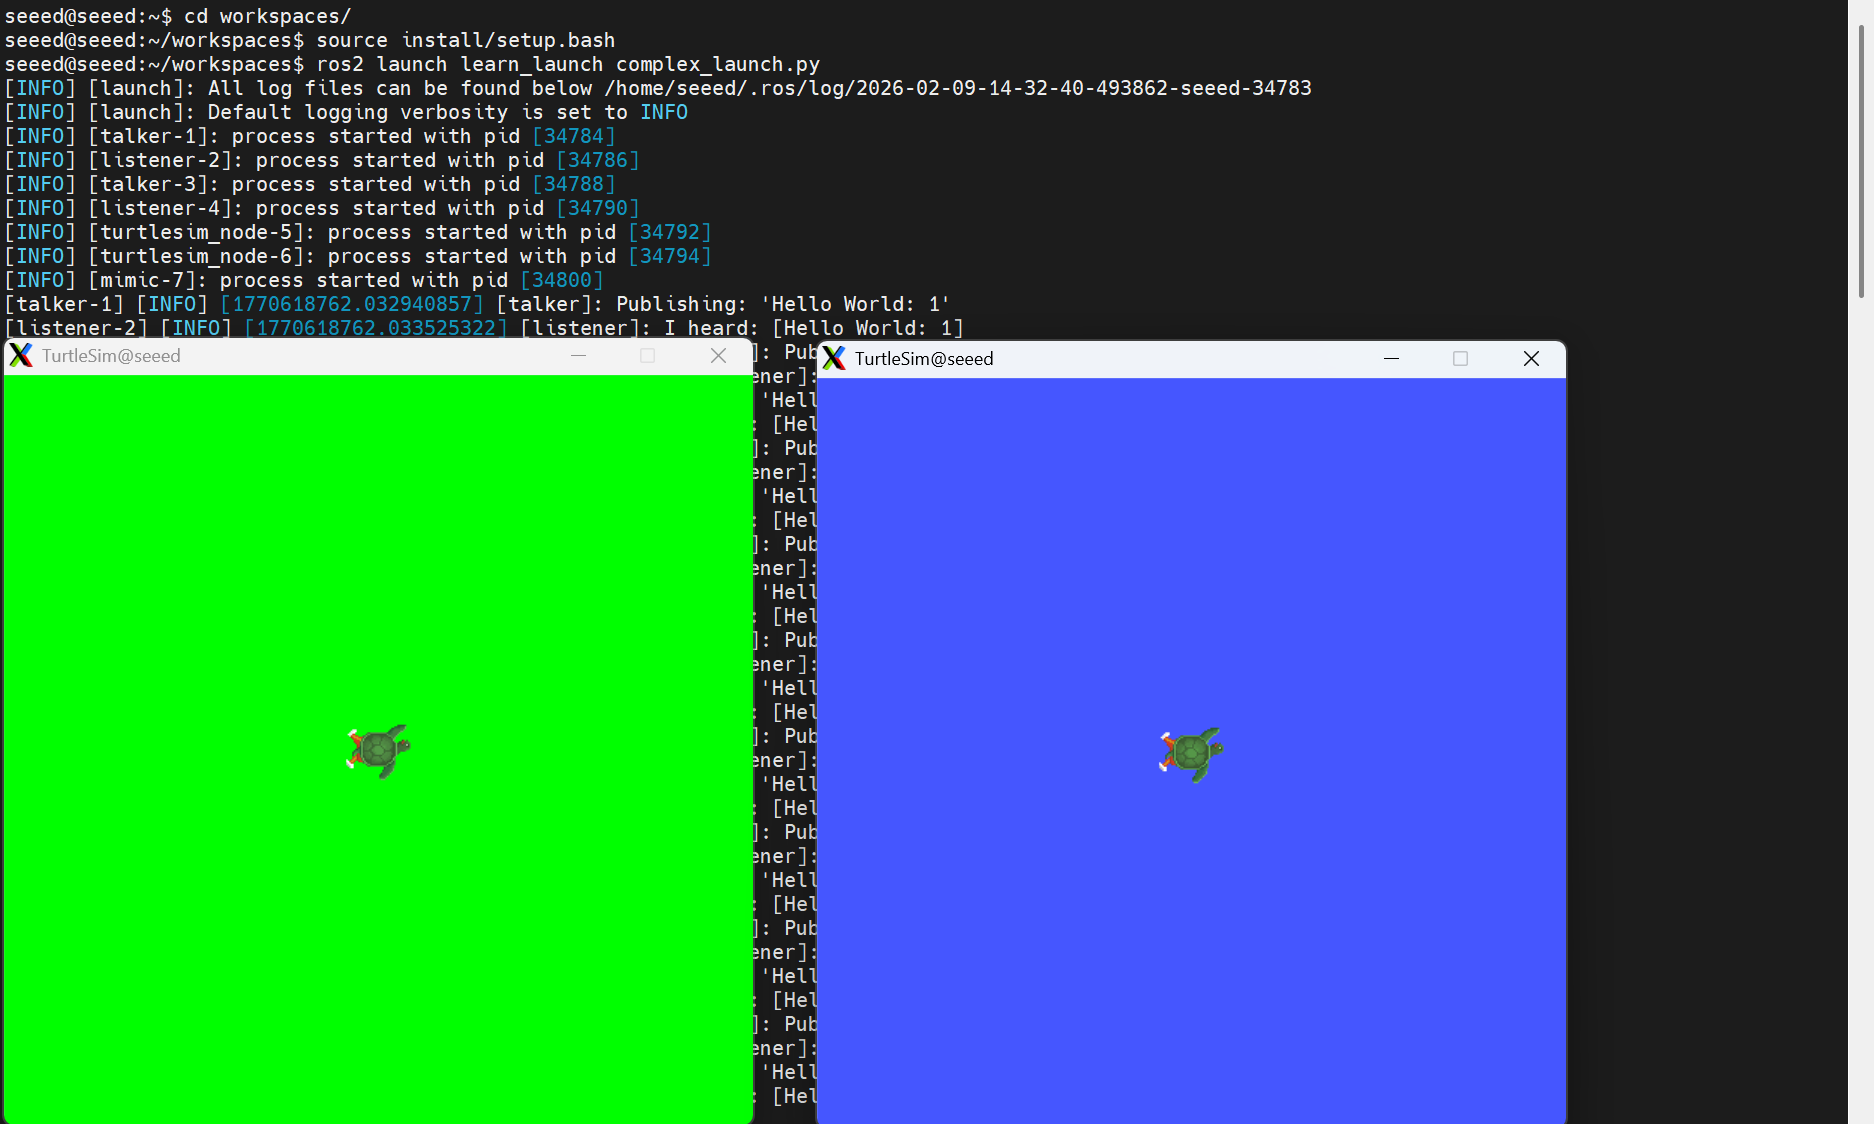
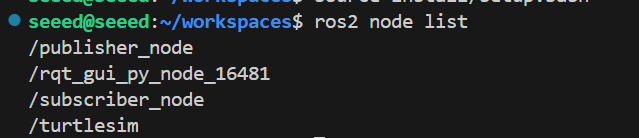
If the terminal does not print the contents, you can see which nodes are activated to verify whether the startup has been successful.

ros2 node list20.3.4 Source resolution
It's like simple node launch.py, just another node!
20.4 Topical re-mapping cases
20.4.1 New launch file
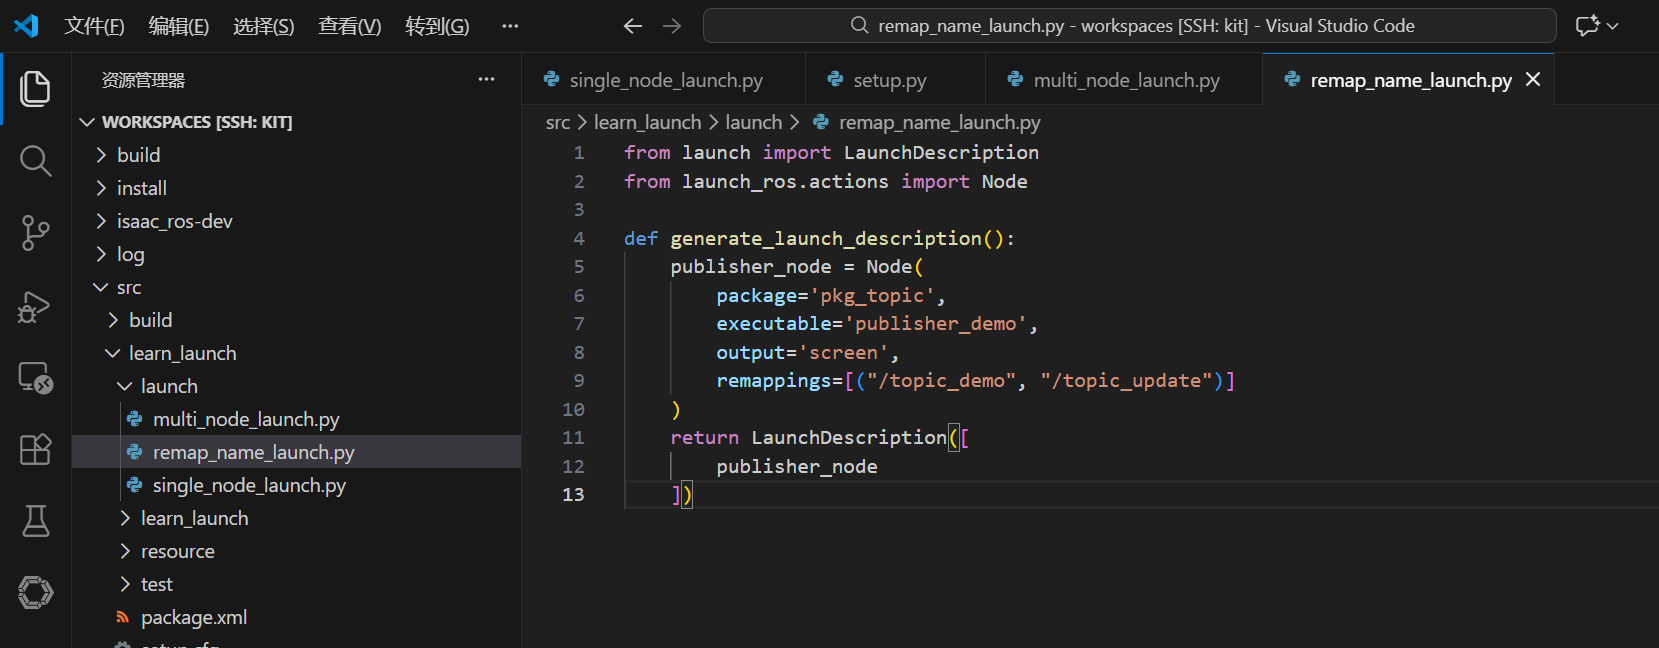
Create a new remap name launch.py file under the multi node launch.py directory, adding the following:
from launch import LaunchDescription
from launch_ros.actions import Node
def generate_launch_description():
publisher_node = Node(
package='pkg_topic',
executable='publisher_demo',
output='screen',
remappings=[("/topic_demo", "/topic_update")]
)
return LaunchDescription([
publisher_node
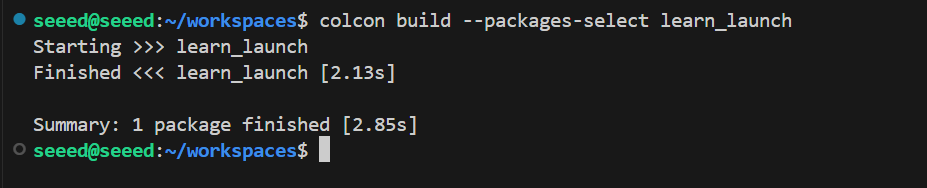
])20.4.2 Compiler functional kit
colcon build --packages-select learn_launch20.4.3 Operational procedures
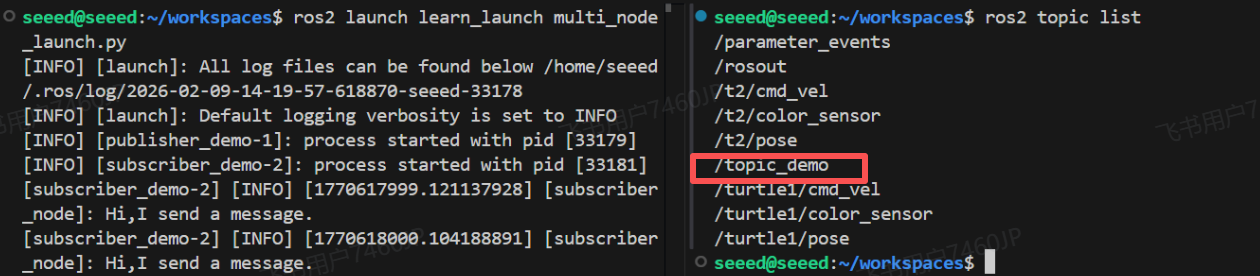
Let's see what the publicsher demo nodes are saying before they re-map the topic:
# ros2 launch learn_launch multi_node_launch.py
ros2 topic list
Here's the topic: /topic_demo.
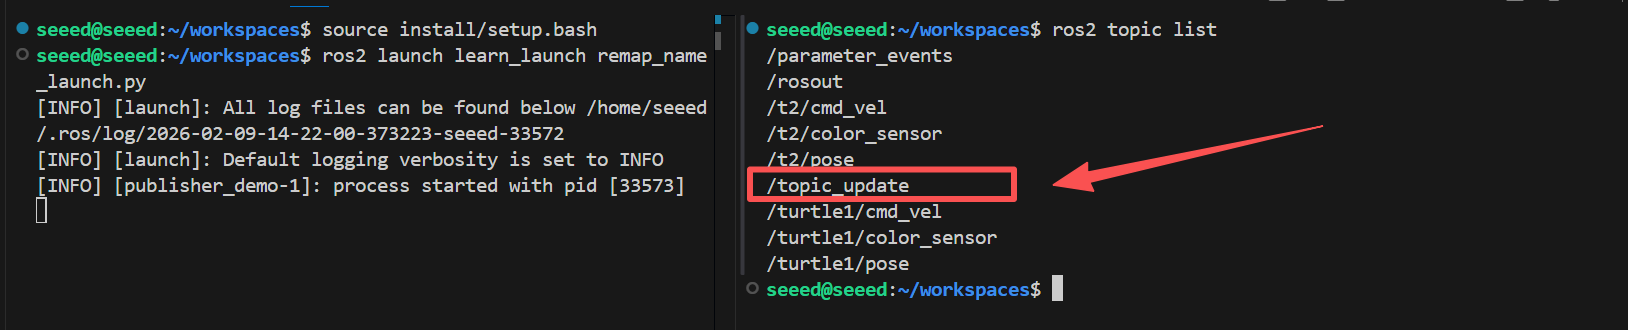
# Refresh the environment variables and run the remapped-topic program to observe the changes:
source install/setup.bash
ros2 launch learn_launch remap_name_launch.py
ros2 topic list
Re-map the subject name /topic_update
20.4.4 Source analysis
In particular, the following sections have been added:
remappings=[("/topic_demo", "/topic_update")]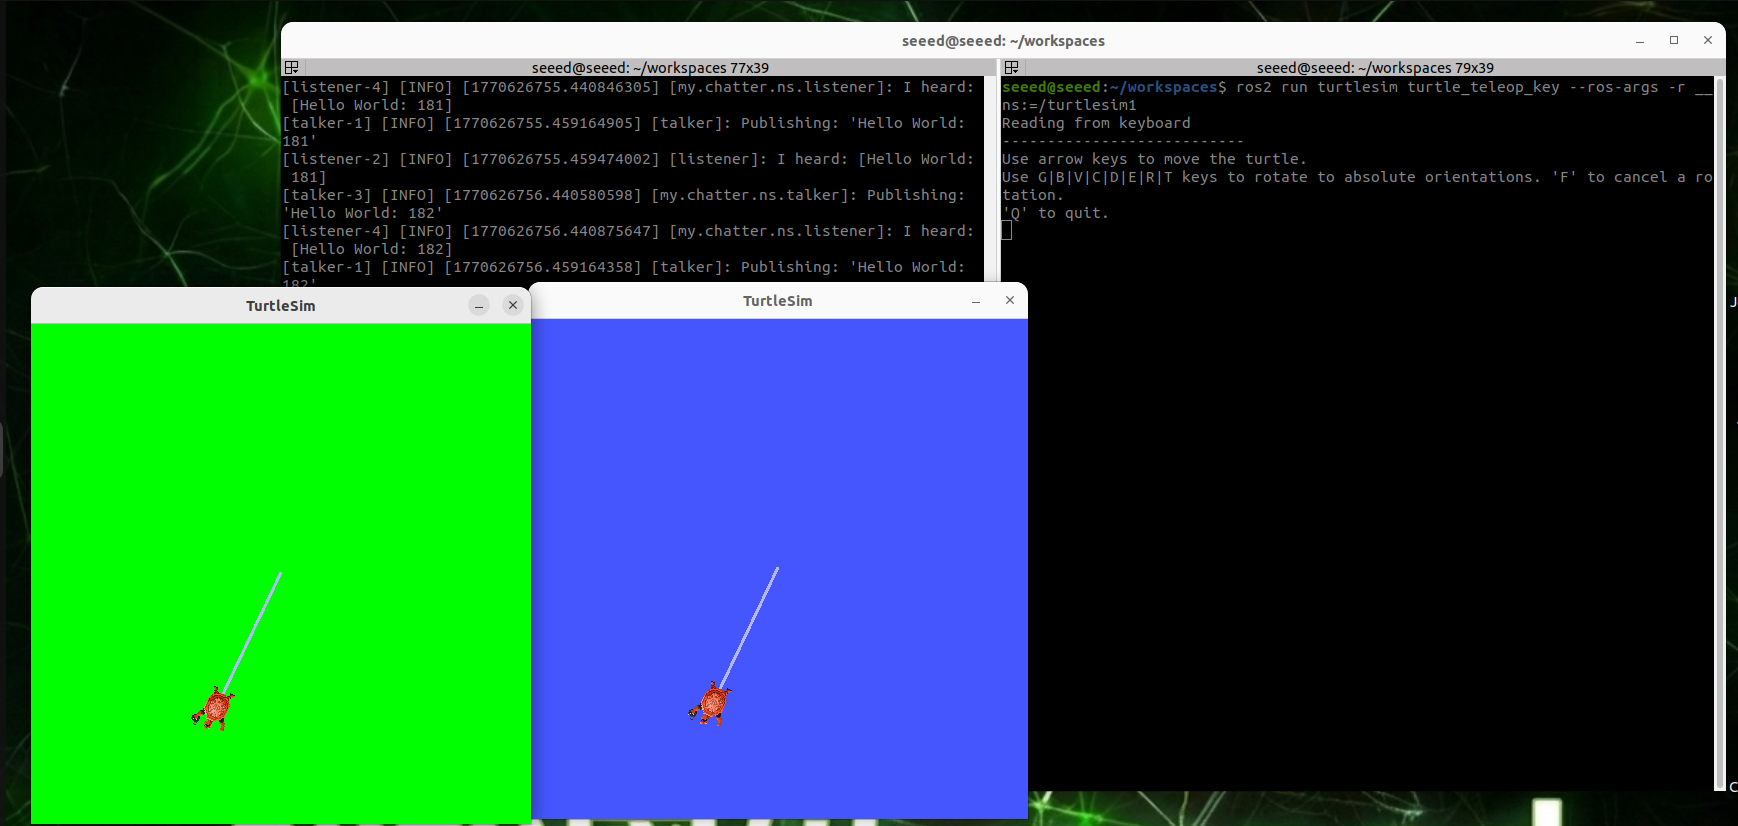
Here's to remix the original XIAITOKEN0 topic into /topic_update.
20.5 Launch File Embedding Starts another launch file
20.5.1 New launch file
New include launch.py under multi-de launch.py directory, add the following:
from launch import LaunchDescription
from launch_ros.actions import Node
import os
from launch.actions import IncludeLaunchDescription
from launch.launch_description_sources import PythonLaunchDescriptionSource
from ament_index_python.packages import get_package_share_directory

def generate_launch_description():
  hello_launch = IncludeLaunchDescription(PythonLaunchDescriptionSource(
  [os.path.join(get_package_share_directory('learn_launch'), 'launch'),
  '/multi_node_launch.py']),
  )
  return LaunchDescription([
  hello_launch
  ])
20.5.2 Compiler functional kit
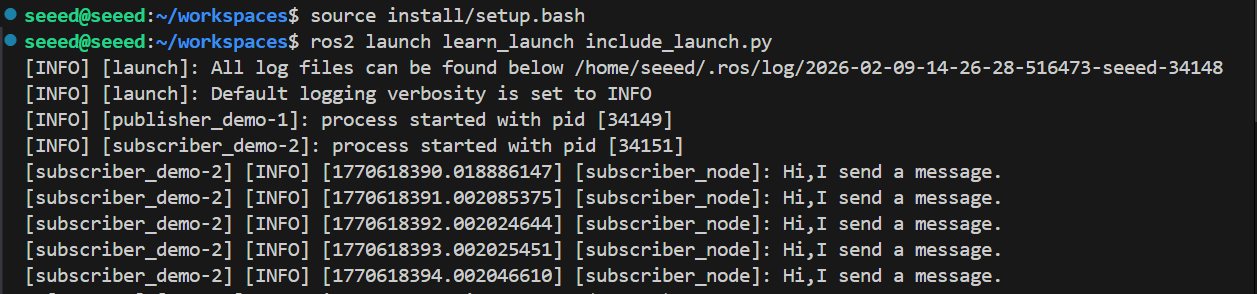
colcon build --packages-select learn_launch20.5.3 Operational procedures

# Refresh environment variables
source install/setup.bash
ros2 launch learn_launch include_launch.py
20.5.4 Source analysis
Embedding the launch file requires the use of the lunch system's IncludeLaunchDescription and PythonLaunchDescriptionsource categories
os.path.join (get package share directory('learn launch'): take the position of the functional package, where the name of the functional package is Learn launch;
(a) launch': means a folder containing launch files under a functional kit;
/multi_node_launch.py': denotes a /multi_node_launch.py file under the launch folder.
20.6 Examples of composite launch documents
This demo mainly shows how complex lanch files are prepared, and the functionality of the program is negligible.
20.6.1 New launch file
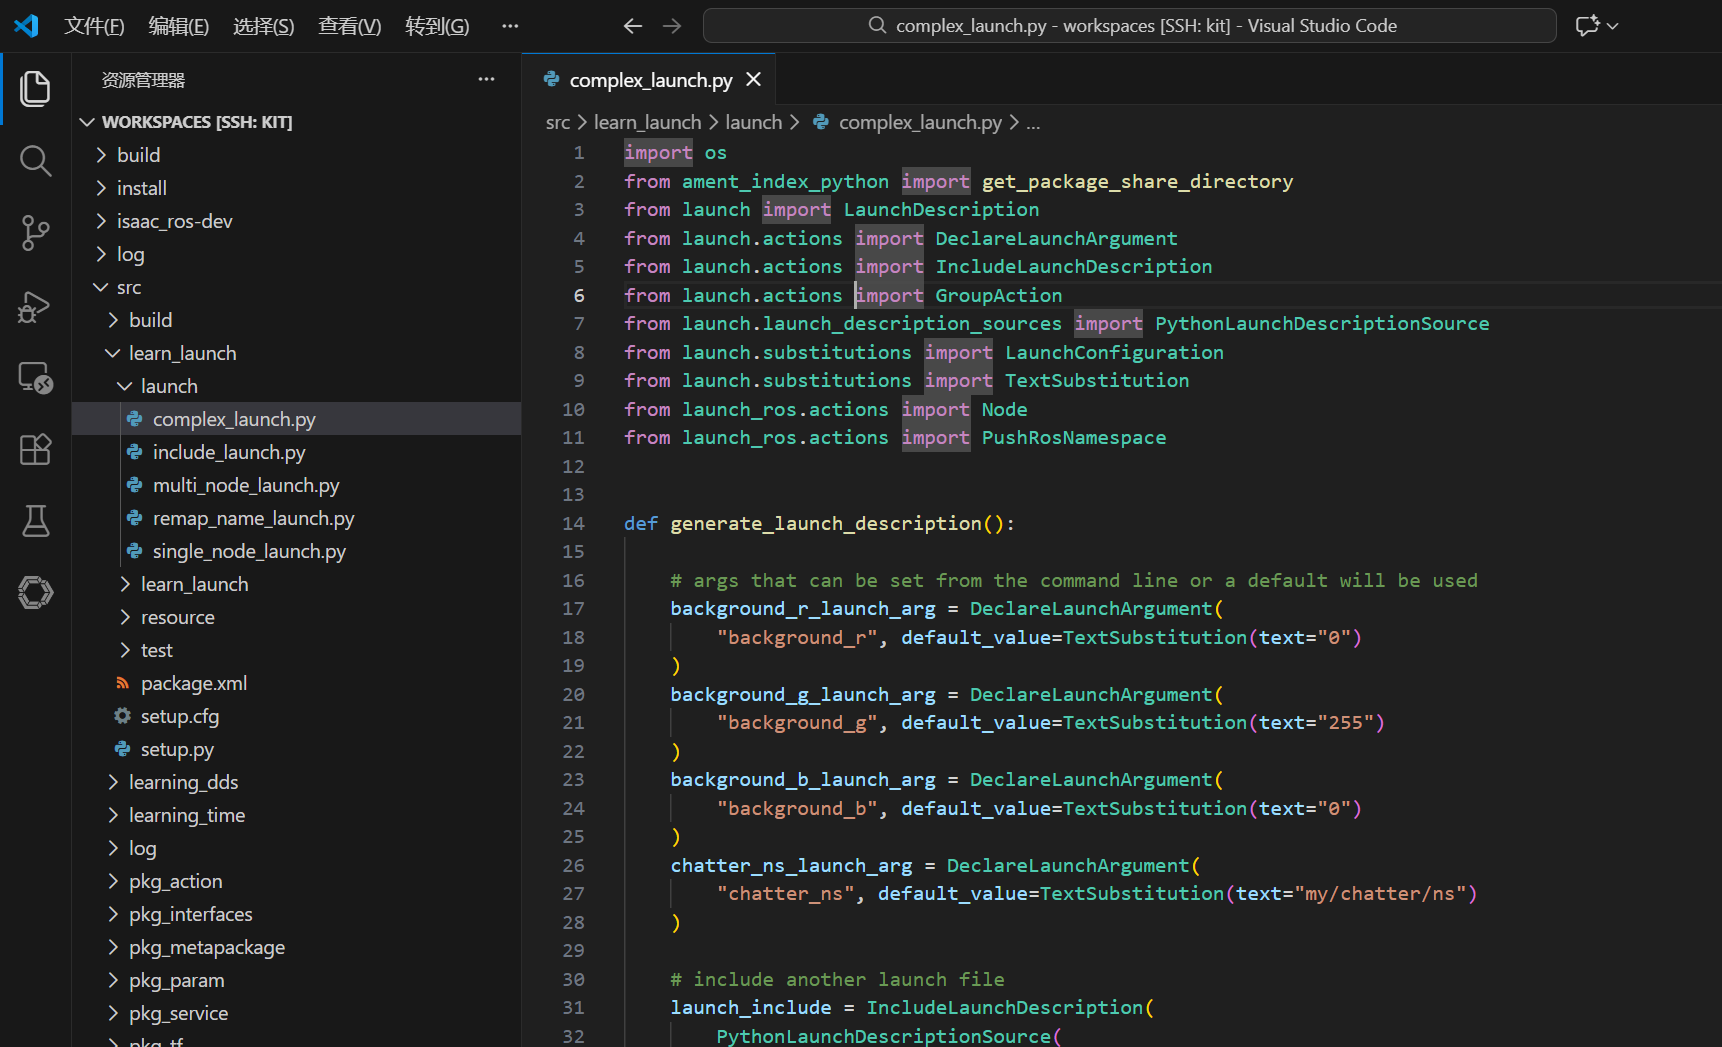
Create a new complex launch.py file under the multi node launch.py directory, adding the following:
# complex_launch.py
import os
from ament_index_python import get_package_share_directory
from launch import LaunchDescription
from launch.actions import DeclareLaunchArgument
from launch.actions import IncludeLaunchDescription
from launch.actions import GroupAction
from launch.launch_description_sources import PythonLaunchDescriptionSource
from launch.substitutions import LaunchConfiguration
from launch.substitutions import TextSubstitution
from launch_ros.actions import Node
from launch_ros.actions import PushRosNamespace
def generate_launch_description():
# args that can be set from the command line or a default will be used
background_r_launch_arg = DeclareLaunchArgument(
"background_r", default_value=TextSubstitution(text="0")
)
background_g_launch_arg = DeclareLaunchArgument(
"background_g", default_value=TextSubstitution(text="255")
)
background_b_launch_arg = DeclareLaunchArgument(
"background_b", default_value=TextSubstitution(text="0")
)
chatter_ns_launch_arg = DeclareLaunchArgument(
"chatter_ns", default_value=TextSubstitution(text="my/chatter/ns")
)
# include another launch file
launch_include = IncludeLaunchDescription(
PythonLaunchDescriptionSource(
os.path.join(
get_package_share_directory('demo_nodes_cpp'),
'launch/topics/talker_listener.launch.py'))
)
# include another launch file in the chatter_ns namespace
launch_include_with_namespace = GroupAction(
actions=[
# push-ros-namespace to set namespace of included nodes
PushRosNamespace(LaunchConfiguration('chatter_ns')),
IncludeLaunchDescription(
PythonLaunchDescriptionSource(
os.path.join(
get_package_share_directory('demo_nodes_cpp'),
'launch/topics/talker_listener.launch.py'))
),
]
)
# start a turtlesim_node in the turtlesim1 namespace
turtlesim_node = Node(
package='turtlesim',
namespace='turtlesim1',
executable='turtlesim_node',
name='sim'
)
# start another turtlesim_node in the turtlesim2 namespace
# and use args to set parameters
turtlesim_node_with_parameters = Node(
package='turtlesim',
namespace='turtlesim2',
executable='turtlesim_node',
name='sim',
parameters=[{
"background_r": LaunchConfiguration('background_r'),
"background_g": LaunchConfiguration('background_g'),
"background_b": LaunchConfiguration('background_b'),
}]
)
# perform remap so both turtles listen to the same command topic
forward_turtlesim_commands_to_second_turtlesim_node = Node(
package='turtlesim',
executable='mimic',
name='mimic',
remappings=[
('/input/pose', '/turtlesim1/turtle1/pose'),
('/output/cmd_vel', '/turtlesim2/turtle1/cmd_vel'),
]
)
return LaunchDescription([
background_r_launch_arg,
background_g_launch_arg,
background_b_launch_arg,
chatter_ns_launch_arg,
launch_include,
launch_include_with_namespace,
turtlesim_node,
turtlesim_node_with_parameters,
forward_turtlesim_commands_to_second_turtlesim_node,
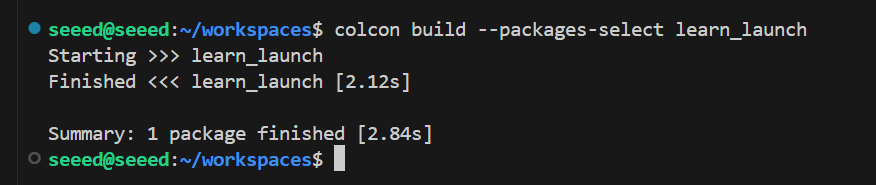
])20.6.2 Compilation workspace
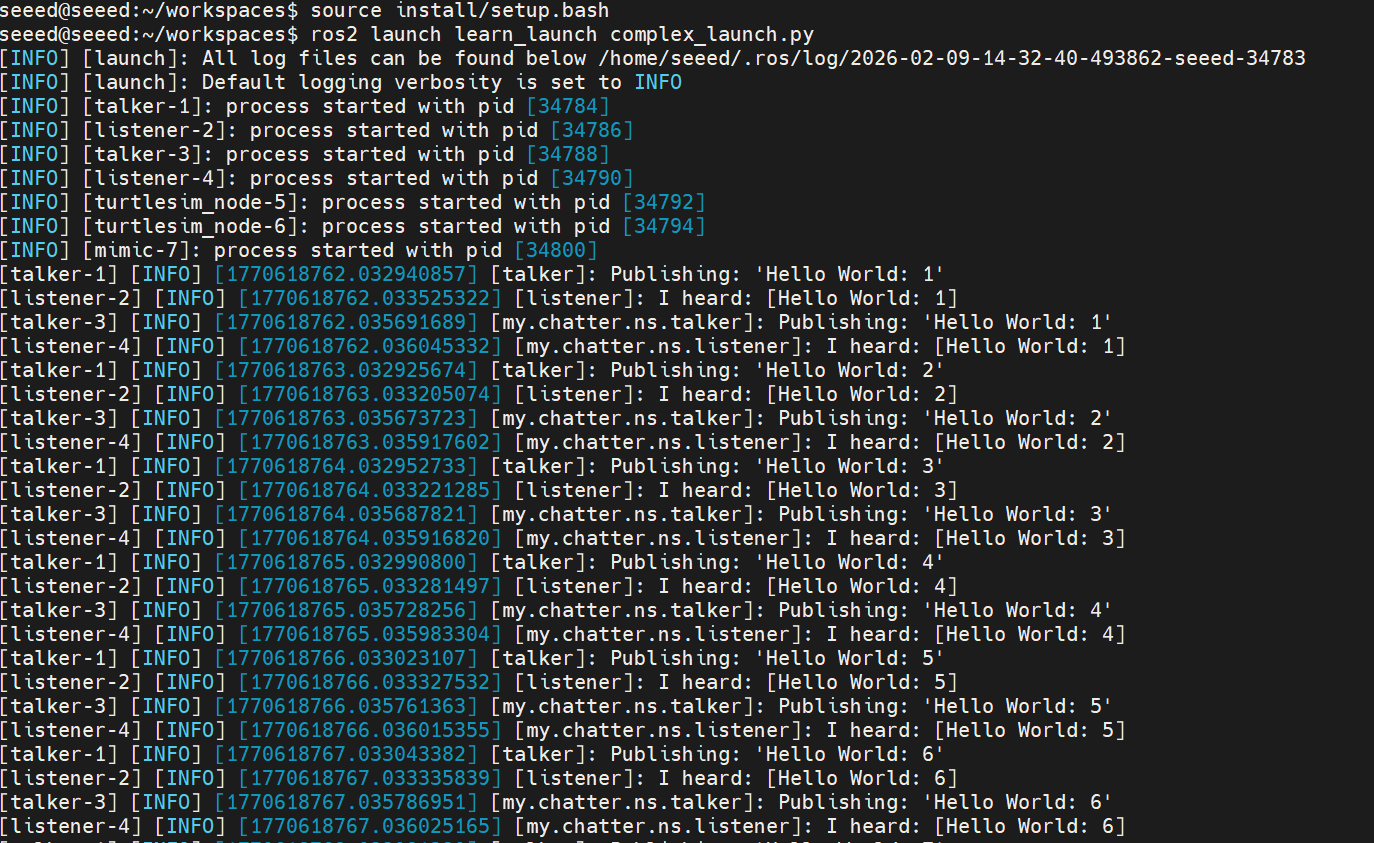
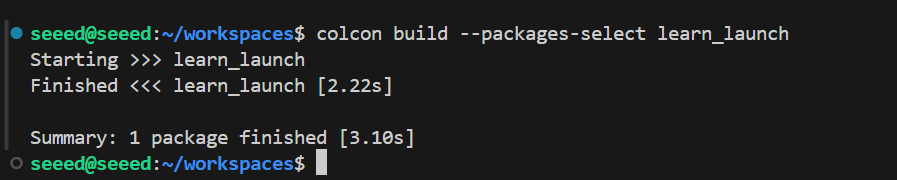
colcon build --packages-select learn_launch20.6.3 Operational procedures
# source install/setup.bash
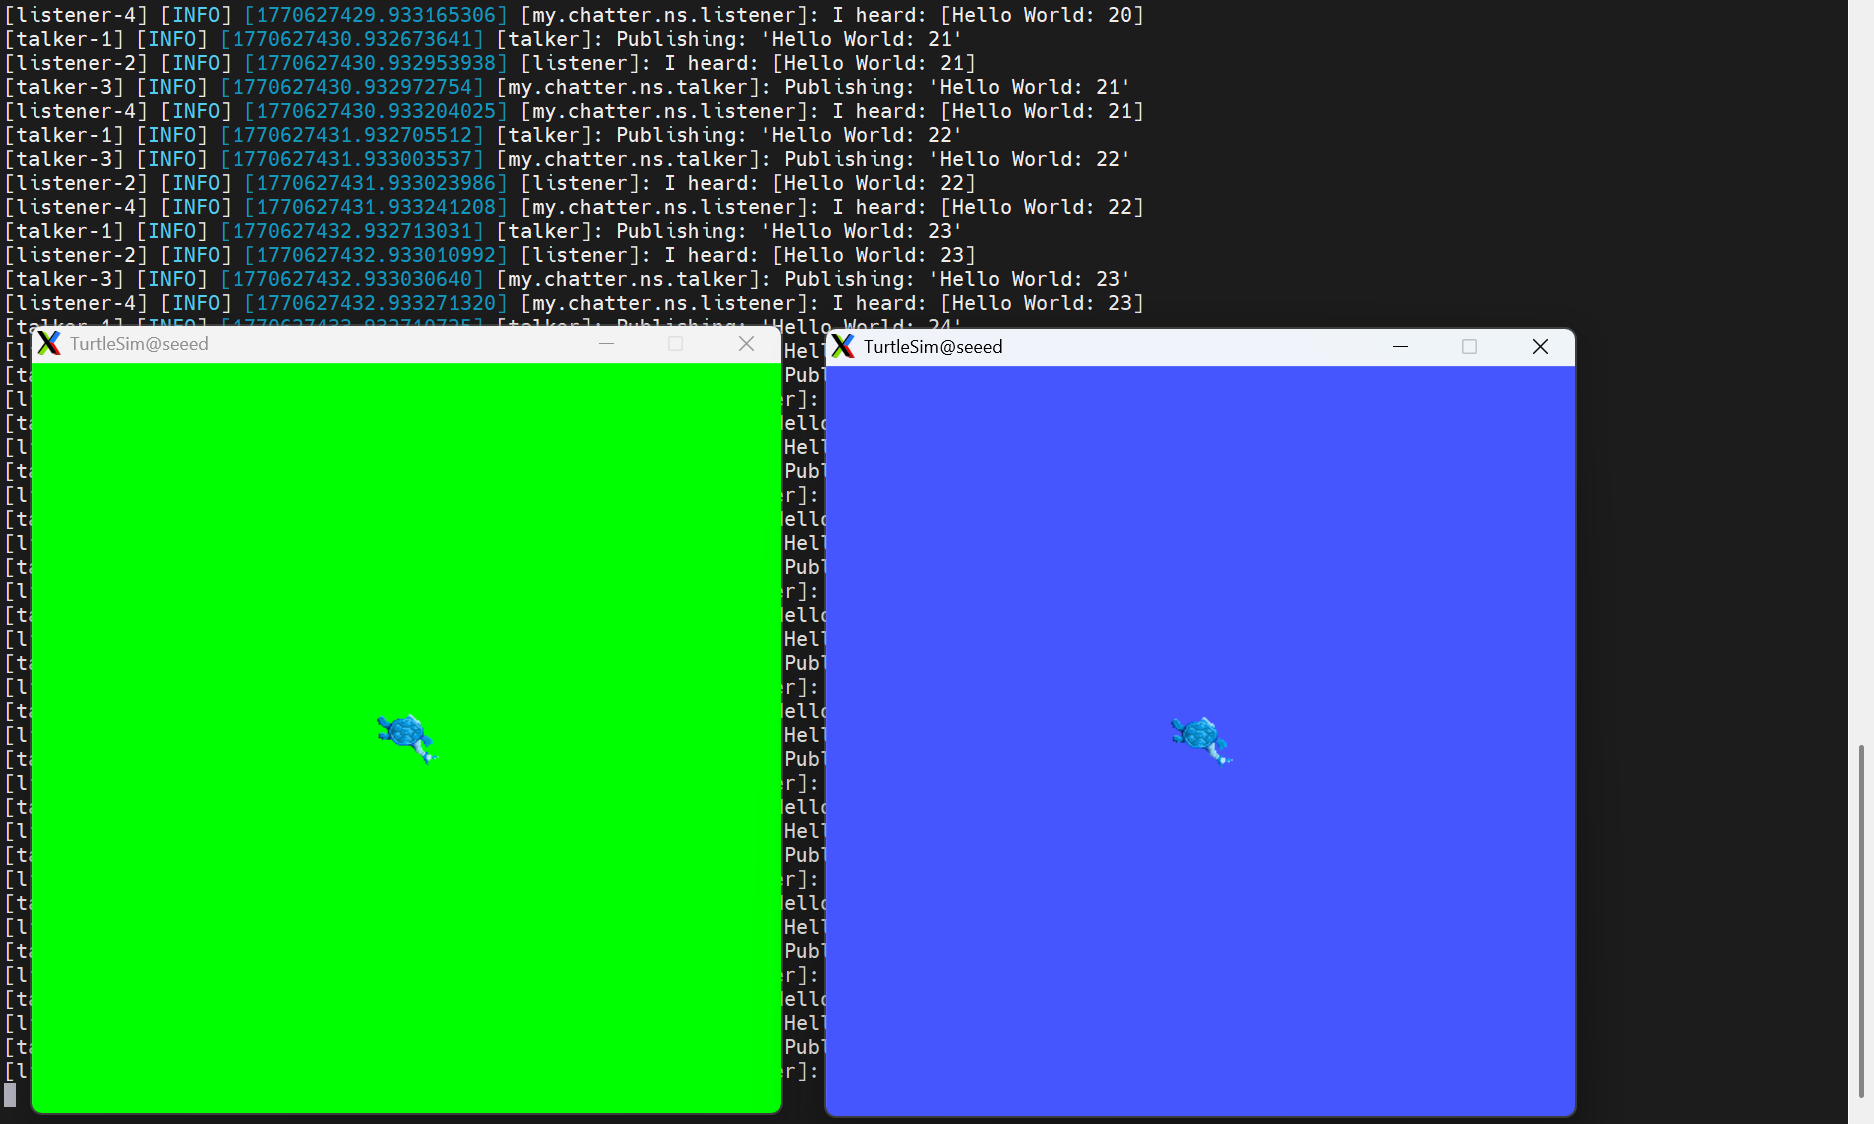
ros2 launch learn_launch complex_launch.pyTwo turtles will be shown on Jetson.
Start keyboard control node and add naming space (because we added naming space when starting node in launch files)
ros2 run turtlesim turtle_teleop_key --ros-args -r __ns:=/turtlesim1Use the right and left buttons to control turtle 1 movement. Sea turtle 2 is a perfect copy of turtle 1.
20.6.4 Description of the procedure
The process consisted mainly of initiation:
One, demo nodes cpp talker lister,
- Talker lister node with namespace
Three, turtlesim1 is a little turtle in a named space.
4 and Turtlesim2 are named spaces for turtles2
Five, remagnify so that both turtles can hear the same command theme.
20.7 xml achieved
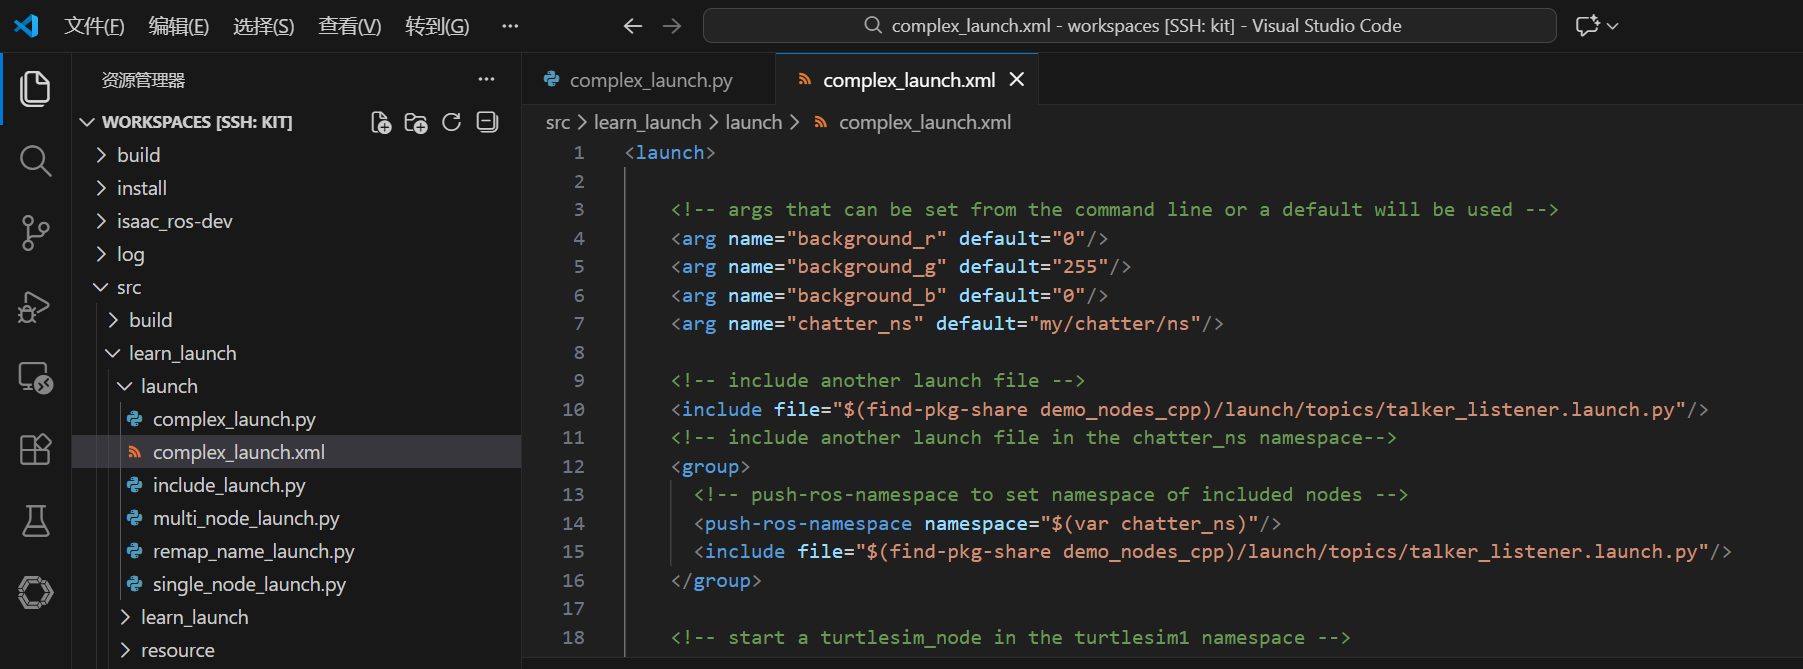
20.7.1 New launch file
New Complex Launch.py file under the directory of complex launch.xml, add the following:
<launch>
<!-- args that can be set from the command line or a default will be used -->
<arg name="background_r" default="0"/>
<arg name="background_g" default="255"/>
<arg name="background_b" default="0"/>
<arg name="chatter_ns" default="my/chatter/ns"/>
<!-- include another launch file -->
<include file="$(find-pkg-share demo_nodes_cpp)/launch/topics/talker_listener.launch.py"/>
<!-- include another launch file in the chatter_ns namespace-->
<group>
<!-- push-ros-namespace to set namespace of included nodes -->
<push-ros-namespace namespace="$(var chatter_ns)"/>
<include file="$(find-pkg-share demo_nodes_cpp)/launch/topics/talker_listener.launch.py"/>
</group>
<!-- start a turtlesim_node in the turtlesim1 namespace -->
<node pkg="turtlesim" exec="turtlesim_node" name="sim" namespace="turtlesim1"/>
<!-- start another turtlesim_node in the turtlesim2 namespace
and use args to set parameters -->
<node pkg="turtlesim" exec="turtlesim_node" name="sim" namespace="turtlesim2">
<param name="background_r" value="$(var background_r)"/>
<param name="background_g" value="$(var background_g)"/>
<param name="background_b" value="$(var background_b)"/>
</node>
<!-- perform remap so both turtles listen to the same command topic -->
<node pkg="turtlesim" exec="mimic" name="mimic">
<remap from="/input/pose" to="/turtlesim1/turtle1/pose"/>
<remap from="/output/cmd_vel" to="/turtlesim2/turtle1/cmd_vel"/>
</node>
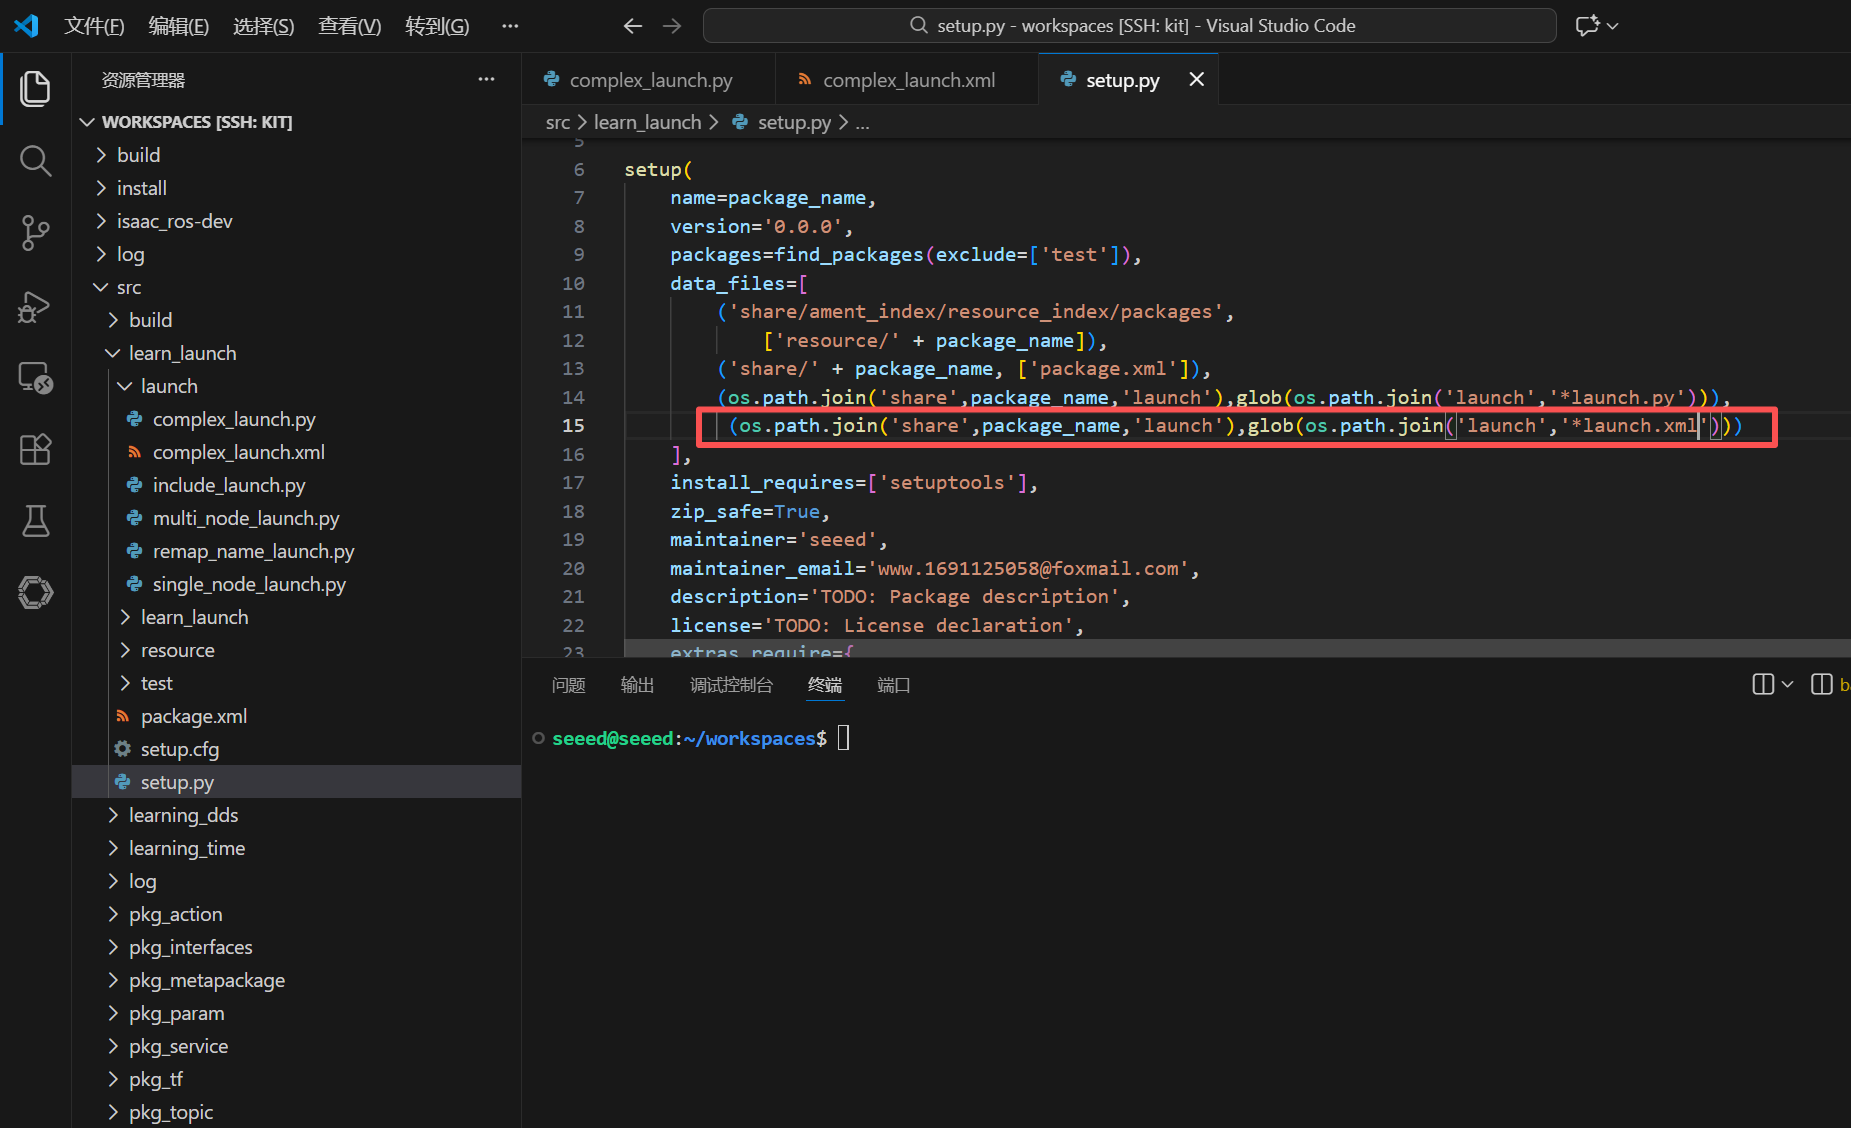
</launch>20.7.2 setup.py file configuration
The system needs to configure the compiled file and copy our .xml lanch files to the install installation directory to find our files
(os.path.join('share',package_name,'launch'),glob(os.path.join('launch','*launch.xml'))),20.7.3 Compiler functional kit
cd ~/workspaces
colcon build --packages-select learn_launch
20.7.4 Operational procedures
# ros2 launch learn_launch complex_launch.xmlTwo little turtles are expected, and the terminal prints log information.
Start keyboard control node and add namespace
ros2 run turtlesim turtle_teleop_key --ros-args -r __ns:=/turtlesim120.8 Yaml achieved
20.8.1 New launch file
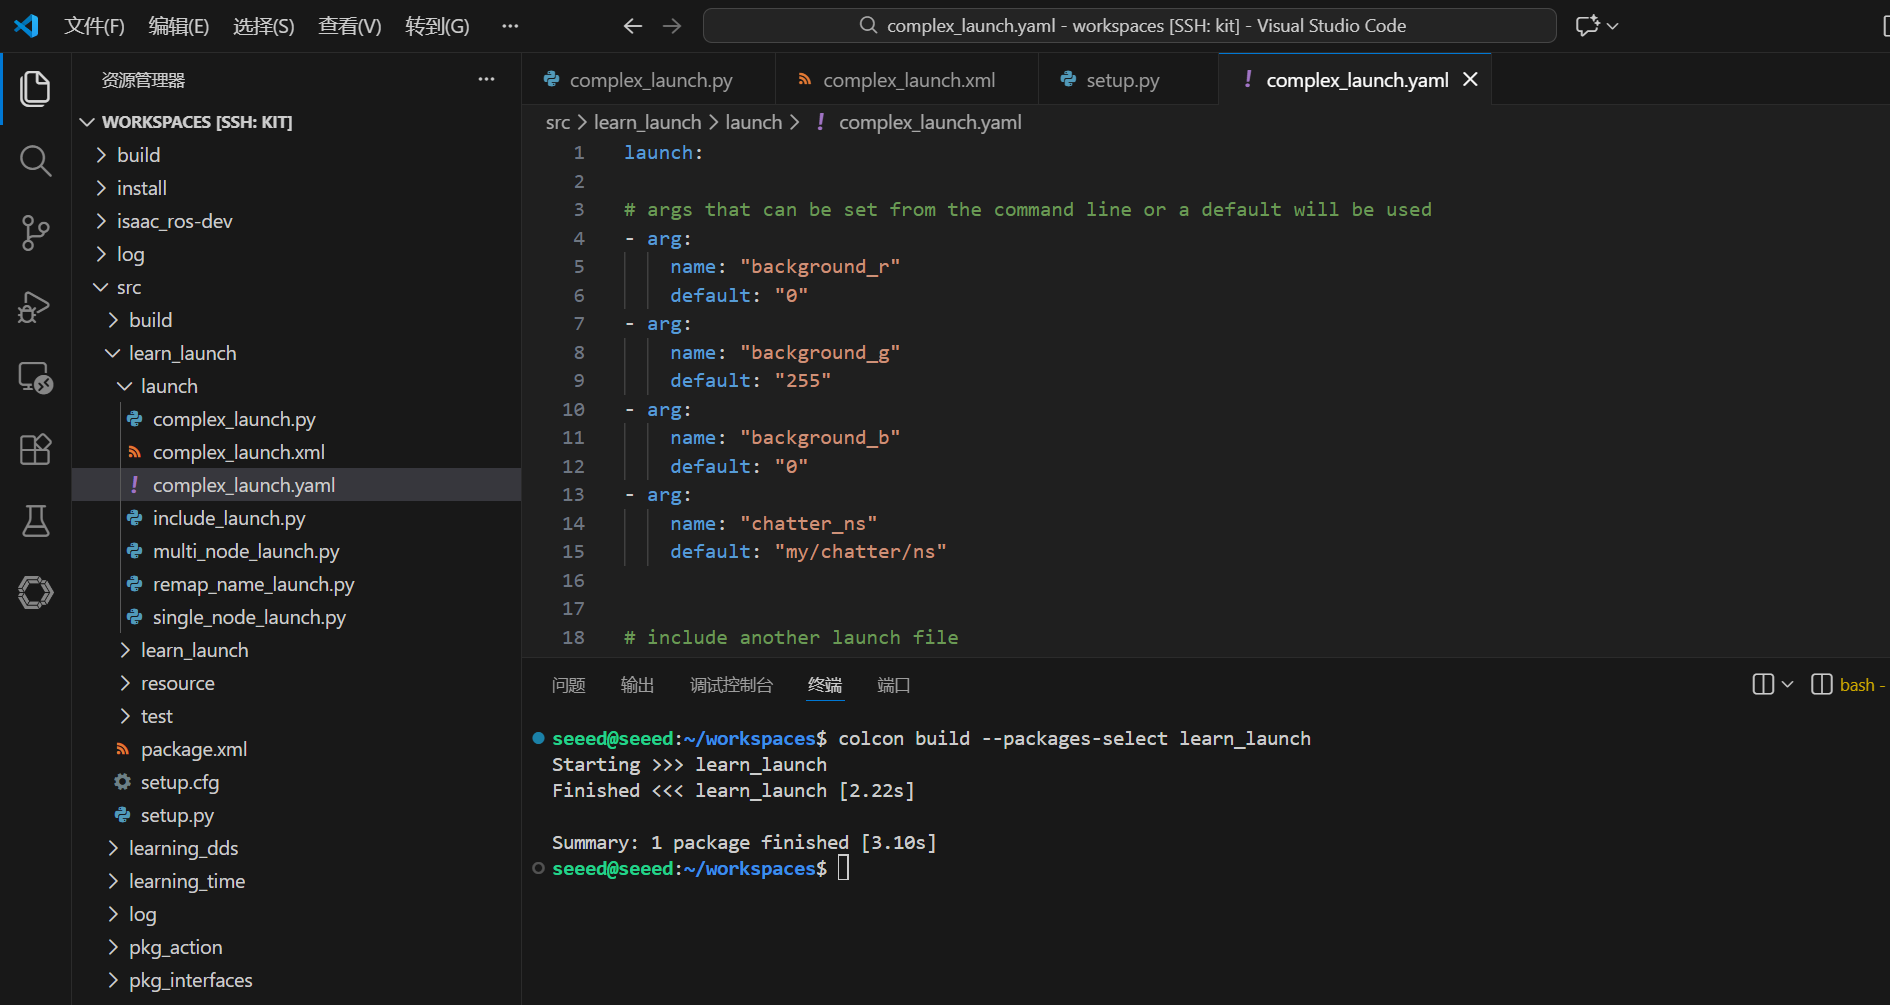
New Complex Launch.pyaml file under the directory of complex launch.py, add the following:
launch:

# args that can be set from the command line or a default will be used
- arg:
  name: "background_r"
  default: "0"
- arg:
  name: "background_g"
  default: "255"
- arg:
  name: "background_b"
  default: "0"
- arg:
  name: "chatter_ns"
  default: "my/chatter/ns"


# include another launch file
- include:
  file: "$(find-pkg-share demo_nodes_cpp)/launch/topics/talker_listener.launch.py"

# include another launch file in the chatter_ns namespace
- group:
  - push-ros-namespace:
  namespace: "$(var chatter_ns)"
  - include:
  file: "$(find-pkg-share demo_nodes_cpp)/launch/topics/talker_listener.launch.py"

# start a turtlesim_node in the turtlesim1 namespace
- node:
  pkg: "turtlesim"
  exec: "turtlesim_node"
  name: "sim"
  namespace: "turtlesim1"

# start another turtlesim_node in the turtlesim2 namespace and use args to set parameters
- node:
  pkg: "turtlesim"
  exec: "turtlesim_node"
  name: "sim"
  namespace: "turtlesim2"
  param:
  -
  name: "background_r"
  value: "$(var background_r)"
  -
  name: "background_g"
  value: "$(var background_g)"
  -
  name: "background_b"
  value: "$(var background_b)"

# perform remap so both turtles listen to the same command topic
- node:
  pkg: "turtlesim"
  exec: "mimic"
  name: "mimic"
  remap:
  -
  from: "/input/pose"
  to: "/turtlesim1/turtle1/pose"
  -
  from: "/output/cmd_vel"
  to: "/turtlesim2/turtle1/cmd_vel"
20.8.2 Configuration
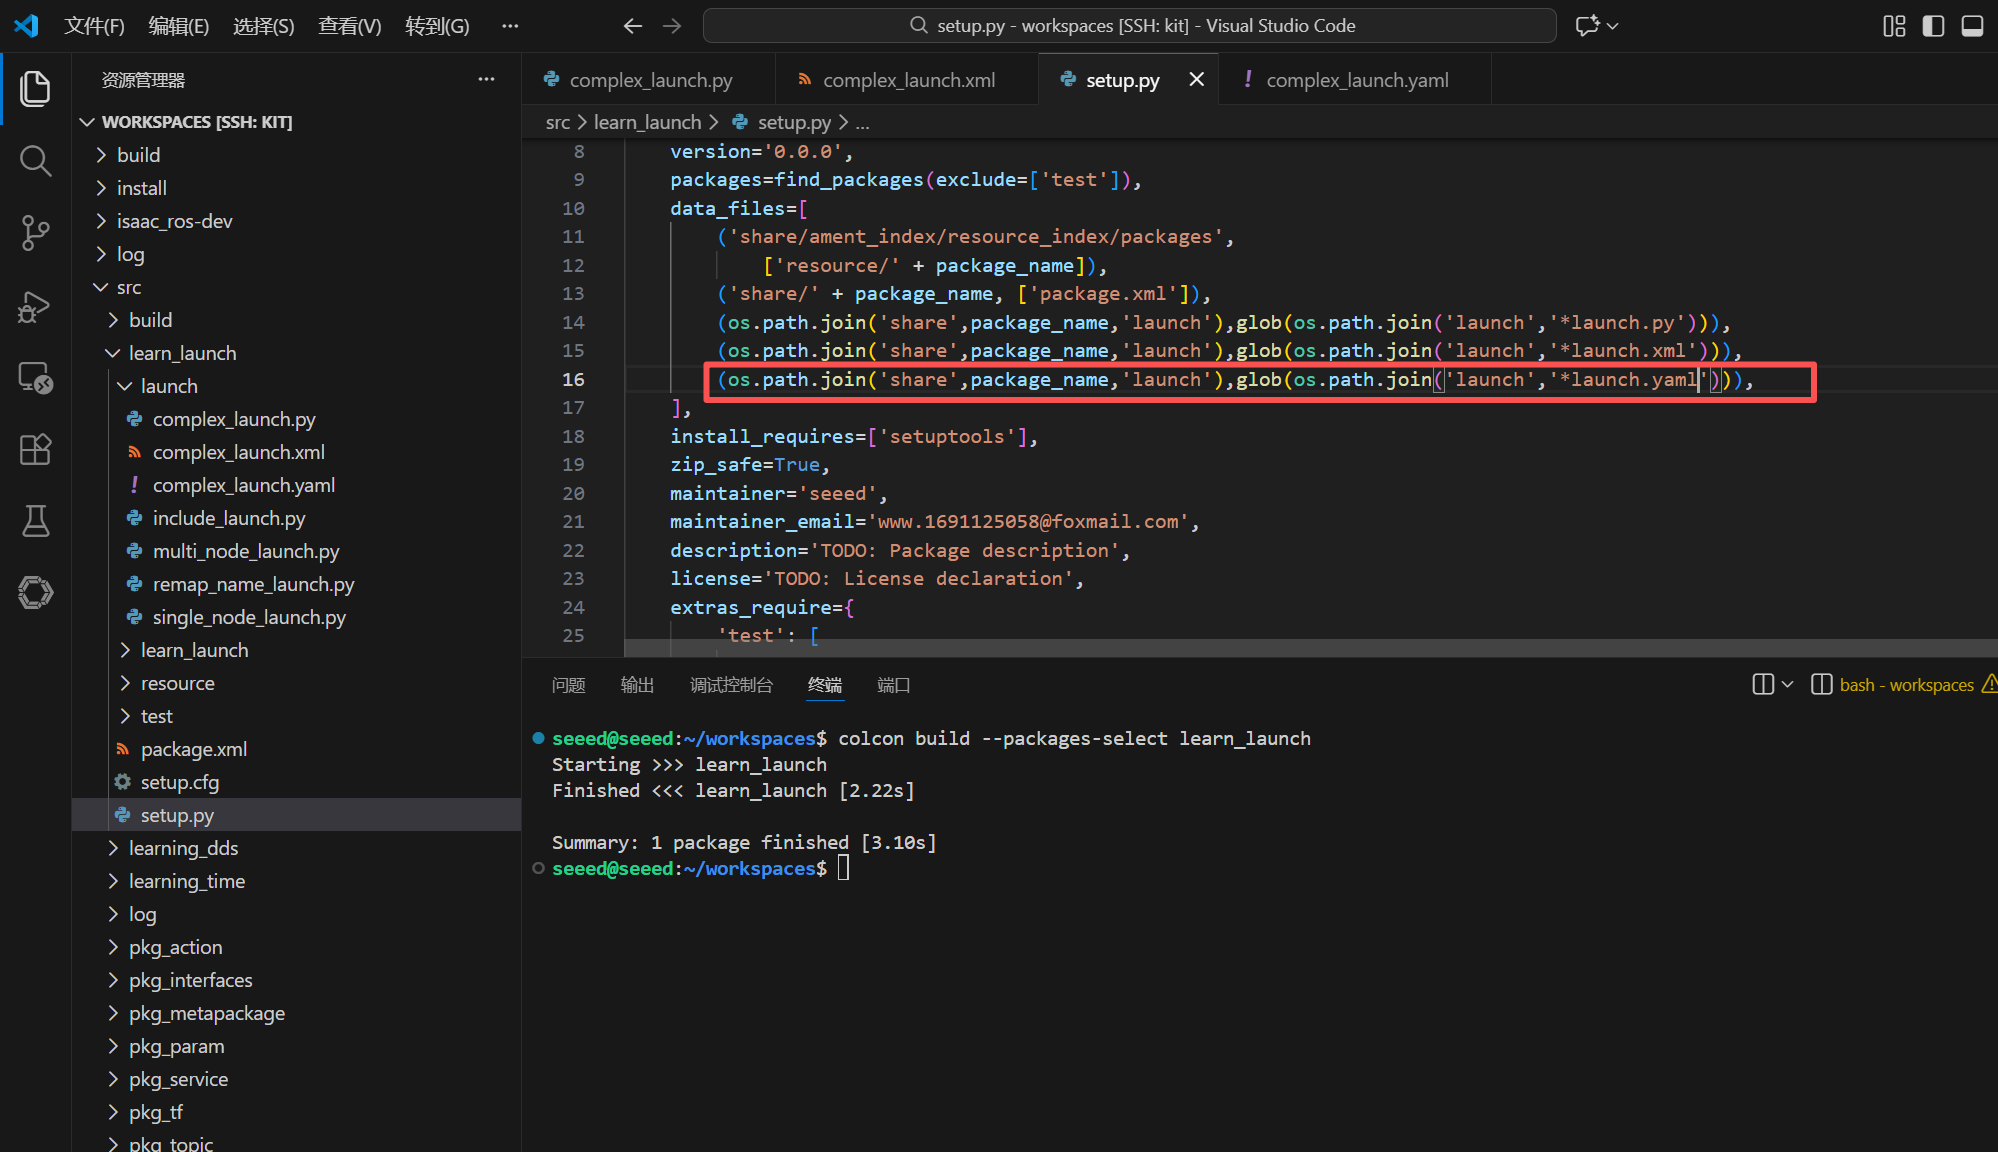
You need to configure the compiled file to copy our .yaml-format launch files to the Install installation directory before the ros system can find our files
(os.path.join('share',package_name,'launch'),glob(os.path.join('launch','*launch.yaml'))),20.8.3 Compiler functional kit

colcon build --packages-select learn_launch20.8.4 Operational procedures
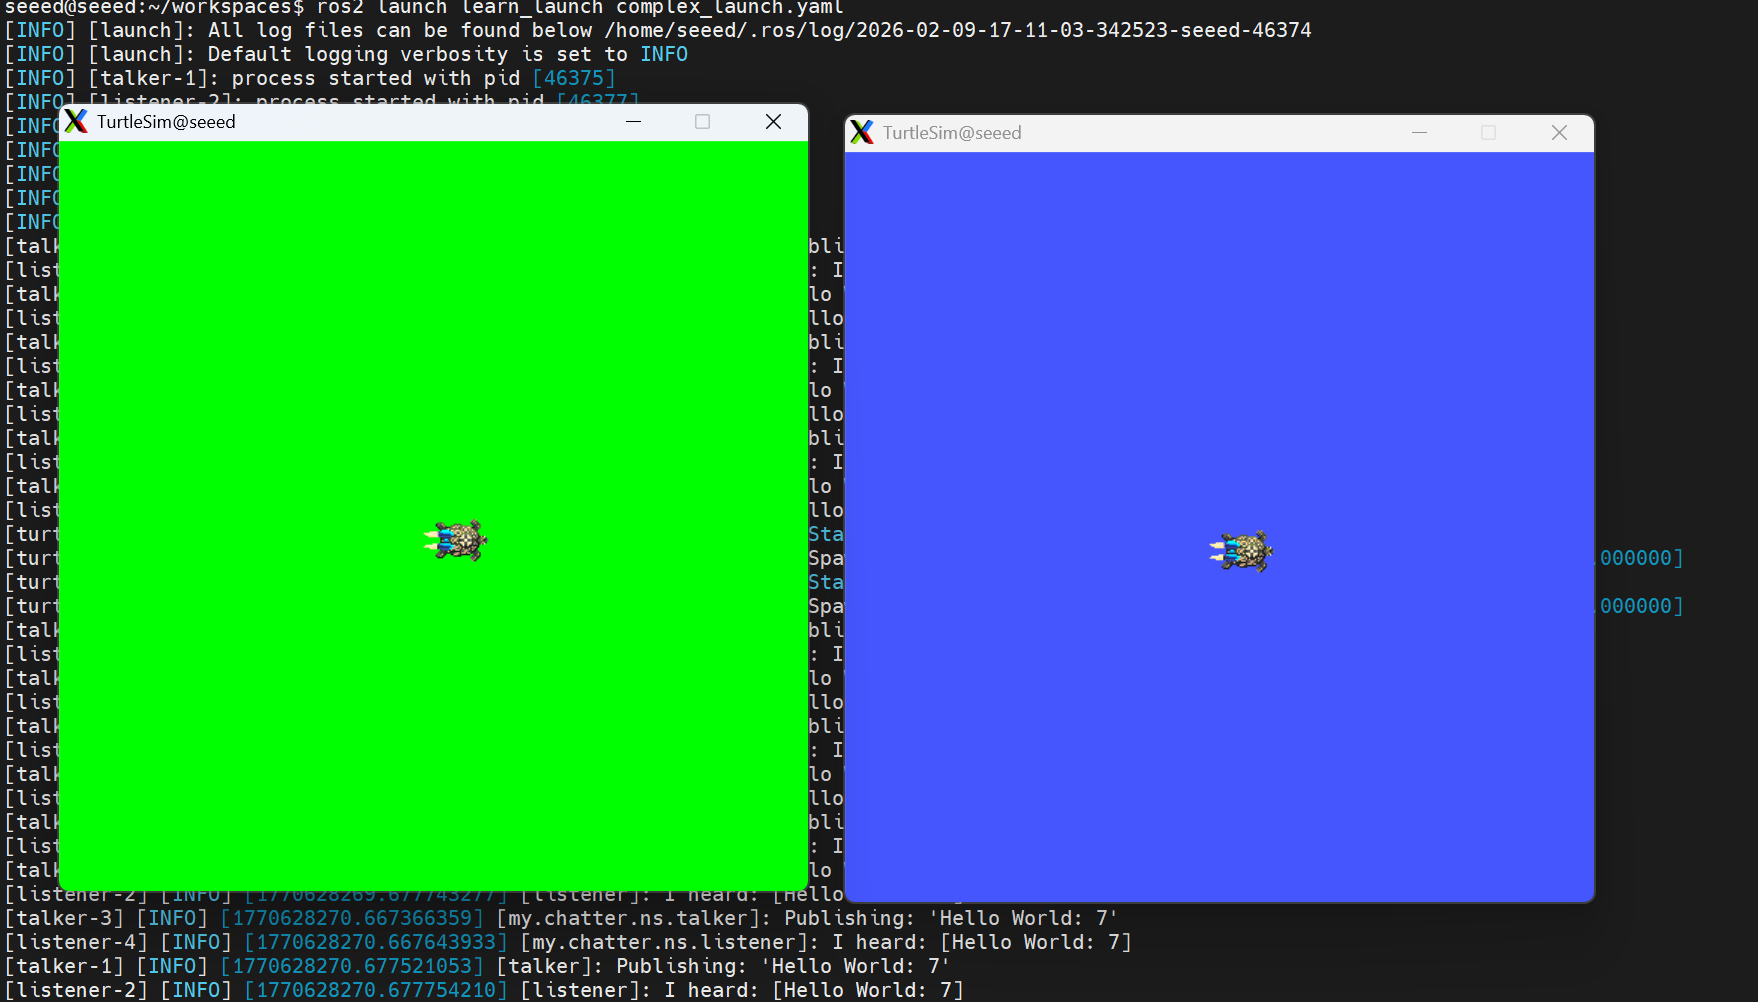
# Refresh environment variables
source install/setup.bash
ros2 launch learn_launch complex_launch.yaml
Start keyboard control node and add namespace
ros2 run turtlesim turtle_teleop_key --ros-args -r __ns:=/turtlesim1Using keyboard control to activate turtle one, turtle two is a perfect imitation of turtle one.
20.9 Next steps
1.21 Record and Playback - learning package recording
- 22 URL models - learning robotic modelling