Setting up
SenseCraft CLI connects your AI to the SenseCraft platform, so real IoT development work gets done: manage devices and telemetry, build and publish applications and models, and deploy to cloud devices.
The CLI is open source — browse the code and skills at github.com/Seeed-Solution/sensecraft-cli.
This guide will walk you through the initial setup of SenseCraft CLI.
Quick start with AI
Section titled “Quick start with AI”Installation & authorization
Section titled “Installation & authorization”The easiest way to set up SenseCraft CLI is with an AI agent. Copy and send the following instruction to your AI tool (e.g., Codex, Claude Code, Pi, Cursor, TRAE, WorkBuddy, Qoder, etc) to let it complete the installation for you:
Set up SenseCraft CLI, handle all terminal commands yourself.
Install with:npx -y @seeed-studio/sensecraft-cli install
Verify with sensecraft-cli --version, and connect itsbundled sensecraft-cli skills.
Start authorization, then verify that setup is complete.
See Authentication for the two authorization methods: browser authorization and importing an Access Key.
Why do you need authorization?
Section titled “Why do you need authorization?”Most CLI features act on your cloud account — listing devices, reading telemetry, managing apps and models — so they run under your credentials. The credentials should be stored locally on your computer, and not exposed to the session context. We also built guardrails for sensitive action, where you have to manually confirm before the agent takes action; learn more in Confirmations and safety.
Manual Installation
Section titled “Manual Installation”You can choose to install it the old-fashioned way if you prefer.
Before you start
Section titled “Before you start”You need:
- A terminal on macOS, Linux, or Windows
- Node.js ≥ 16, check with
node -v
Installation & configuration
Section titled “Installation & configuration”Run the following command in your terminal to complete the installation:
npx -y @seeed-studio/sensecraft-cli installVerify the installation with:
sensecraft-cli --versionInstallation is successful if the terminal answers with a version number:
sensecraft-cli version 0.2.0 (c689653, darwin/arm64)If the terminal answers command not found, see the step-by-step fix in
Installation.
Complete user authorization
Section titled “Complete user authorization”SenseCraft CLI authenticates with an Access Key — an Access ID and a secret issued per organization. There are two ways to get one onto this machine: the guided browser flow, or a manual import of a key you created yourself.
| Method | Use it when | |
|---|---|---|
| A | auth init — guided browser authorization | Default. You have a terminal and can open a link |
| B | auth add — import a key from the account center | No interactive terminal (script, CI, agent-driven session), the link can’t be opened anywhere, or you must reuse a specific key |
[2/3] Authorize the CLI
Section titled “[2/3] Authorize the CLI”Method A — guided browser authorization (recommended)
Section titled “Method A — guided browser authorization (recommended)”sensecraft-cli auth initThe wizard walks you through five steps:
-
Pick the site — Global (International) or China.
-
Open the link it prints and approve with your primary account. The one-time code is already embedded in the link, so it is a single click — and you can open it on any device:
Plain Text Copy the link below into your browser and authorize with the primary account:https://account.seeed.cc/device?user_code=ABCD-2345Verification code: ABCD-2345 -
Wait in the terminal. The CLI polls and continues by itself once you approve; keep it running until it does.
-
Choose an Access Key. It lists the keys already on your account — select one, or let it create a new one with a Label and a Read / Write permission.
-
Done. The key is saved as the active profile and printed back:
Plain Text ✓ SenseCAP setup completeKey ID: K1234567890Organization ID: 12345Config file: ~/.config/sensecraft-cli/sensecraft.json
A headless machine is not a blocker: run auth init there and open the
printed link on your laptop or phone. Use Method B only when you have no
interactive terminal, or no way to open the link at all.
Method B — import an Access Key you created
Section titled “Method B — import an Access Key you created”Step 1 — Create the key
Section titled “Step 1 — Create the key”Open the Access Keys page for your site and sign in with the primary account (sub-accounts cannot manage Access Keys):
| Site | Page |
|---|---|
| Global (International) | account.seeed.cc/account/access-keys |
| China | account.seeed.cn/account/access-keys |
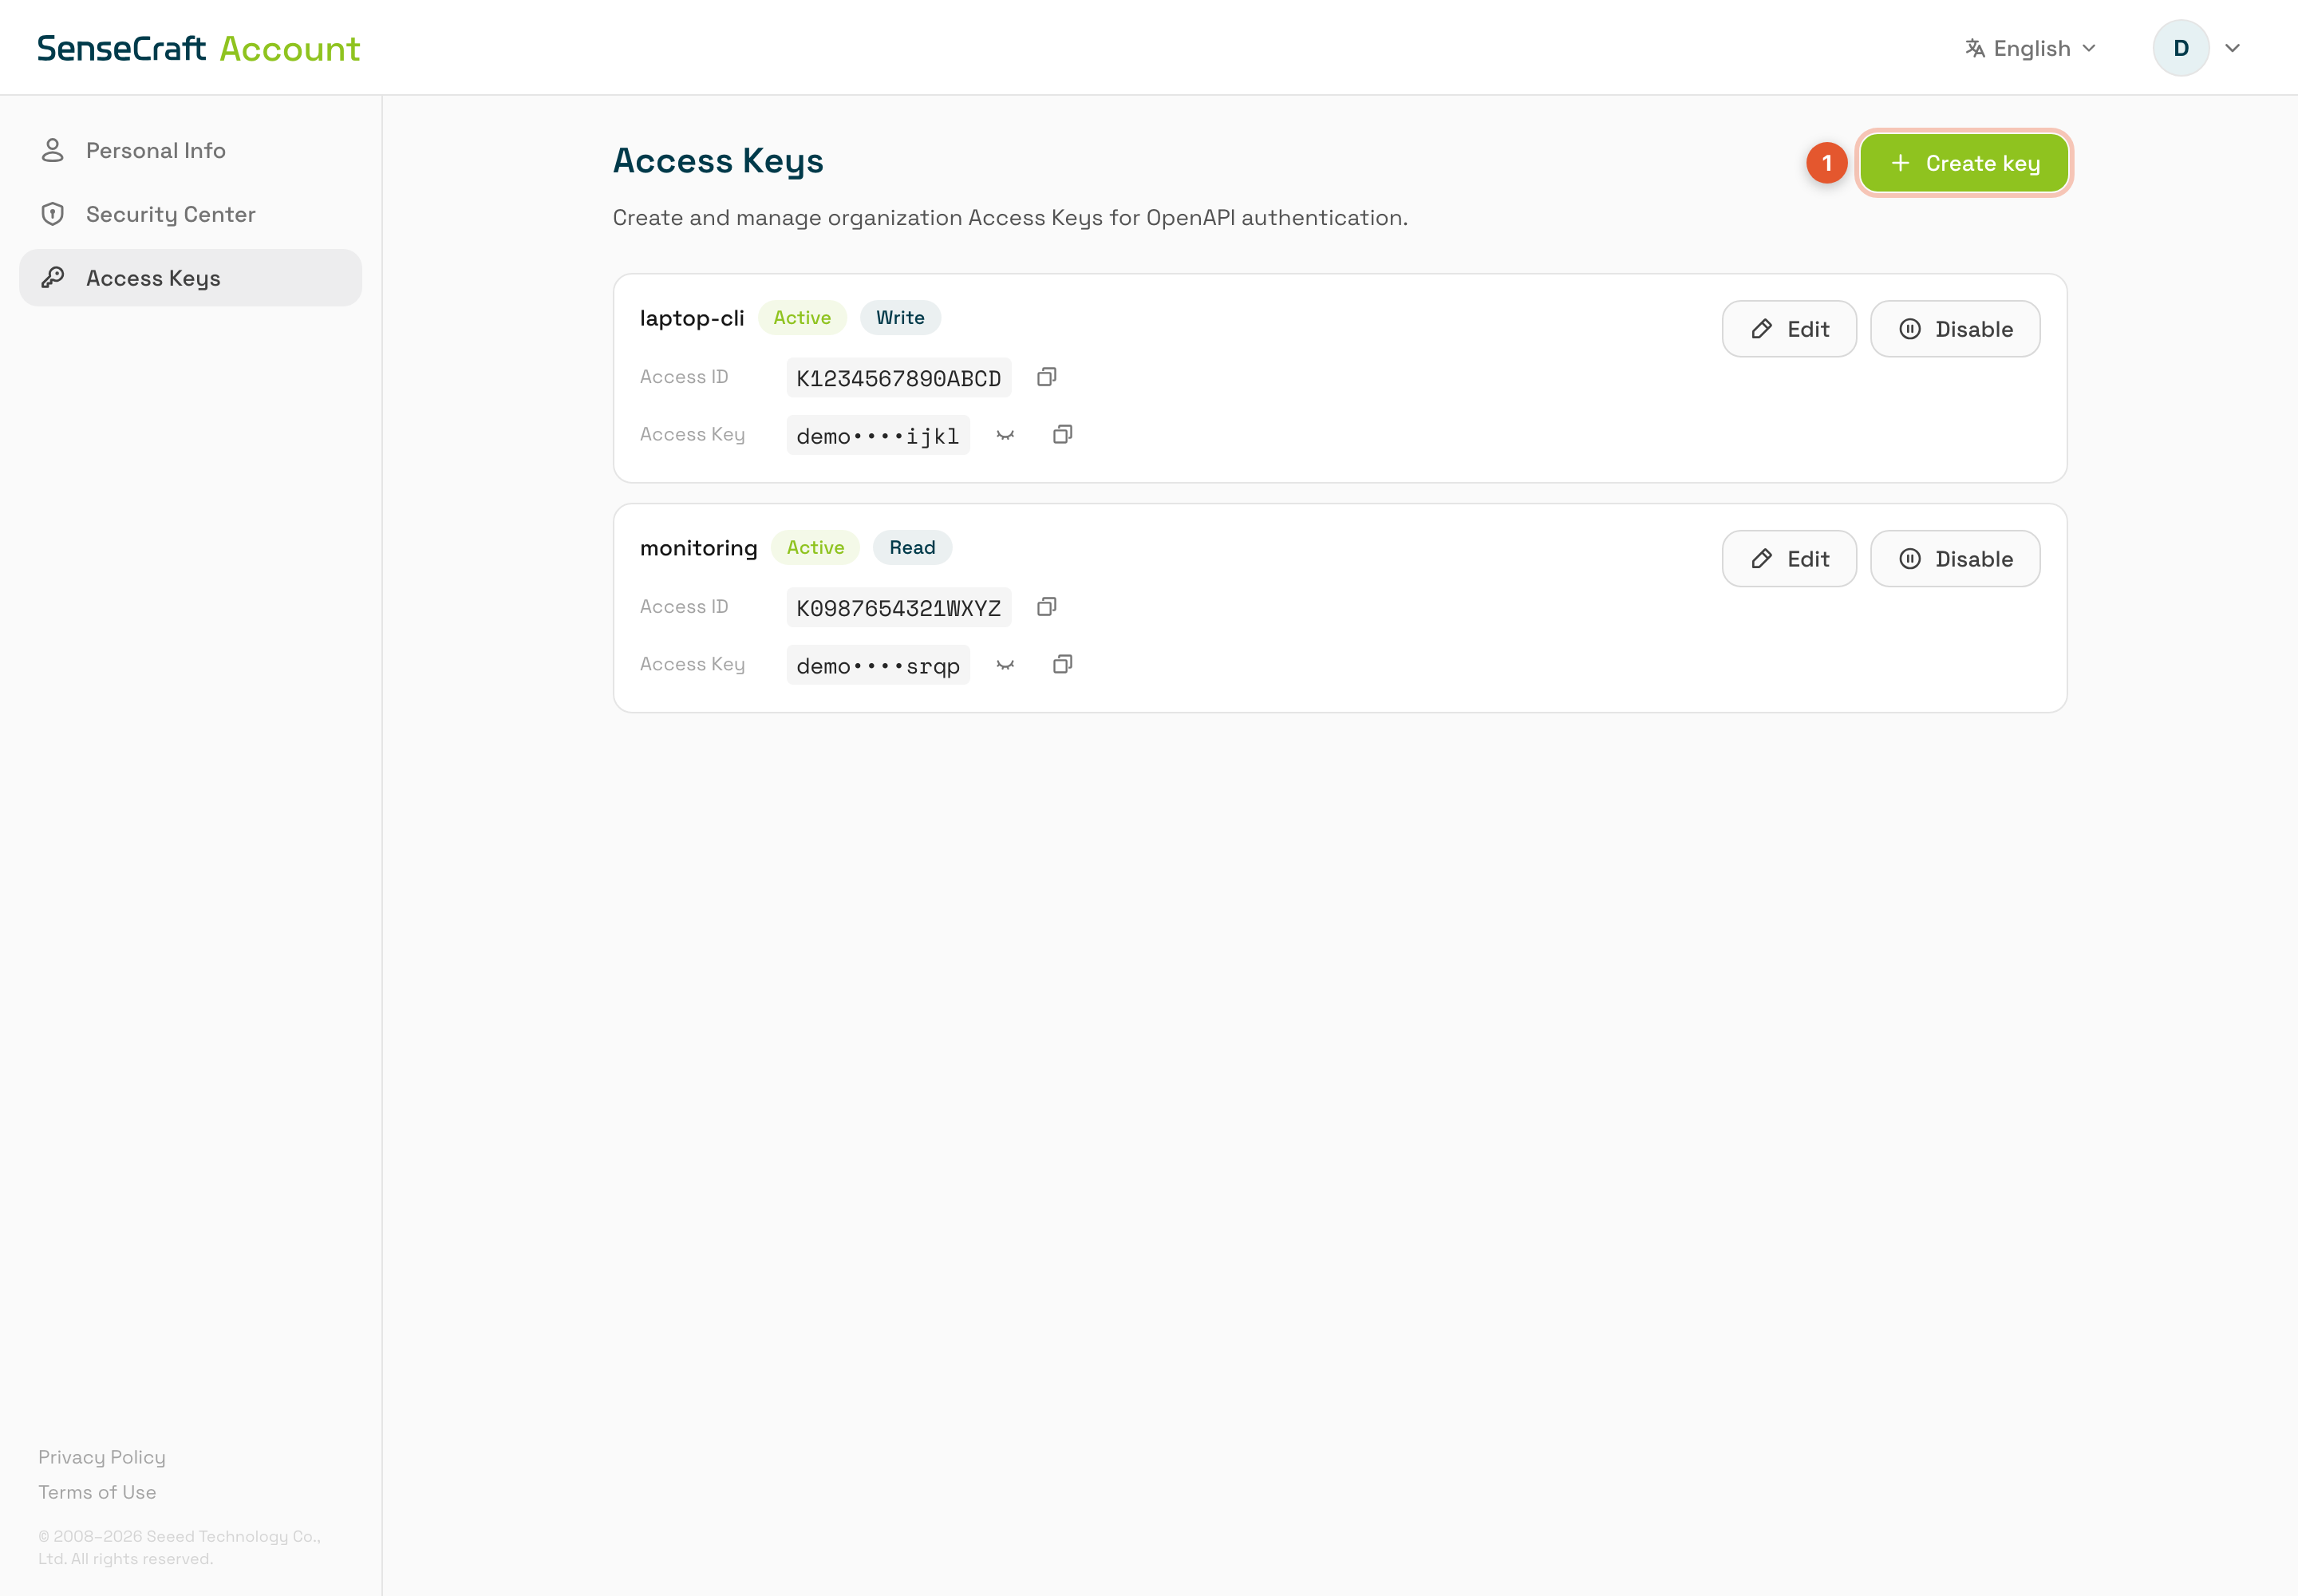
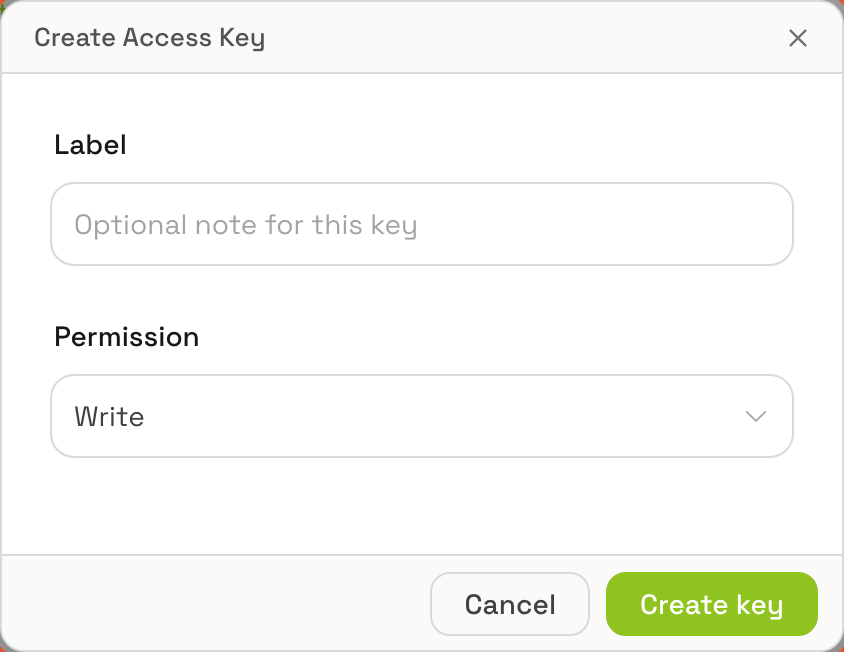
Choose Create key, give it a Label you’ll recognize (e.g.
laptop-cli), and pick its Permission:
- Read — list devices, read telemetry, search apps and models. Enough for monitoring and read-only agent workflows.
- Write — everything Read allows, plus creates, updates, publishes, deletes, uploads, deploys and binds.
Copy both values from the new key’s row:
- Access ID — the public identifier. The CLI calls it the Key ID.
- Access Key — the secret. Reveal it with the eye icon, then copy it. Treat it as a password.

You can return to this page at any time to reveal the secret again, change the Label or Permission, or Disable the key.
Step 2 — Import the key
Section titled “Step 2 — Import the key”Run this in your own terminal, with the site that issued the key:
sensecraft-cli auth add \ --key-id <Access ID> \ --access-key <Access Key> \ --site Global--site accepts Global (default) and China. In an interactive terminal
any missing value is prompted for instead of failing:
Key ID: K1234567890Access Key: <paste the Access Key>Select the SenseCAP site to connect to 1) Global (International) 2) China (China site)Enter number [1]:We advise against pasting the key into chats, logs, screenshots, or the conversation with your AI tool. This will expose the key and create a security risk.
Step 3 — Confirm the import
Section titled “Step 3 — Confirm the import”The CLI checks the key against the platform, saves it as the active profile, and prints what it saved:
Verifying Access Key against OpenAPI ...✓ Access Key verified  Site: Global  Organization ID: 12345  Key ID: K1234567890
✓ Access config saved and set as active  Config file: ~/.config/sensecraft-cli/sensecraft.json
[3/3] Check what’s active
Section titled “[3/3] Check what’s active”Both methods end at the same place — either one prints, or can be confirmed with:
sensecraft-cli auth infoThe credential lives in that config file (permissions 0600) and every
later command reuses it — you authorize once per machine.
If a command fails with a permission error, the key has Read permission; create or pick a key with Write permission the same way.
Beyond the Access Key
Section titled “Beyond the Access Key”For everything else around credentials — multiple profiles, switching the active one, and removing credentials — see Authentication.
Read next
Section titled “Read next”- How we guardrail your safety: Confirmations and safety
- Learn about the agent skills: Skills